Last week I finished off my Guild Ball pitch.
The Pitch
I hit up Bunnings for supplies for this project. A sheet of MDF, 1830x915x3mm cut in half to form two 915mm squares, a sheet of XPS 1200x600x30mm (I had a second sheet at home), some non-slip rubbing matting material (roughly 900mm square), and some duct tape.


I glued my two sheets of XPS on to one of the pieces of MDF. After it had dried, I clamped the second square of MDF on to form some sort of MDF XPS sandwich. I then cut the excess off with a knife, before using my hot wire cutter to bring it right back to the edge and make it nice and neat.


Some wood putty was required to fill the join where the XPS sheets met, and as it turned out I didn’t fill the slight dip in that section quite enough. I then glued sand on the XPS surface and sealed with PVA.


Next up I painted the play surface. A heavy coat of dark brown, followed by a light coat of a lighter brown, then a dry brush off off/bone white.
I mixed up some flock (light, dark, and mid green in a ratio of 1:1:2) and glued that on to the play surface, again sealing with PVA. I mucked up the sealing and didn’t cover the whole surface sufficiently, so I had to redo.

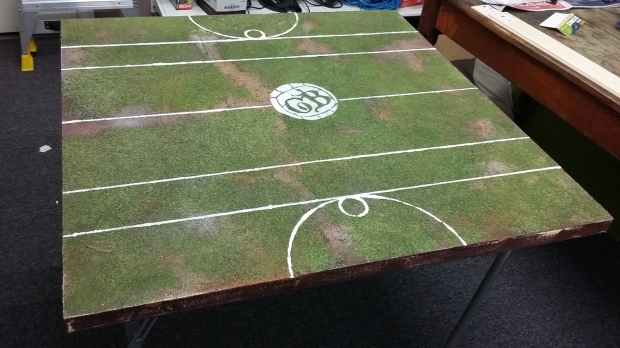
The play surface has a nice variety of green, with some dirt and sand looking spots too. I like how they add variety. Next I used a stencil of the Guild Ball logo I made (Photoshopped to get the right size, printed, glued to cardstock, then cut out with a scalpel – I’ve included the templates at the end of this post) and sponged it on in white. I probably went a little heavy and I had to touch up the flock to mark out the G, but it came out alright. Next I lay out the pitch markings with masking tape and brushed them on in white. Finally I used another template to do fancy goal markings (I knocked up a half template in Photoshop).
For the final touches I taped around the edges with the duct tape. I made cuts at the corners to fold and stick the excess to the underside of the pitch. Finally, I covered the back in PVA and glued on my anti-slip rubber matting material.


I’m pretty pleased with the finished product. I think it really pops from the table (which was the aim), and the non-slip matting means I don’t have to place a tablecloth on my kitchen table to protect it when setting the board up, in addition to the pitch not sliding around when bumped.

The above templates will give you a Guild Ball logo and half a goal line marking. Each are 150mm square. When using the half goal marking, remember to ensure the surface of the stencil is dry before flipping it to do the other half of the goal marking!

Great tutorial. You can use this for anything!
LikeLike
Absolutely! It’s the basics of terrain boards and modular set ups. Easy to make, and not expensive or time consuming either.
LikeLike