AAR – Bolt Action – 750pts – Soviets V Germans – Kursk Mini-Campaign

My mate came round for some Warfare Wednesday. We played a 750pt game of Bolt Action. I took control of the Germans while my mate took command of the Soviets in a hard fought and very enjoyable battle. Some notes before I get into it: I only have four order dice each of brown and red (from the Normandy Firefight box), so the large D6 (red for Soviet, white for German) are being used as order dice. The small red D6s are our pin markers. My account below is fairly accurate, but there are a few things later in the battle my memory is a little hazy on, so images don’t quite match up with my account.

Update 13/11/2015: We decided to make this the first of a three game mini-campaign. To the victor go the spoils of $20 worth of sushi and sake from this sushi train place in the city.

The Forces

 01 - Soviets

Soviets, all units are inexperienced:

First Lieutenant and two staff, all with SMGs

Three 12 man LMG squads, each with an NCO with SMG and an LMG (I accidently left one guy in the box for the squad on the front right)

One 12 man SMG squad with an LMG, all with AT grenades

One 12 man rifle squad (free)

One medium mortar

One Maxim MMG

One T-34/76

 02 - Germans

Germans:

First Lieutenant with two staff, all with SMGs

Three Heer grenadier squads, each with an NCO with SMG, second SMG model with panzerfaust and LMG

One MG42 MMG

One Stug G.

Having played a sum total of one game of Bolt Action previously, I wasn’t sure how robust each of the lists were. I had concerns the inexperience of the Soviet horde would be their undoing, but figured their superior numbers would balance the scales.

The Table

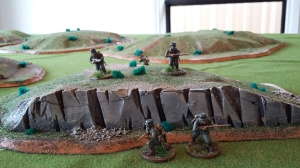
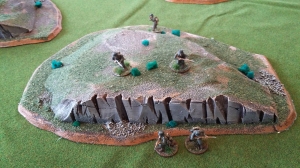
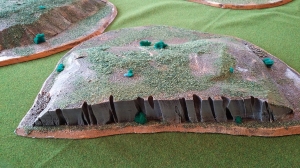
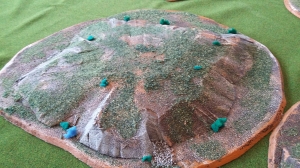
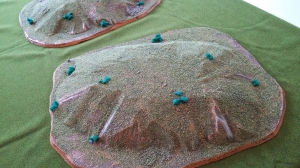
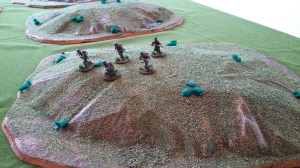
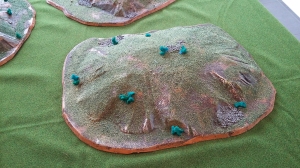
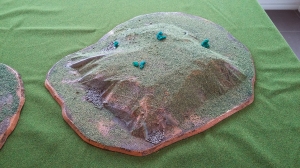
Unfortunately I snapped the jigsaw blade good and proper last weekend so I couldn’t finish off the roads (they need to be cut in half and other pieces need to be cut out), but I’m very pleased with my new faux fur fields. Also the hills saw some action.

 03 - Battlefield 04 - Battlefield 2 05 - Battlefield 3 06 - Battlefield 4

I selected Maximum Attrition as the mission we would play – my mate had never played before and I’m really only learning myself. You score one point for each enemy unit destroyed. Score 2 more points than your opponent to win a clear victory, 0 or 1 higher nets a draw.

Turn 1

All units begin off the field for this mission and so it was mostly moving things on, however two shots were fired. The first Soviet LMG squad ran into a building in the centre, followed by the Rifle sqard into the field on the Soviet right. I then brought my MG on up onto the hill. I consider the move fairly safe given I didn’t think anything could shoot at it – except I forgot about the medium mortar. It was the next to come on, advancing and firing indirectly at my MG – though he needed a six to hit, my mate managed, causing four hits and three casualties. The German MG team became the victims of first blood.

 07 - now you see them 08 - now you don't

The rest of the turn was spent moving things. SMG squad and an LMG squad went behind the hill, Soviet commander hung hard right with the Maxim, the T34 came on the road, shooting and missing at some Heer that had moved on opposite. The final LMG squad advanced into the forest in the centre while I brought one Heer squad each on the left and right flanks (in addition to the centre), my commander on the right and my Stug in the centre – firing and missing the T34.

 09 - Right flank T1 10 - Armoured stand off T1 11 - Left flank end T1 12 - right flank end T1

Turn 2

Turn 2 began with the LMG squad on the Russian far left moving up and firing on my Heer, scoring a kill. My Heer passed their order test and returned fire, killing four. The Stug and T34 both shot and missed each other. Meanwhile my Heer on my left came under fire from the Maxim, but lost no one and in returned landed on kill on the team. Other squads just moved up: the SMGs cresting the hill and running forward. The LMG squad in the house stayed put, the other moved up, likewise the commander and the Rifles. The mortar shot at and missing my Heer on my right while my other Heer squad run into the house in the centre on my side. My commander and his men made a risky move moving up to try fire on the SMGs but were out of range.

 13 - Maxim and rifles left flank 14 - right flank end T2 15 - Left flank end T2

Turn 3

Turn three I moved my Stug up into the field and used my MG to open up on the Rifles, I killed one and they fought on as normal, rolling a 4 for their Green check. My Heer on the left followed up by advancing onto the road and shooting at the Rifles, inflicting some casualties and adding a pin. In response the rifles failed their order test and went down. The Maxim moved up and shot at my Heer scoring three hits, but only one kills – a six. Rerolling again another six was scored (resulting in three consecutive sixes, because one of the hits was a six too!). My NCO was chosen to be removed and my Heer failed their initiative training test. Meanwhile on the right things looked not so good for me. The SMGs moved up and shot at my Heer on my far right – killing three. I passed my order test and returned fire, then also issued a fire order to my commender. The SMG squad lost some men and acquired two pins. The LMG squad on the Russian far left advanced and picked off another two Heer, while the other LMG squads also moved up: one going into the barn, the other leaving the house. My Heer in the house shot at the LMG squad in the barn to no effect. The T34 shot at and missed my Stug, but the mortar managed to again hit with indirect fire needing a six on my Stug. It did no damage (it needed a 6 to glance), but the Stug received a pin none the less.

 16 - Soviets close in on right flank 17 - Road end T3 18 - Heer V Maxim 19 - Armoured stand off 20 - T34 and Mortar

Turn 4

Turn four was a turn where things went south for the German let flank. I ordered my Stug to fire on the Rifle squad, but it rolled a 9 for its order test – failing by just one – so it reversed and went down. Things went from bad to worse when I followed up with my Heer on the left, who were ordered to fire on the MG, proceeding not just to fail their order test, but roll double sixes and FUBAR! They paniced and ran back towards my long table edge. To add insult to injury the Maxim opened up and again scored exceptional damage, choosing to remove the Panzerfaust. On the right things went quite a bit better than I imagined. I ran my Heer out the building over to where the melee would begin expecting a poor outcome. My mate decided to order his LMG squad to run first, fearing the two pins on his SMG squad. They assaulted my Heer squad (now four men strong), who opened up with some excellent defensive fire. Thinking about it now, he probably needed a morale check for 50% casualties from shooting. Either way, he only managed to kill one of my remaining men in close quarters while I took out two and won the melee.

 21 - The disasterous assault 22 - Rifles down in the field24 - Panic Heer

The SMG squad failed their order test and went down. I decided to run my Commander to the left to try amend the situation taking place over there next turn. The LMG squad in the barn shot and killed one of the Heer in the squad that had run up to assist the right side, while the other LMG squad fired and picked another one or two off. The T34 fired on the Stug and scored a glancing hit, resulting in a crew stunned result – the Stug now had 3 pins. The mortar fired on the Stug and missed. Finally the soviet commander moved up to be in range of the Rifle squad, who passed their order test because of the morale boost. They then ran into the building on my left.

 23 - Aftermath of the assaults

Turn 5

Things weren’t looking good for the Germans. I assaulted the SMG squad with my other Heer squad nearby and wiped them out, but lost a man for the trouble (by the look of the image above I think this actually happened in turn 4, so perhaps I didn’t waste a turn shooting the men in the barn like I thought, it matters not though). My Commander ran up to be in range of the Stug – which enabled it to pass an order test and fire, but missed. Before that shot, however, the T34 machine gunned my commander’s staff members. On the left the Heer passed an order test and fired on the Maxim, killing it, but took more casualties from the Rifle squad now in the building. In the centre the men in the barn opened fire and wiped out the last three men of the Heer squad on the far right. The other LMG squad moved up and took out a couple from the Heer squad now alone on the road. The T34 (whom we forgot to put a pin marker on) shot and missed the Stug, likewise the mortar team.

  27 - Consolidating on the road 26 - Armoured warfare

Turn 6

My Stug passed its order test again, fired on the T34, hit, but rolled a one for penetration. The T34 finished off machine gunning my commander. My Heer on the right failed their order test and went down, with another one picked off by the Rifle squad. My Heer on the road shot at one of the LMG squads, but caused no casualties. The LMG squad in the barn left the barn and ran towards the Heer on the road. Otherwise events this turn were minor moves. At this point we actually thought we were on turn 5, so we played turned 7 as though it were six, then rolled for a turn 7 which was actually a turn 8. This did alter the outcome of the game, but I’m still happy with how it went.

 28 - Last stand on Butcher Road

Turns 7 and 8

I’ll deal with both these turns under one heading, because there are really only three things that need mentioning across the turns. In turn 7 the LMG squad that had left the barn assaulted my Heer. I killed six men in defensive fire, but they passed their morale and promptly kill three of the four remaining Heer. I killed one in retaliation but was ultimately destroyed. My Stug fired on the T34 in turn 7, hit, and again rolled one for penetration. In turn eight it fired again and scored a hit, but only a glancing one, resulting in crew stunned. At this point I realised we had forgot to put pins on the T34 – it didn’t matter though because it missed in turns 6, 7 and 8.

Finally the Heer on the left continued to be shot at by the Rifle squad. They were finished off in turn 8 by the Soviet commander and his staff, who came around from behind the building and SMGed the remaining men.

 29 - Armoured stand off 30 - Soviet Commander opens fire T8

 The Result

With the last Heer squad dead the Soviets were able to secure 5 points while the Germans only had three – a clear victory to the Soviets. However, as mentioned, we did accidently play one additional turn so it would have been a draw if we’d realised. Still, I’m fine with the result, it was a very fun game with MVP clearly going to the mortar for first blood and a crucial pin on my Stug.

The learnings for me were to be a bit more defensive with my opening moves, and grouping my units a bit more probably would have helped. That said, two terrible order rolls in turn four meant that I completely lost the left flank – right when I was in a position to secure it and enable forces to be shifted right to deal with the horde. I’ll probably see about getting my Panzer IV G together before next time we play and swap the Stug out for it. It’s only five points more and gives me some more infantry killing power.

 All in all, a great battle and I’m looking forward to our next game.

This Week: Bolt Action – Soviet Infantry, T-34, Stug, MG-42 – Oh My!

So my mate and I decided we’d see about getting our things together and actually playing on some sort of regular basis – Flames of War, SAGA, Bolt Action, basically the stuff that makes for good written after action reports. We’re locked in for a game Wednesday week (28th of October).

Bolt Action Things

Before then I want to get my German (Heer) and Soviet forces up to 750ots:

01 - To paint

So I have 27 Soviet infantry, a T-34/76, an MG-42 team and a Stug G to get done. I would like to say here that Warlord Game’s T-34 model is fantastic. It looks great and it is really, really easy to put together. The only annoying bit is the storage on the back (I don’t actually like the way they look, I left them off all my T-34s for Flmaes of War). The Stug G on the other hand: frustrating.

The reason for this was that I purchased a resin one (I believe there is a plastic model that makes a G or Stuh 42). I had an issue with the left track (so right track in the image). It wasn’t cast flat on the side that glues to the hull. In the process of trying to shave it down a bit I put the Stanley knife into the palm of my hand, which was an undesirable situation. I managed to get the track on looking ok in the end though and used some green stuff to conceal the gap that still remained. I’m not looking forward to getting the side skirts on but.

Terrain

So I still have 10 trees to finish:

02 - Trees in progress

I’ve not bothered with close ups yet, but I think they’re looking better than my first lot because I made the trucks thicker. I just have the messy part of cutting up the scourers for the foliage to go, so really they’re not that far away from done. I’ve also like to get some 28mm scale rural roads done before our battle too (I bought MDF for them today).

All That in a Week and a Half?

Yeah, nah, probably gunna struggle with it. I’ll get as much done as possible however and we’ll see what happens. So look forward to more painted things in the future (my Anglo-Danes still need a photo shoot) and an after action report for something, probably Bolt Action. Until next time.

AAR – Flames of War – Mid War – Hungarians V Soviets – A Hill Too Far

As promised,here is the After Action Report for the Flames of War battle I had back in August. Given the amount of time that has passed, I’m a bit sketchy on the detail, but there are plenty of pictures and I recall enough to give a general outline of the order of the engagement.

The Forces

Both forces were 1000pts (from memory)

The Hungarian force consisted of:

HQ

Three Puskas platoons with three sections each – although I can’t recall if I made them Rifle/MG teams

A weapons platoons with three HMGs and two light mortar teams

Two MG platoons with three HMGs

A mortar platoon with four mortars and an observer team

Puskas anti-tank platoon with four 40mm guns

Artillery platoon with four 149mm howitzers and observer team.

A tank platoon with five Panzer T-38Gs.


SAMSUNG

The Soviet force consisted of:

A HQ with two obr1942 45mm anti-tank guns

Three strelokovy companies, each with two platoons, a Maxim HMG and light mortar team

A mortar platoon with three squads and observer team

A light tankovy company with 10 T70 light tanks (T60 models used in proxy)

SAMSUNG

The Battlefield

Completely treeless and using two of the three hills I had finished at that point, the Soviets would be attacking from the farm side of the field, moving up the road, over the rail line and across the open ground with the objective of capturing one (or both) of the two hills.

Beer

Unfortunately my mate was a little under the weather from the night before, so abstained. So I got to enjoy an excellently poured poured beer on my own.

Deployment

I deployed my weapons platoon with HMGs and light mortars on the western hill, the AT guns in the centre of my line on the road and another HMG platoon on the eastern hill. The observer team was on the outside edge of that hill, spotting for the howitzers at the very back of the field. The rest of my force was in reserve, I placed the Panzers in ambush. The soviets were deployed in a massive horde at the southern end of the field. Western flank held the T70s, then the strelokovy stretched the rest of the line, with the mortars back behind.

Order of Battle

The Soviets, being the attacker, had first turn and moved everything up. What little shooting there was caused no casualties, although my HMGs on the western hill became pinned (if I recall correctly).

In response my 40mm guns took out a single T70 to draw first blood.

In turn two the Soviets continued their advance while their shooting remained as fruitless as the first turn. The issue was that the Hungarian forces were in prepared positions and the Soviets lacked the fire power to clear any teams out. The MGs and AT guns were pinned, but promptly unpinned and in response took out another couple of T70s. Also on the western flank the Panzers sprung their ambush from the back of the hill, knocking out another T70. Meanwhile on the eastern flank the strelokovy were pinned by MG and artillery fire, though casualities were limited.

Turn three was the turn mistakes were made – both of the error of judgement kind and the error of rules (possibly) kind. The strelokovy on the eastern flank failed to unpin (even with the Commissar’s “encouragement”) but the rest of the forces moved up. Shooting took out a single AT gun after which my mate decided he would assault the T70s up the western hill into the MGs in an attempt to dislodge them. At this point I conducted defensive fire, however it only occurred to me after that tanks might not be able to use main guns in defensive fire. I’ve not actually doubled checked this, but if it is the case, then the assault would not have been the disaster it turned out to be. Or at least more T70s would have made it in to base contact and the odds would be far more favourable than they turned out to be. In the end the charge was a disaster: a number or T70s were taken out when they gunned their engines into the MGs. The lone T70 that made it through was eventually overwhelmed and promptly surrendered.

That mistake (either on my part or his) really made it an impossible task to take the western hill. The strelokovy on that flank were gunned down over the next two turns. Meanwhile on the eastern flank the lead strelokovy company was whittled down and, if I recall correctly, pulled back to the rear rather than destroyed. The company that followed suffered the same sorts of debhilitating losses as it crossed the rail line and so we decided to call it there.

The image above goes a long way to detailing the Soviet’s failures, but a different outcome for the T70 assault would likely made for a much closer game – my reserves didn’t start showing till turn 4!

That all said, the game did actually make for some nice images I think. I really need to get some Zis-3s for my Soviets or other heavier firepower to deal with dug in units. I think next time if we do a defensive mission I’ll make sure the T34s and Panzer IV F2s are fielded to give an assaulting Soviet force a more significant punch.

Victory to the Hungarians!

I’m not sure when our next game will be, but I’m very much hoping we can play on a more regular basis and probably rotate through Flames of War, Bolt Action and SAGA – when forces for the latter two are ready. I’ve finished off my Anglo-Danes and hope to post up images this weekend. I’m also on the home stretch with my next 10 28mm trees so they’ll not be far away either. I’m not sure if I will get stuck into my Welsh or continue with the German infantry I started getting together last week next, or maybe do something completely different… Until next time, happy wargaming.

Wargaming Hills

It’s ok, I’m not dead. Just resting. Life has been pretty busy the past couple of months. Things have taken longer than I thought to complete as a result, however I’ve got a few things near completion, pictures and posting about. In my last post I also promised an After Action Report. Well I can gladly report that that battle did take place, however it was a bit of a cop out on account of it being quite a one sided affair. As a result, at the time I decided not to post about it (two months ago). I downloaded the images for it today, however, and going through them I thought they all looked pretty cool. So at some point I will post the AAR as originally intended. Today, however: hills.

Wargaming Hills

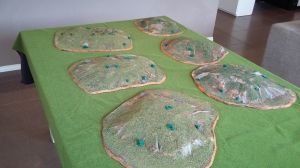
I finally got around to finishing my grassy hills and ridges.

I made four hills and two ridges. Materials used are very simple: 5mm MDF for the bases (cut out with a jigsaw); XPS (from Bunnings, they sell it for about $12 a 1200x600x30mm – from memory – you can also get it in 50mm thick, but that costs more. I carved it up with a hot wire cutter); then the usual things, paint, PVA glue etc.

02 - Ridge 2 2 03 - Ridge 2 04 - Ridge 1

Carve out the XPS (hot wire cutter makes this easy, although you can use a knife). Glue it to your MDF board. Paint that with PVA and cover with sand. Seal the sand with watered down PVA. Paint brown. Paint lighter brown. Paint rock areas a dark grey. Dry brush the rocky areas with a lighter grey. Paint with PVA and apply flock. Seal with watered down PVA. Easy stuff.

As you can see from the above images of the ridges, they are low ridges/hills at 28mm scale. They’ll hide infantry that are completely behind them, but vehicles will still be visible. For 15mm scale, however, they will conceal vehicles and infantry.

05 - Hill 2 06 - Hill 1 07 - Hill 1 08 - Hill 2 09 - Hill 3 10 - Hill 4

And here is a bunch of random images of them up close and a couple of other angle shots. Our loyal defenders of the Fatherland are crossing over one the hills and it all looks very nice. Having now completed these, however, I have decided I would like another few that are higher so that they conceal vehicles at 28mm too. So at some point I intend to head to Bunnings to grab a sheet of 50mm thick XPS (and more MDF, and more PVA…). From that I will make two hills and one ridge.

Next Time

That’s all for now, just a quick post to show that I am alive and showcase the results of my hill making. Currently I am very close to finishing my 4pt Anglo-Dane force for SAGA. They look nice. I’ve also started on my next 20 Heer/Heer Grenadier infantry for Bolt Action (the first five models of which are in the images above). Terrainwise I am working on another 10 trees for 28mm use. They’ll be the next things to feature here, along with that AAR when I get around to it. For now, I shall try to contain all the ideas running around my head. Happy wargaming!