Recently, a mate (Dan) and I have been getting hyped for Kings of War. Consequently, I put together a couple of 1,000 point lists utilising my old Warhammer Fantasy collection. We were able to get them to the table late last year, but I’ve only just gotten around to getting this write up finished.
Disposition of Forces
I took command of the goblins (with orc allies). The force comprised of:
A horde of goblin sharp sticks with a maw pup;
A regiment of orc ax with a skull pole;
A troop of orc morax;
Two regiments of goblin spitters;
A regiment of goblin fleabag riders;
Two goblin sharp stick throwers;
A goblin wiz; and
A goblin big git.
Dan took command of the undead, which consisted of:
A horde of zombies;
Two regiments of skeleton spears, both with giant undead rats;
A regiment of ghouls;
A regiment of revenant cavalry (horses currently lack riders);
A horde of werewolves (lacking suitable models, these are represented by 40mm bases);
A necromancer with heal (3); and
A vampire lord with surge (4).
These lists were built from the models I had on hand, and I skipped on magic items to keep things simple, so I’m well aware they’re not particularly optimal or anything.
Order of Battle
The scenario we rolled was kill. In this scenario you count up the points costs of units that each side has routed. If one side routed at least 10% of the enemy force’s total value (so 100pts in this case) more than the enemy had of theirs, then they are the winner. Otherwise the battle is a draw.
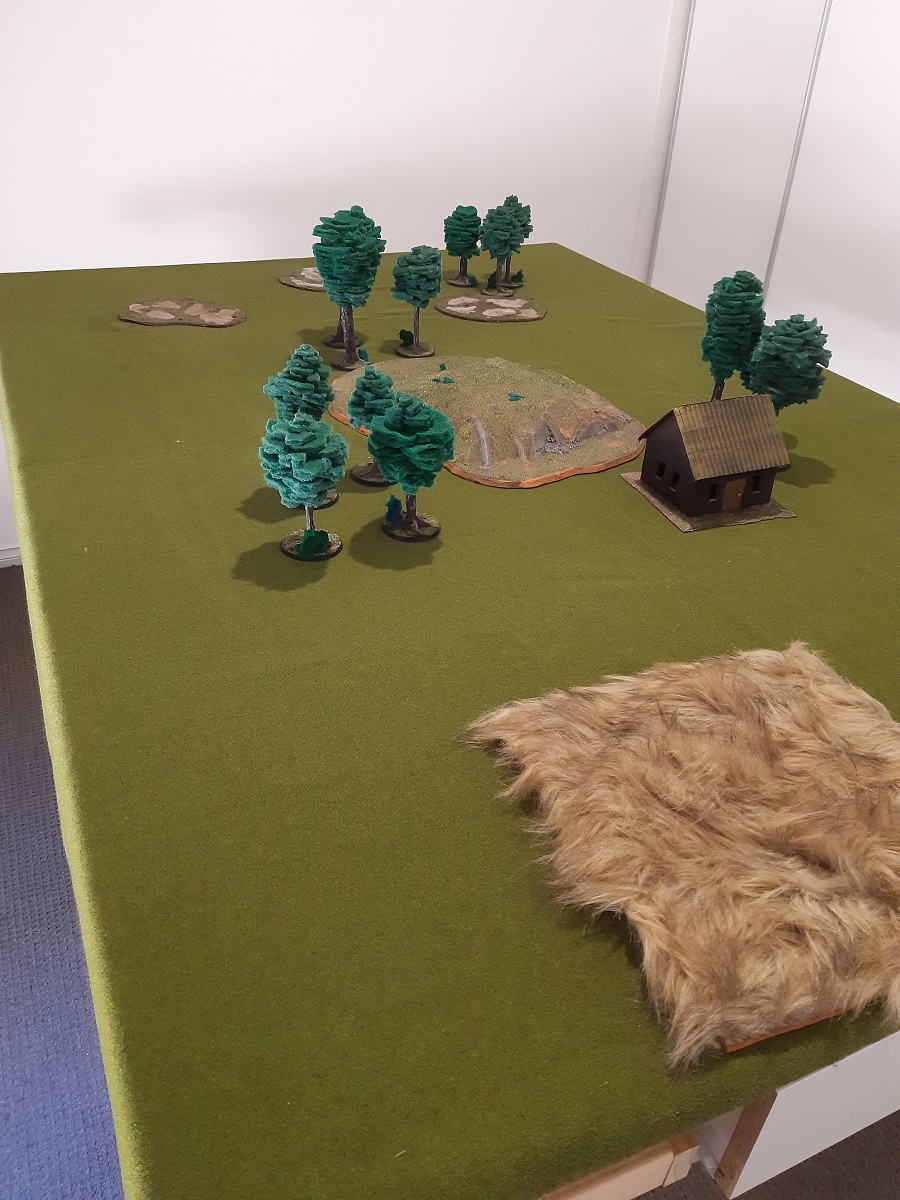
The below description of the battlefield is from my perspective.
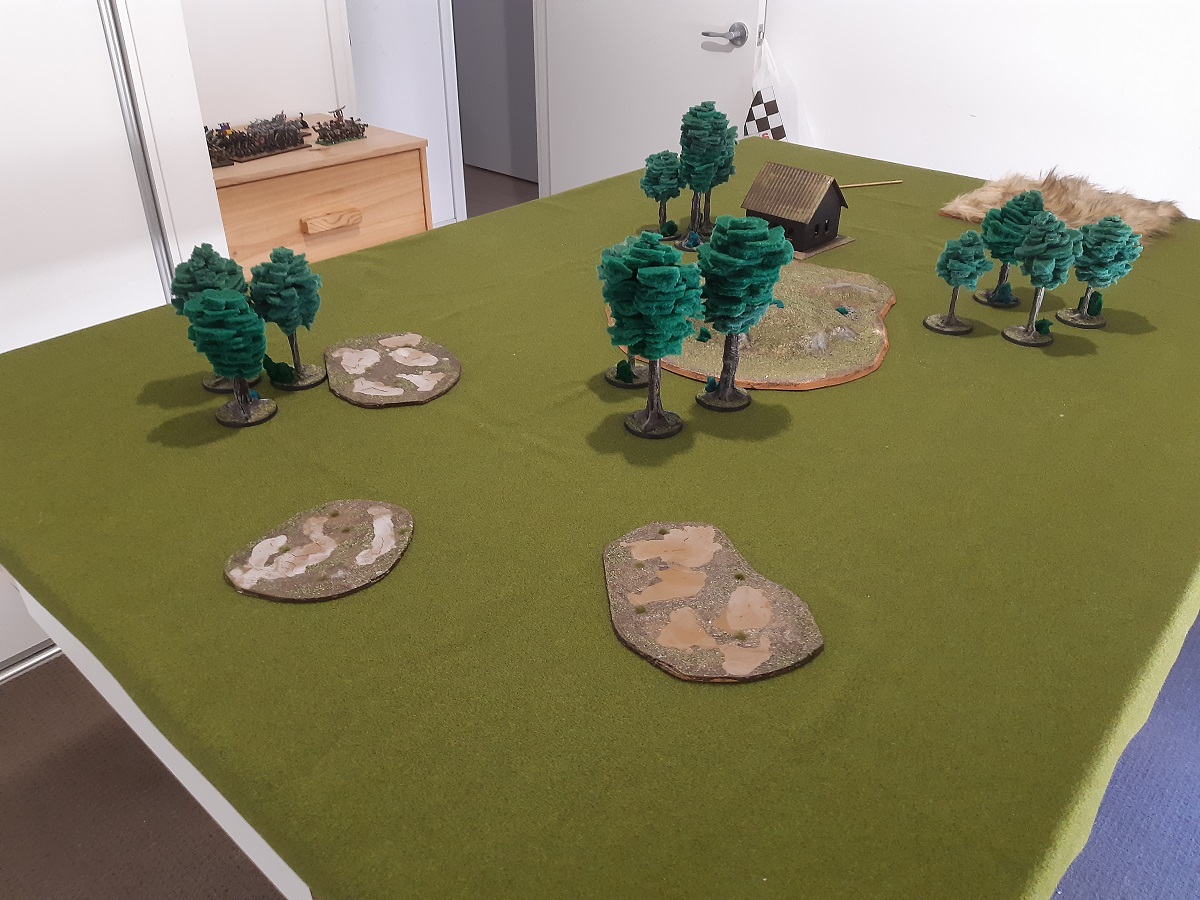
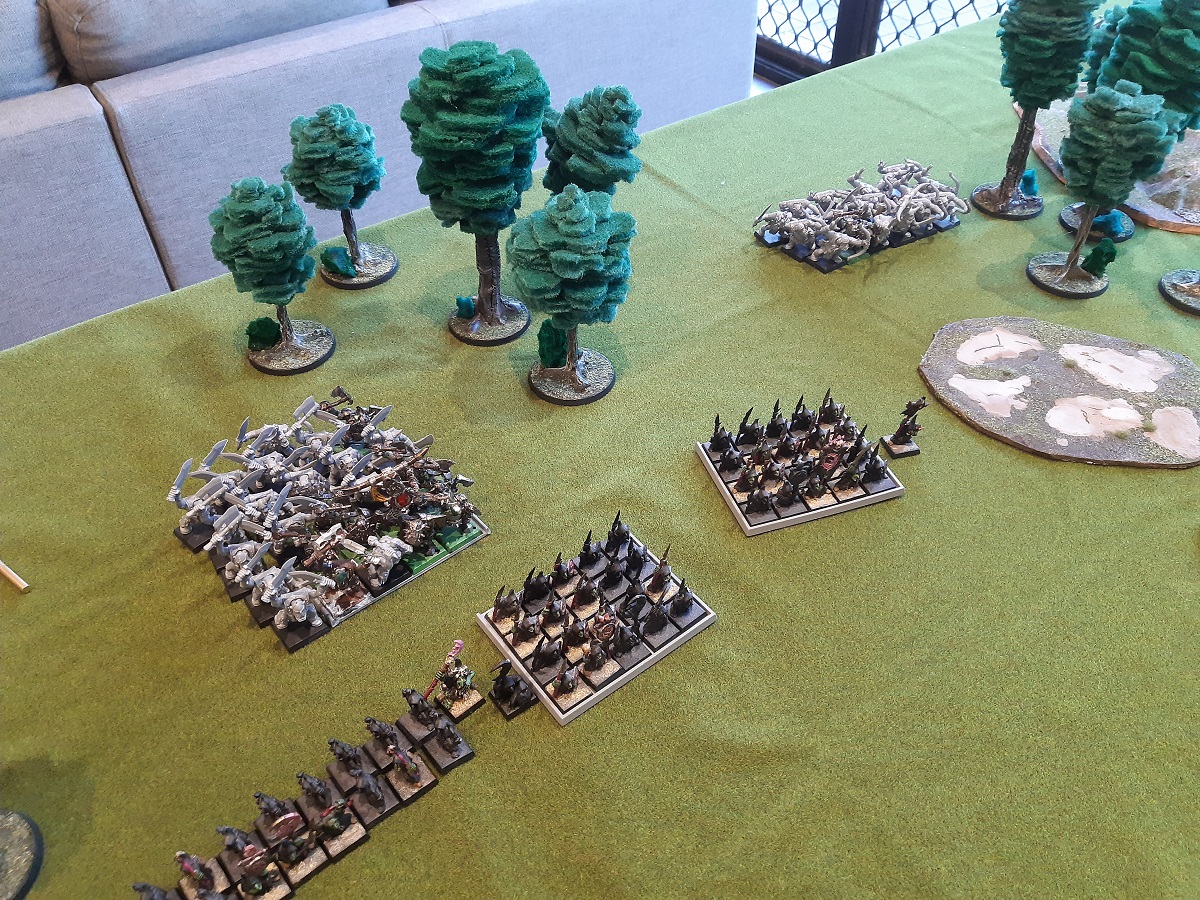
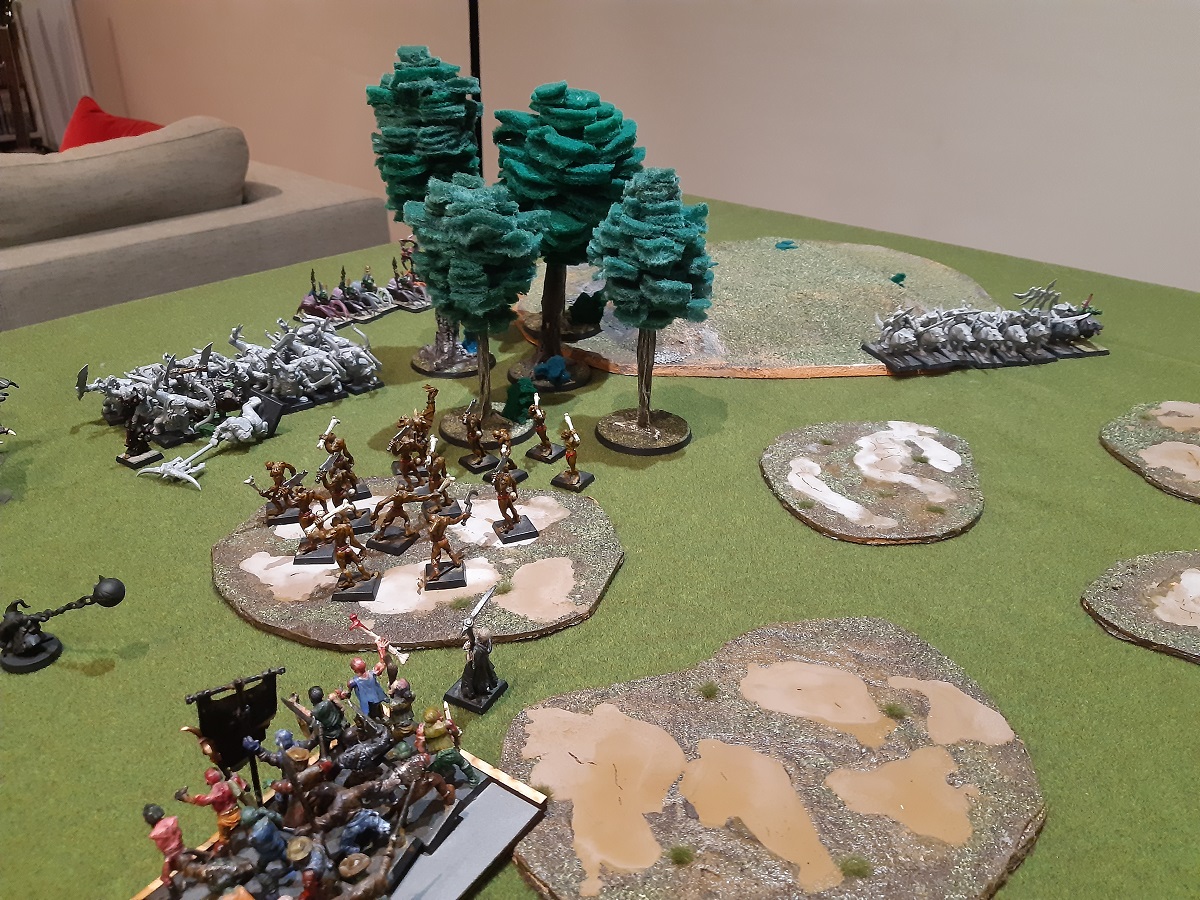
Forward of the centre line on my left flank was a field. On my centre left and covering the centre of the field was a wood in front of a house. After a gap, more trees stood forward of the house. These features were left of a hill positioned directly in the centre of the battlefield.
The right hand side of the battlefield was comprised of stands of trees ringing swampy ground. One stand of trees was on my centre right at the front of my deployment zone. The first marsh was positioned next to these trees on the forward left. The next stand of trees ran alongside the hill at the centre line of the battlefield. The second marsh was right of these trees, in the centre of my mid-right. The final marshes were forward left and right of this central marsh, while the final stand of trees of left of the forward and left of the first of those.
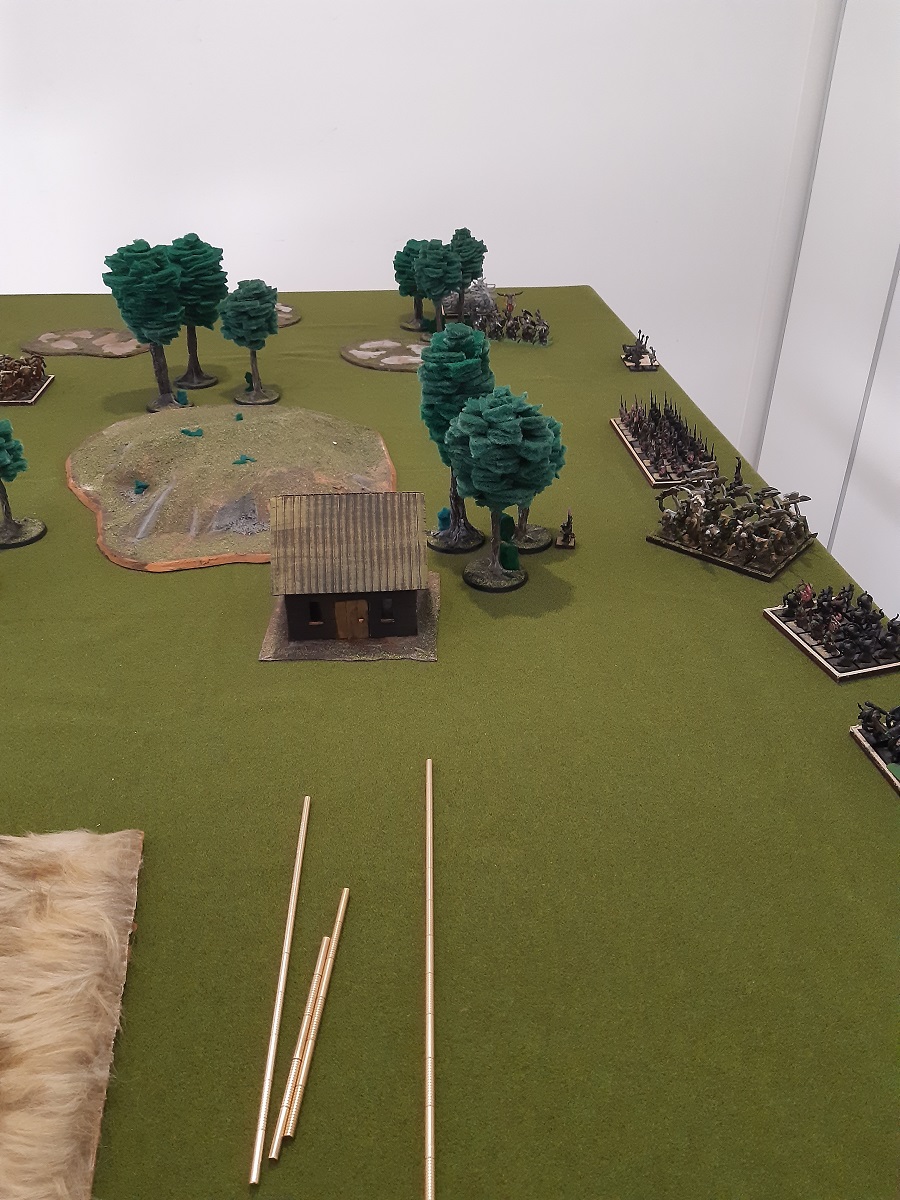
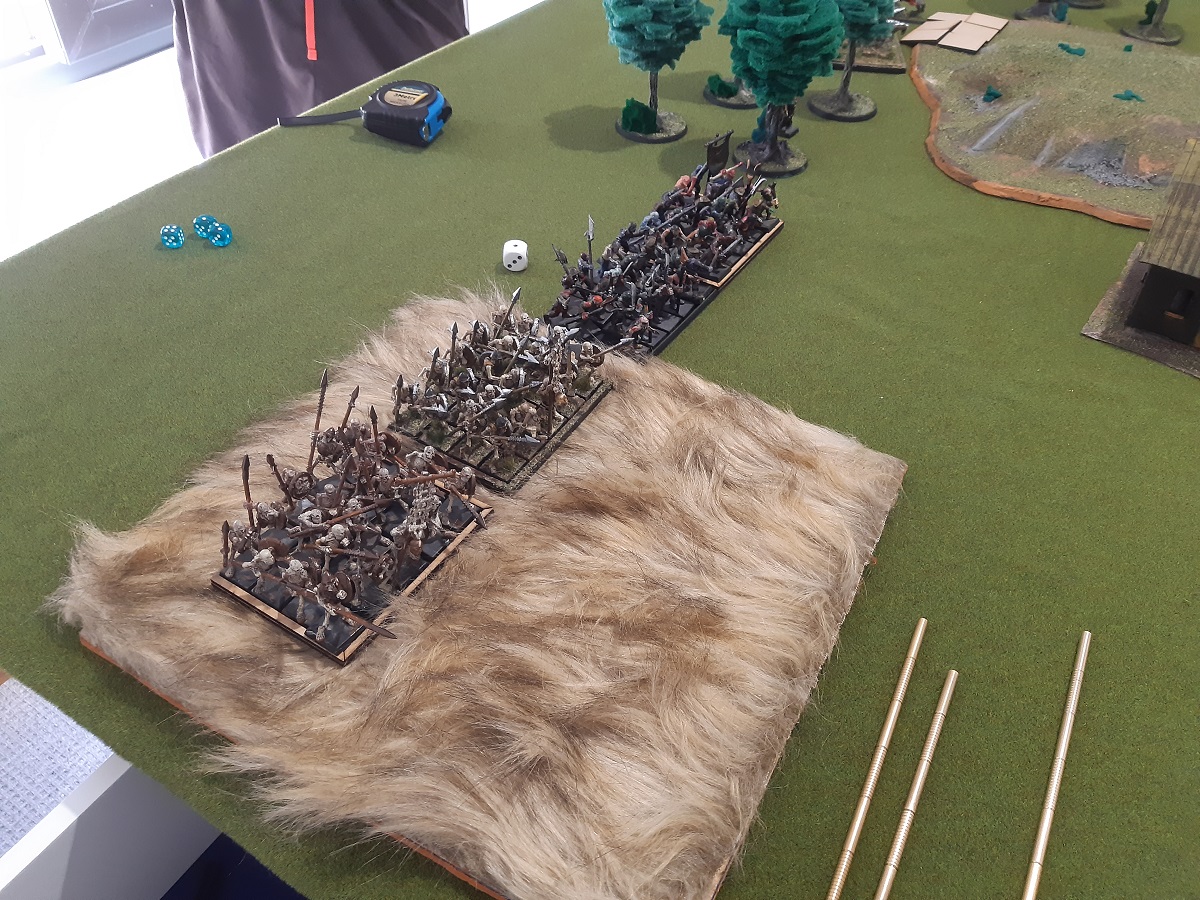
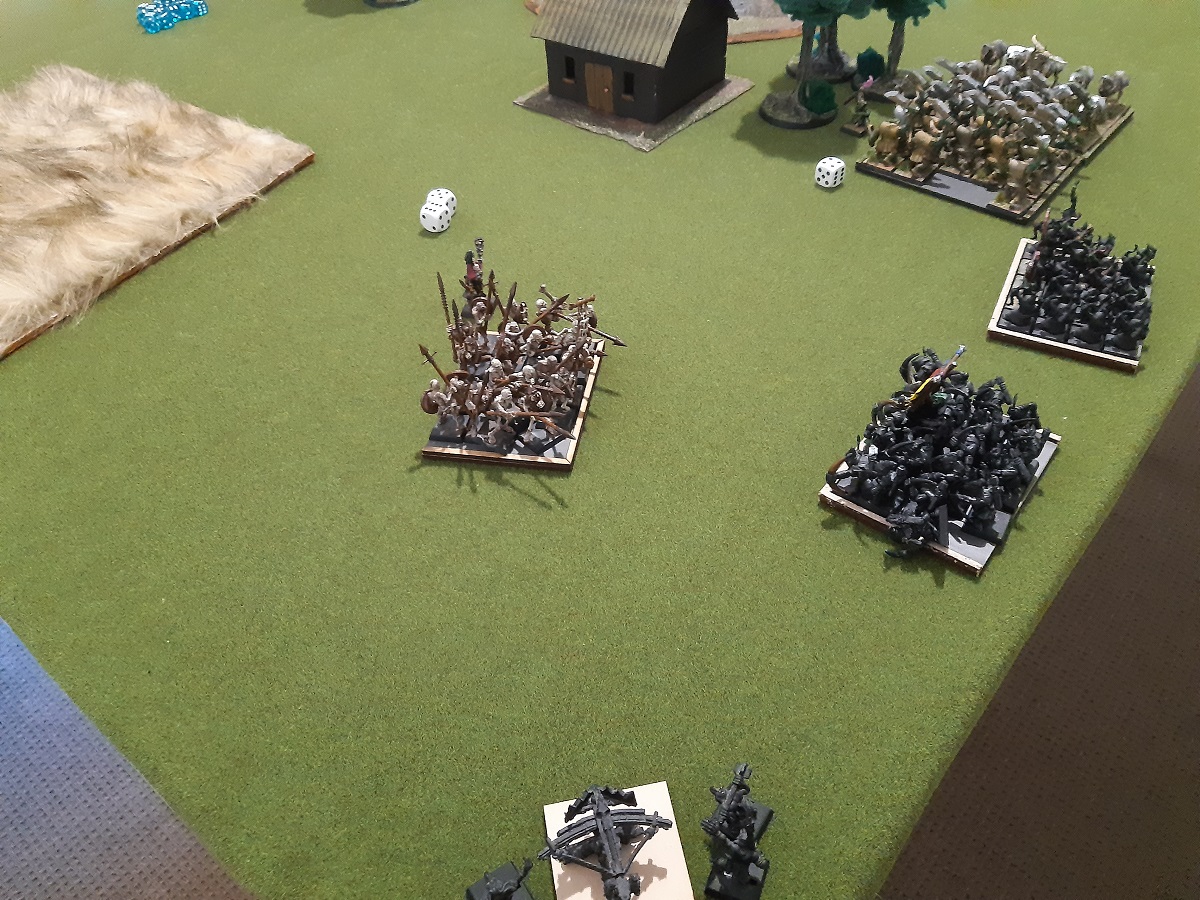
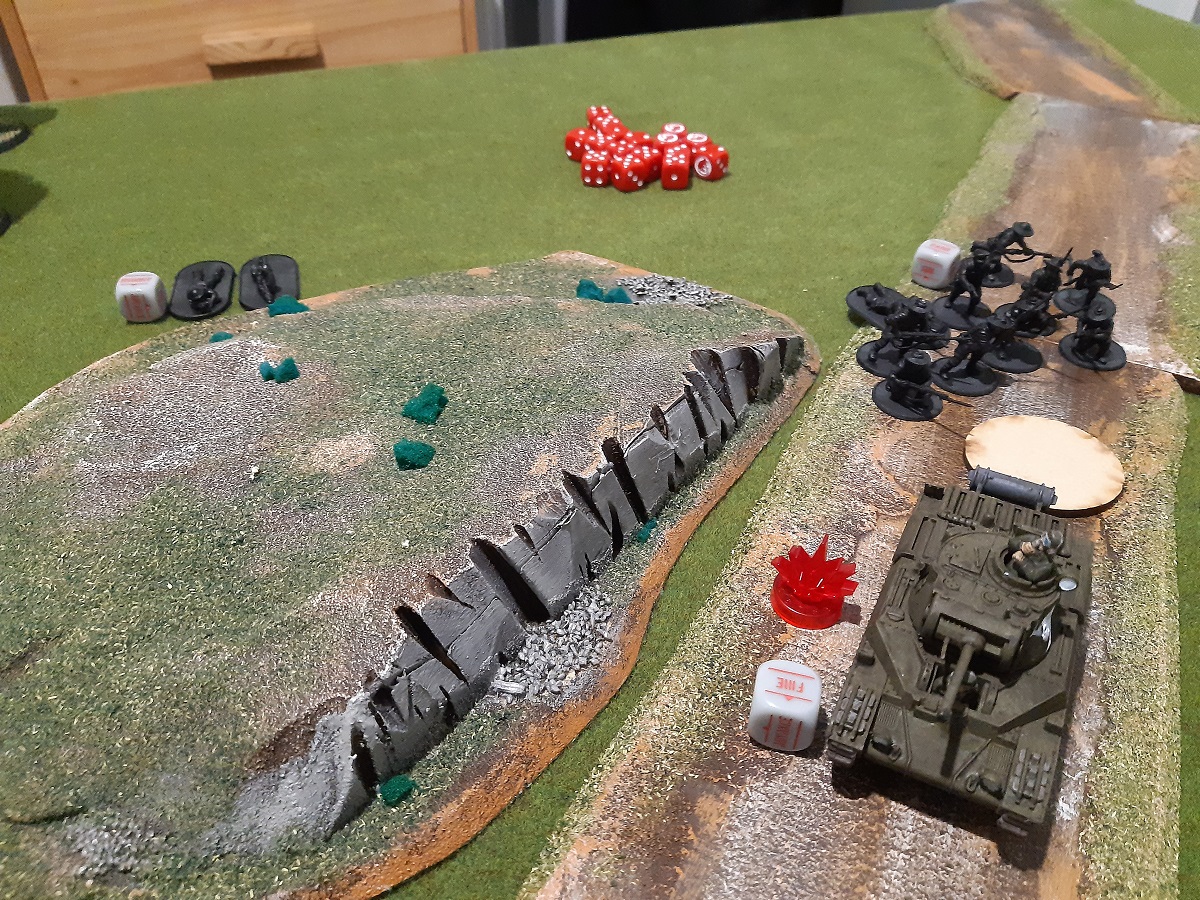
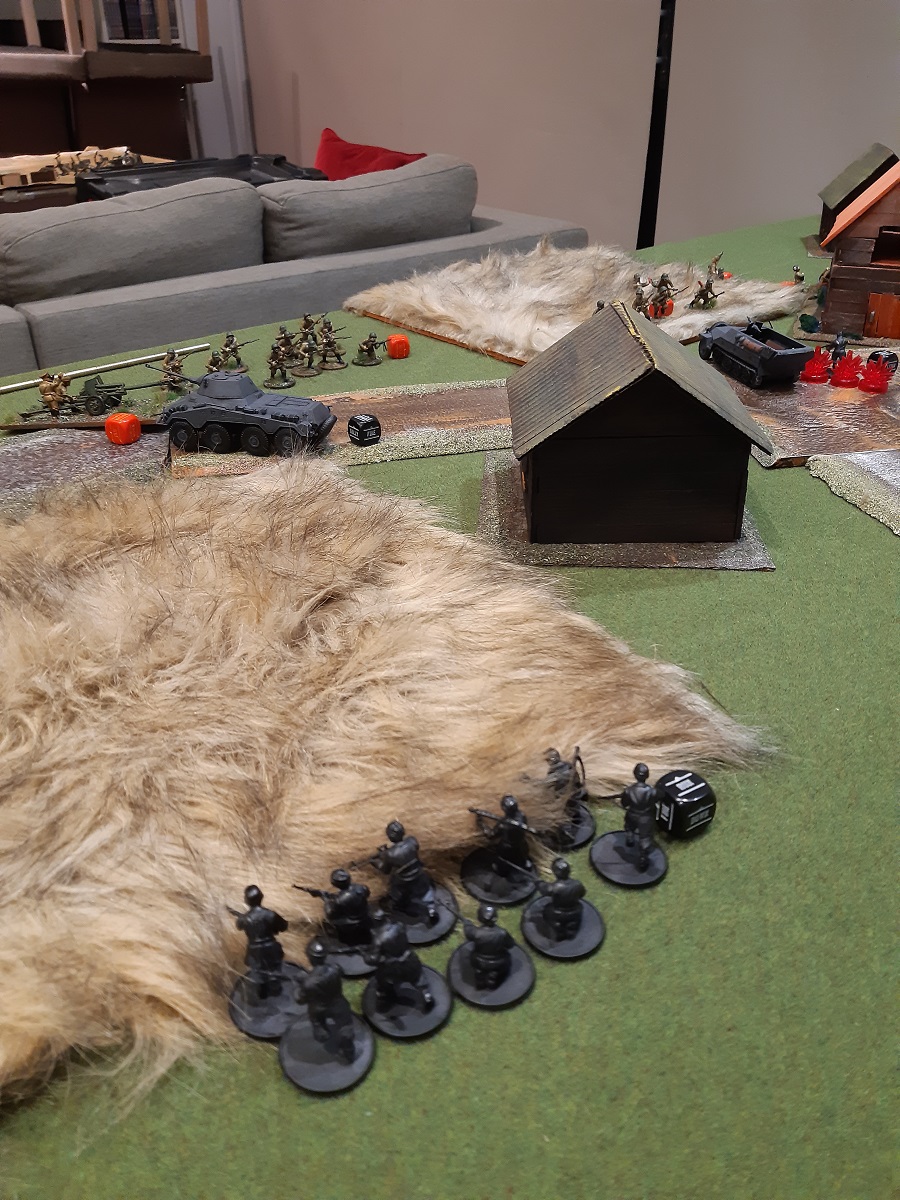
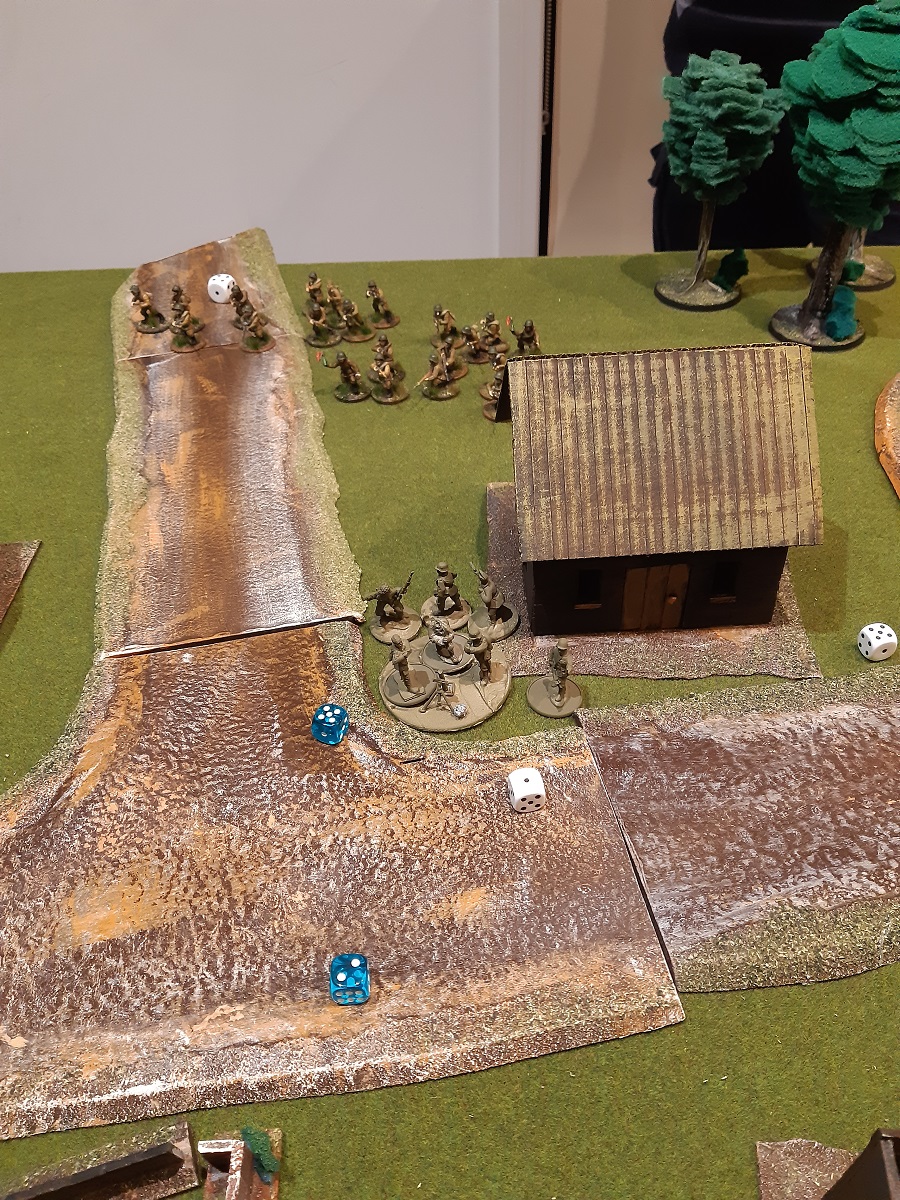
I deployed one sharp stick thrower on my far left deep in my deployment zone. To the right of that were the two units of spitters. Right of them were the ax and the wiz, then in my centre the big git and sharp sticks, with the second spear thrower to the right of the latter. Finally my morax were right of the second sharp stick thrower, while my fleabags had the far right wing.
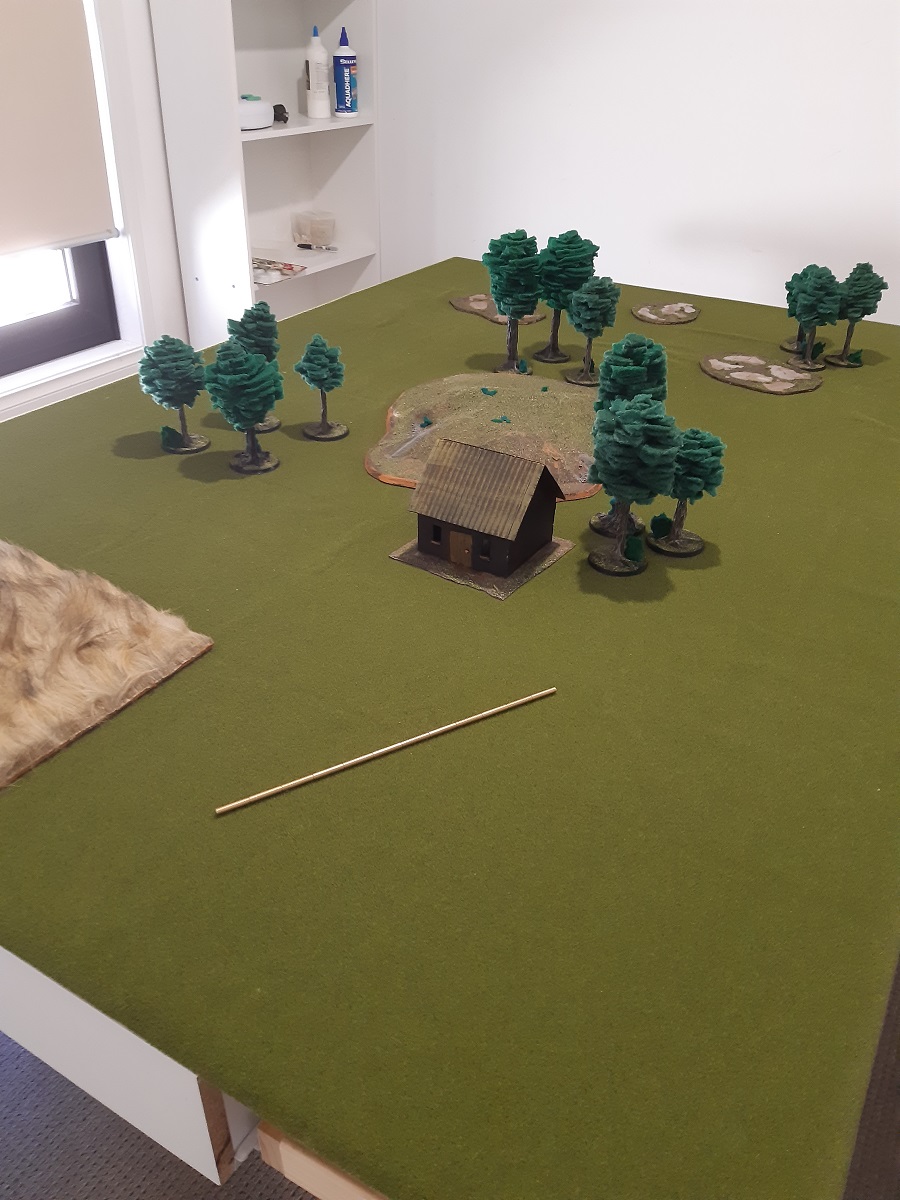
The goblin battle line. Alas I don’t have a good shot of the undead at deployment.
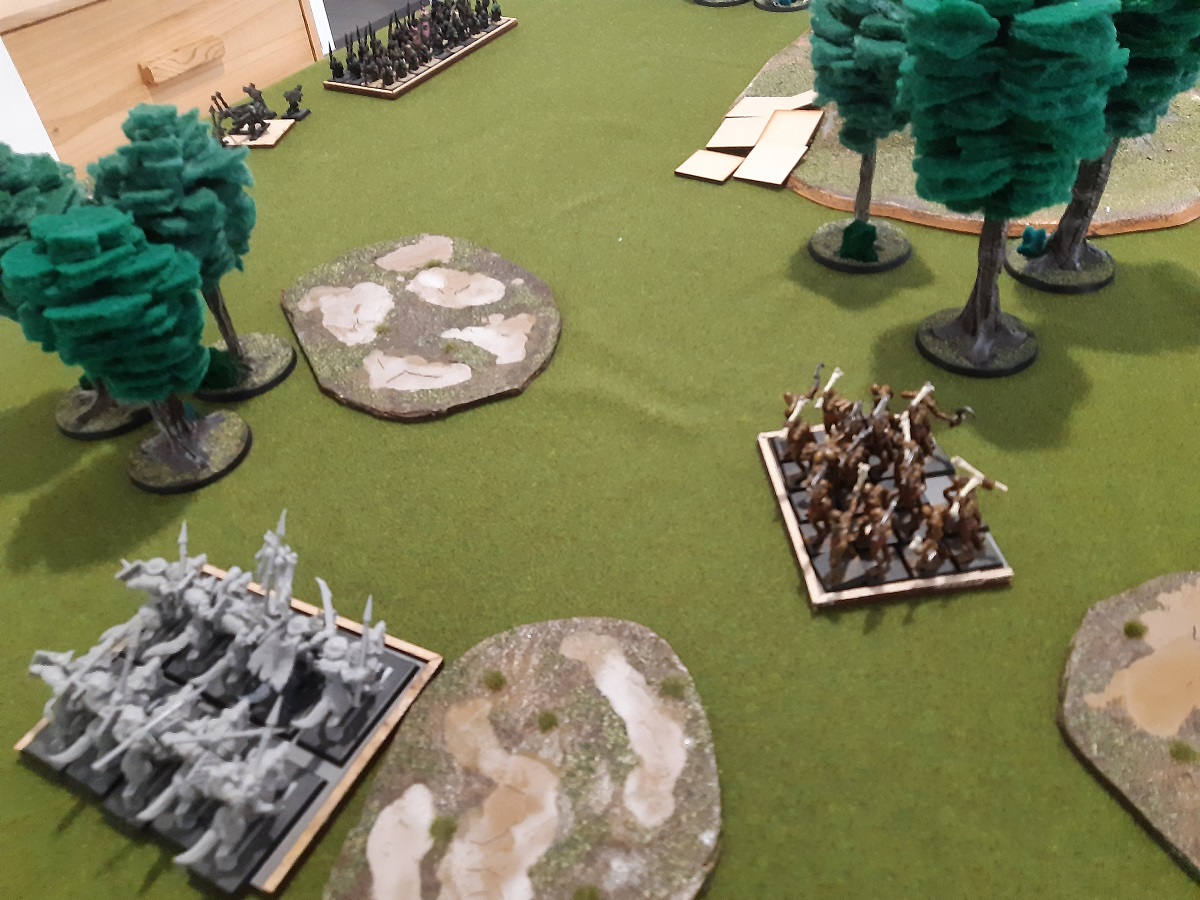
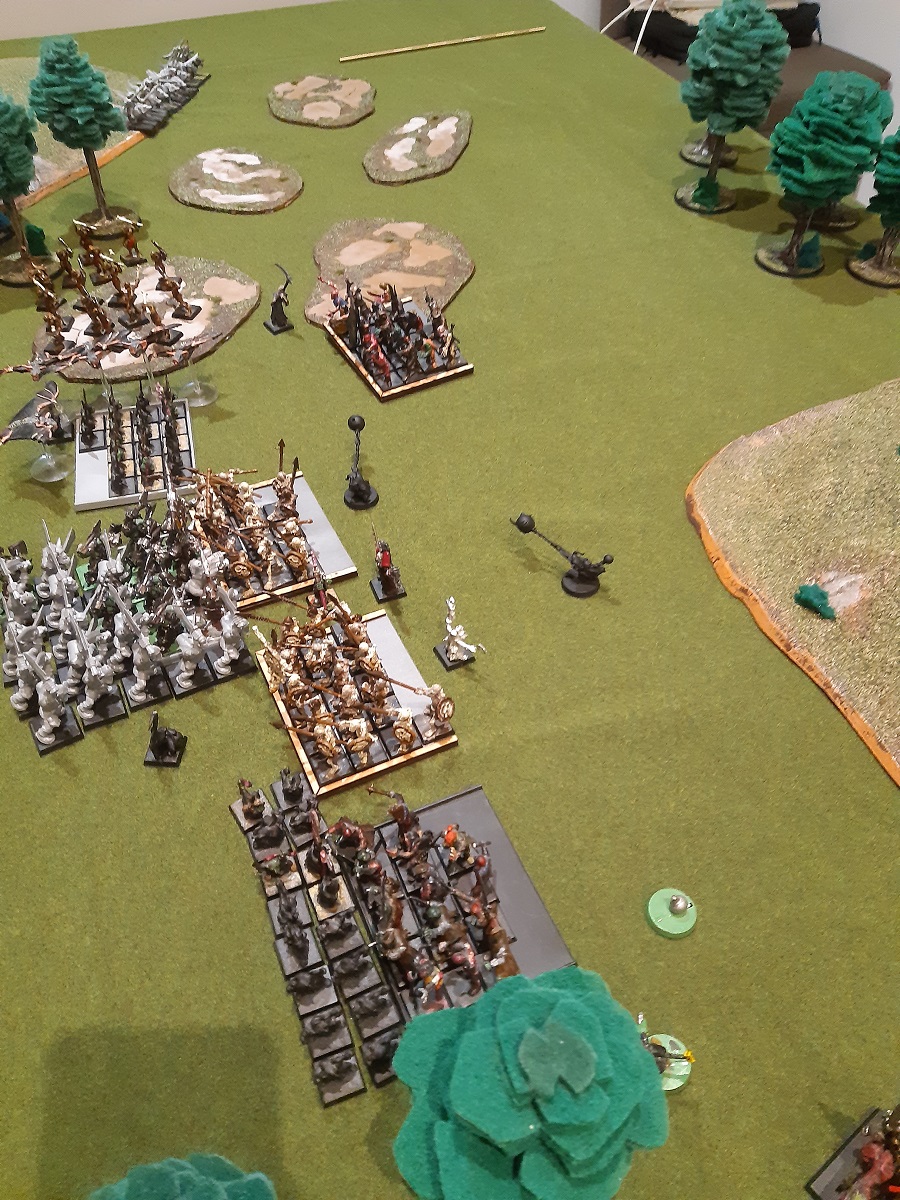
As for Dan’s deployment, he placed the two units of skeletons right up behind the field. Next to those in the open were the zombies supported by the necromancer. In his centre were the revenant cavalry, vampire lord, and werewolves. Finally his ghouls protected his left flank.
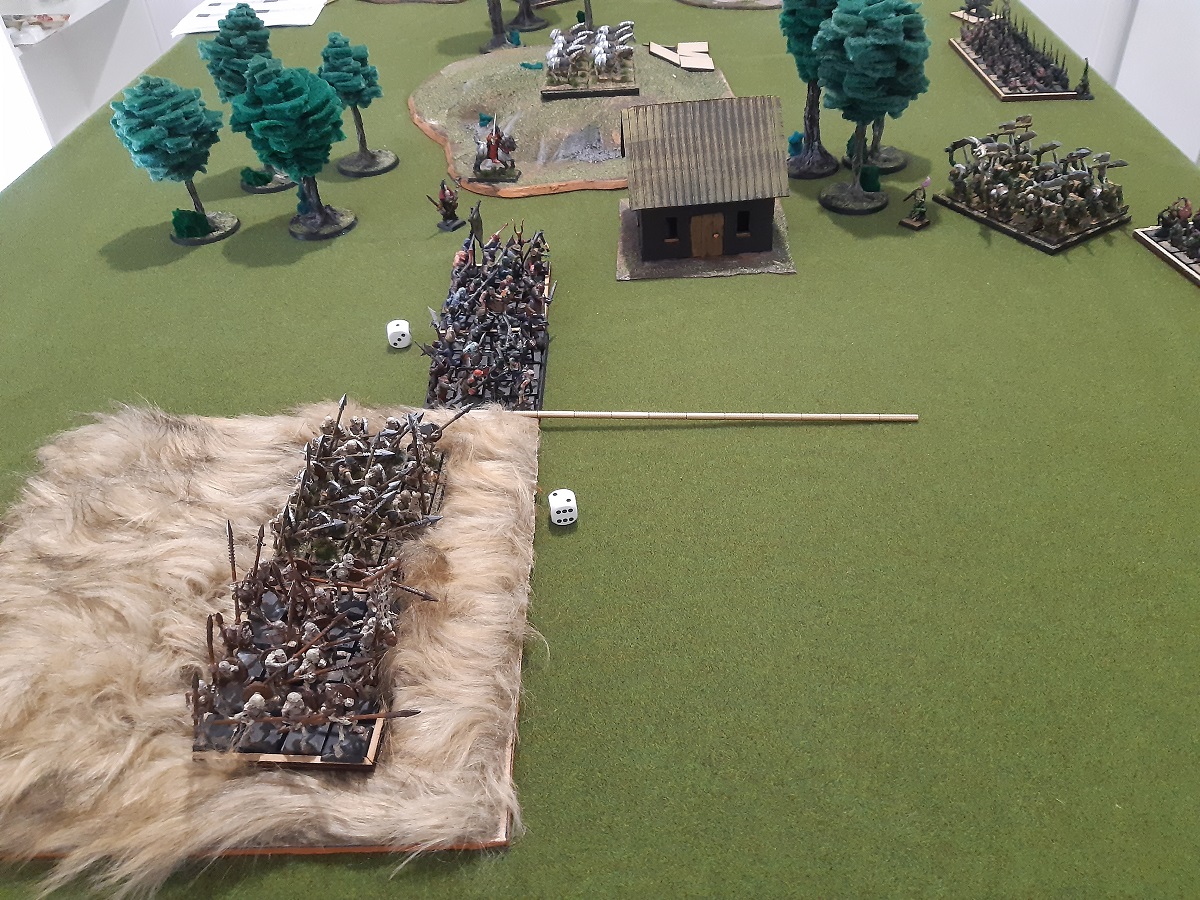
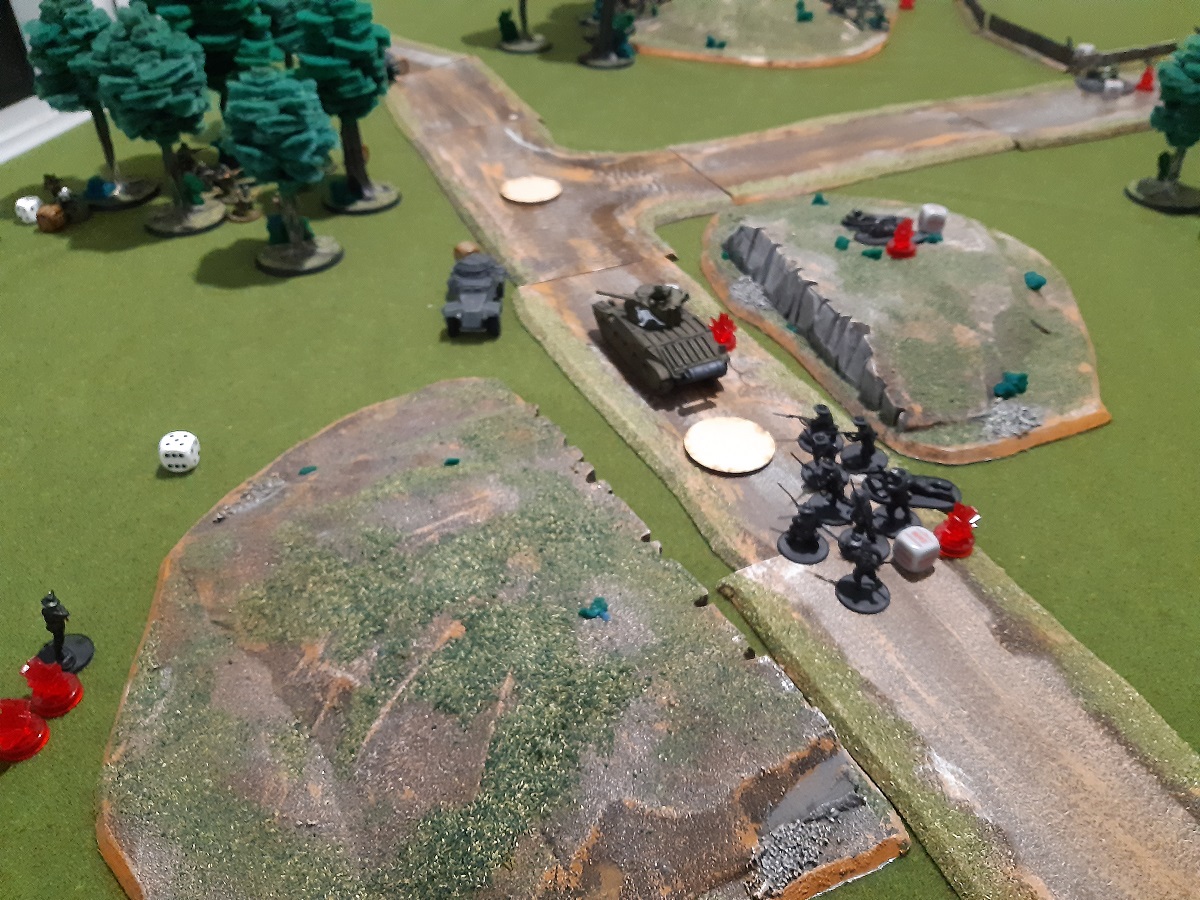
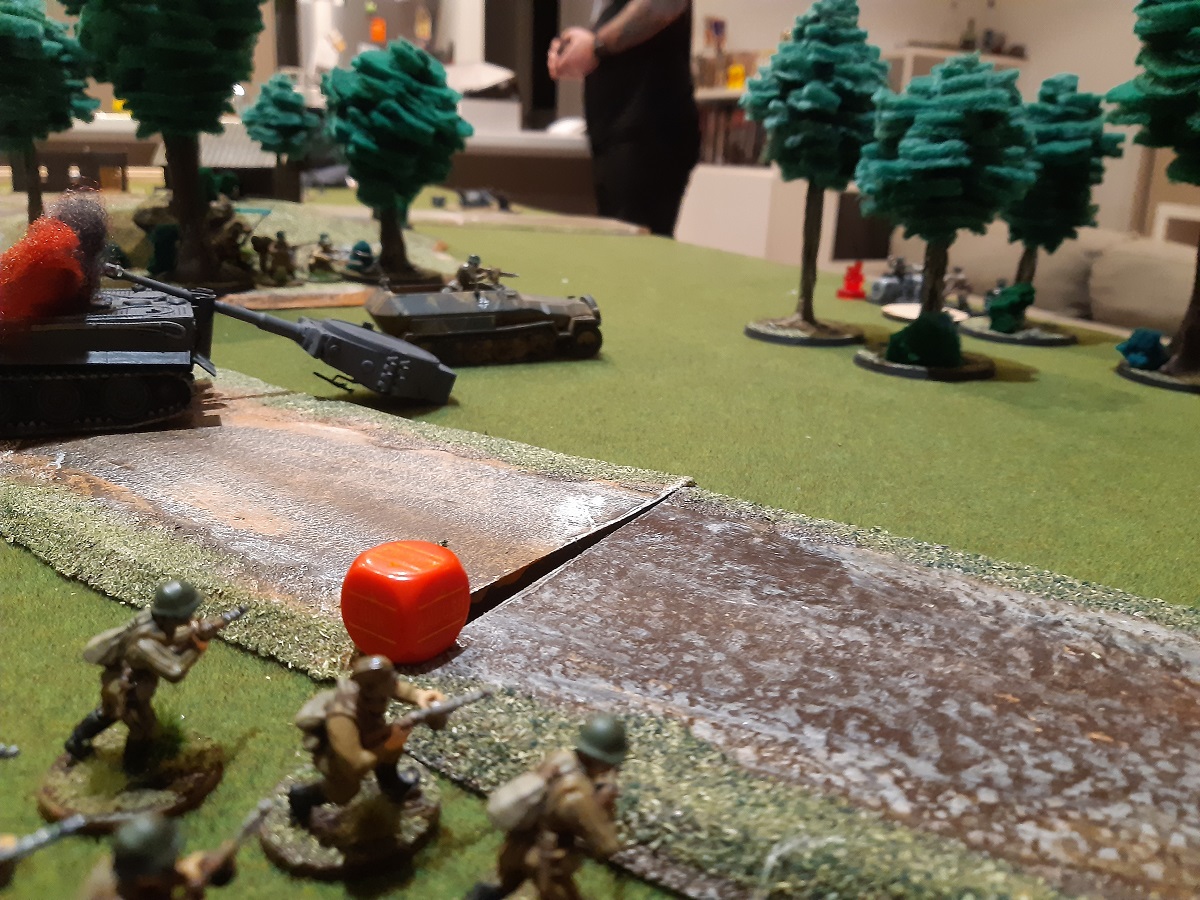
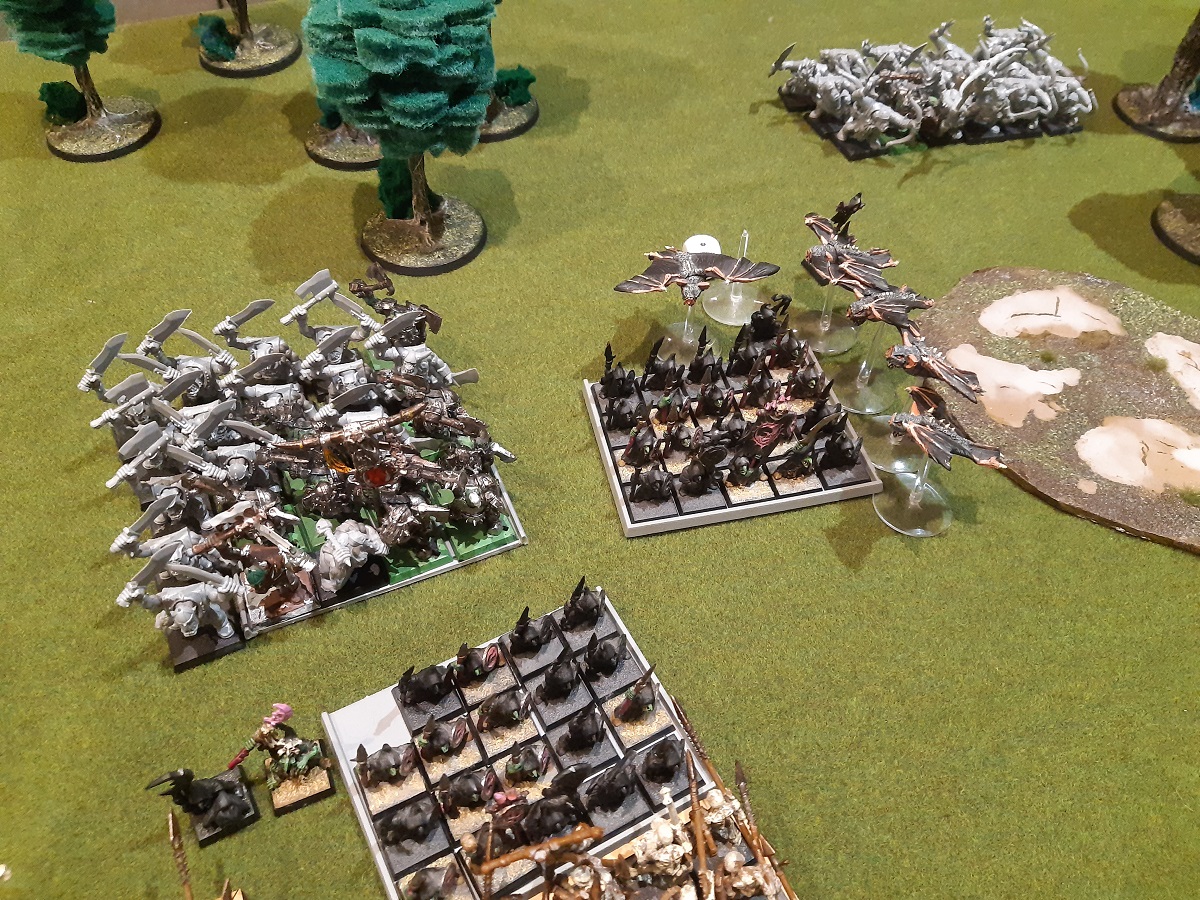
I went first and had a very exciting turn indeed. I moved my fleabags at the double up on the right between the marshes while, on the left, my thrower inflicted three damage on the zombies opposite. Dan’s first turn was perhaps even more exciting with his ghouls pivoting to front my fleabags and the rest of his force moving up just short of bowshot (or the hill in the case of his centre). In his shooting phase, Dan’s necromancer healed the damage the zombies had taken.
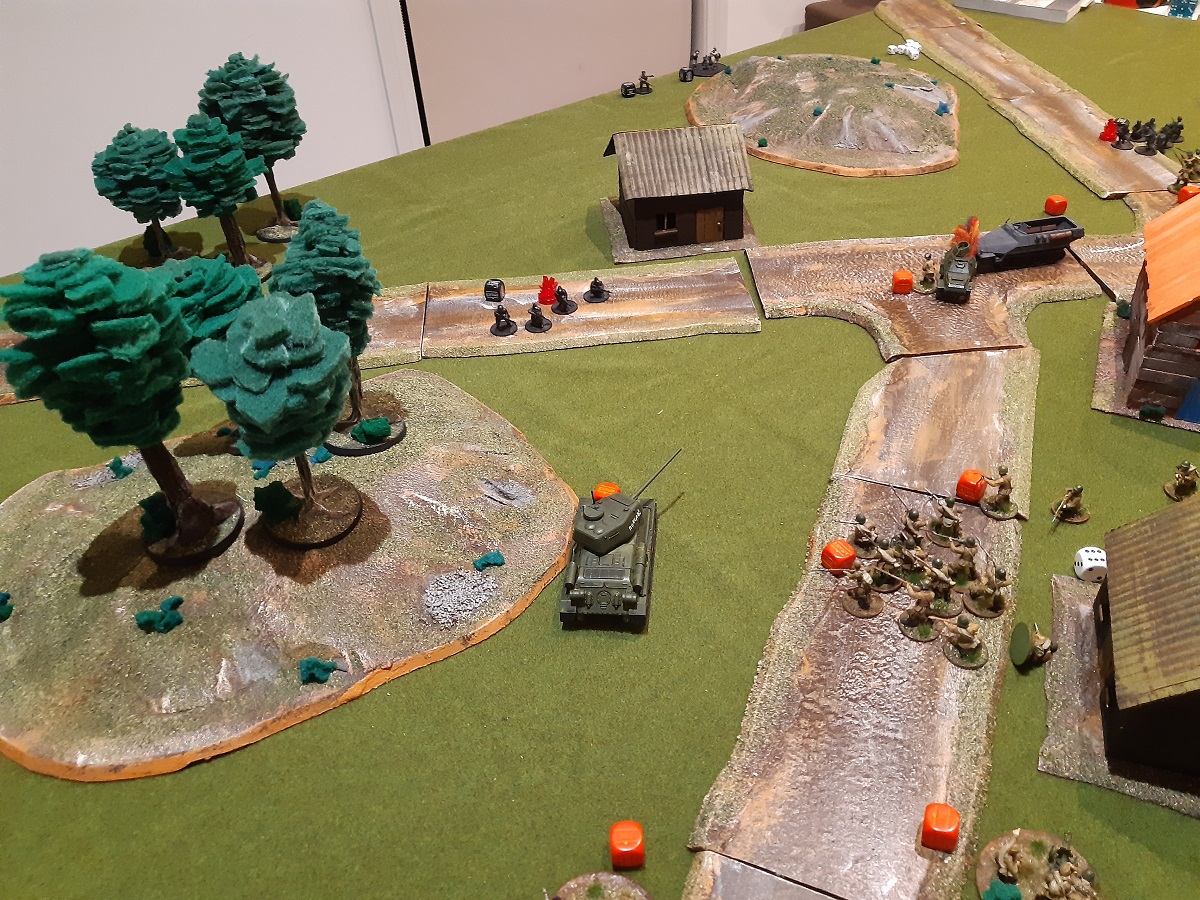
The standoff between the fleabags and the ghouls.Dan’s units on the other side of the hill to my line.Skeletons and zombies shuffling toward my line, turn one.
Turn two and I didn’t like my chances with a hindered charge from my fleabags on the ghouls, particularly with the werewolves there to turn around and ruin my day. Consequently I moved my fleabags back and turned them to face the centre. My left most thrower fired on the zombies again, but the results weren’t very exciting.
The fleabags and the ghouls shift around, turn two.
Dan spent his second turn moving his forces up again. His right lumbered forward into bowshot, his cavalry crested the hill while his werewolves surged over it, and his ghouls moved up right into the face of my fleabags. Dan’s movement was followed by some very minor surging.
Dan’s shambling masses come into bow shot.
My turn three and I opted for a hindered side-flank charge from my fleabags onto the werewolves. Dan’s ghouls had moved up too far to, in his turn, threaten my fleabags after such a move and I didn’t like the idea of a hindered frontal charge on the ghouls (having moved my fleabags back a little too far the turn before). To support the charge I moved my sharp sticks and morax up. The positioning was such that the werewolves wouldn’t be able to charge the morax or thrower. My ax also shuffled up.
My shooting wasn’t particularly crash hot and the zombies continued to stick around. Melee was similarly unspectacular with my fleabags managing a measly two damage to the werewolves.
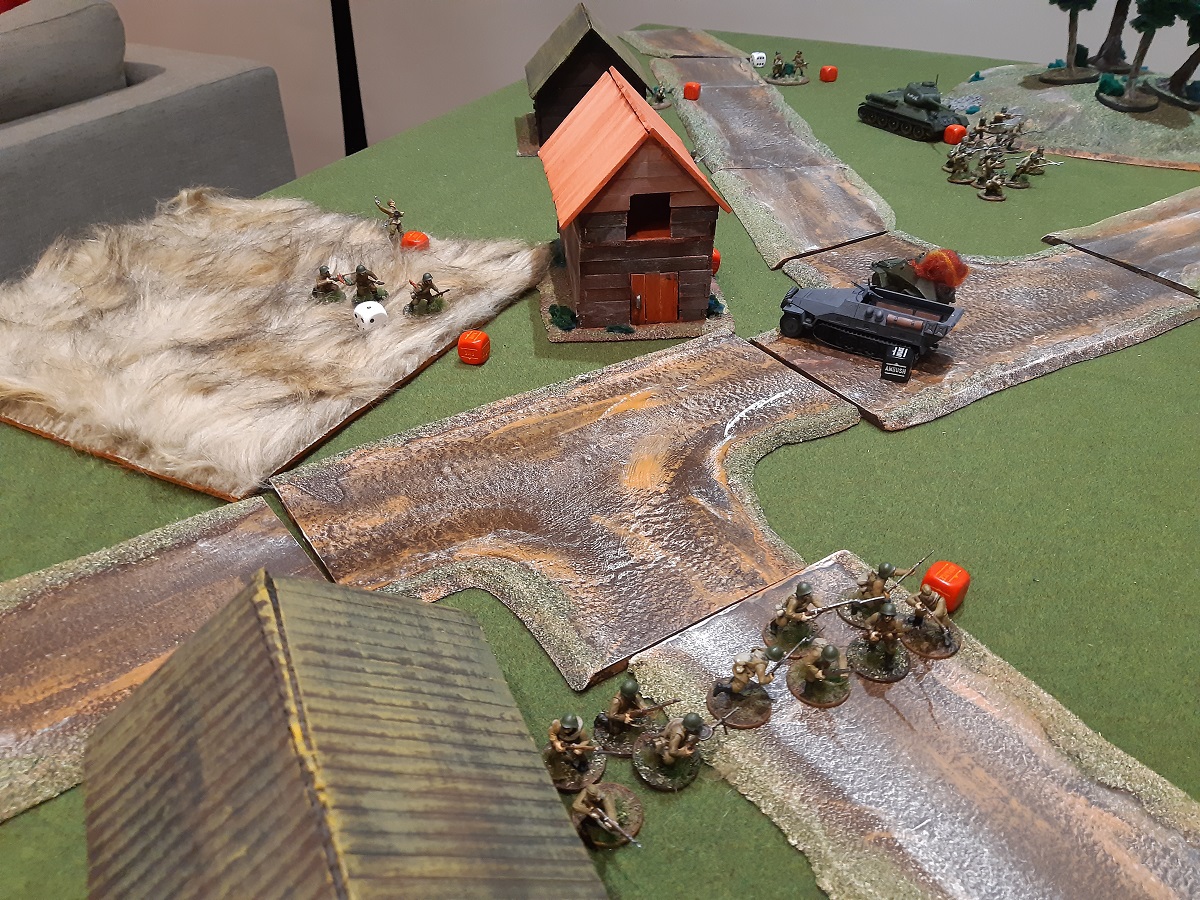
The action in the centre at the end of my turn three.
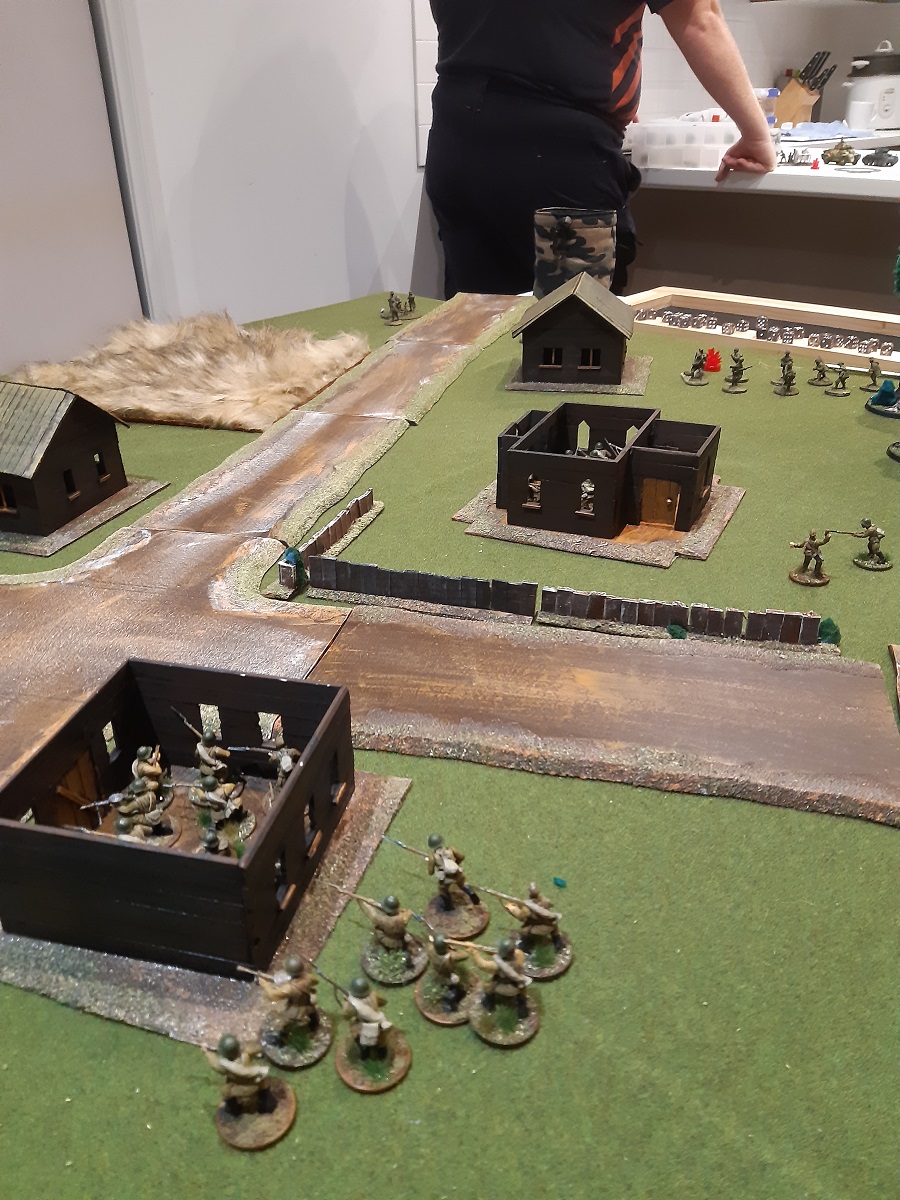
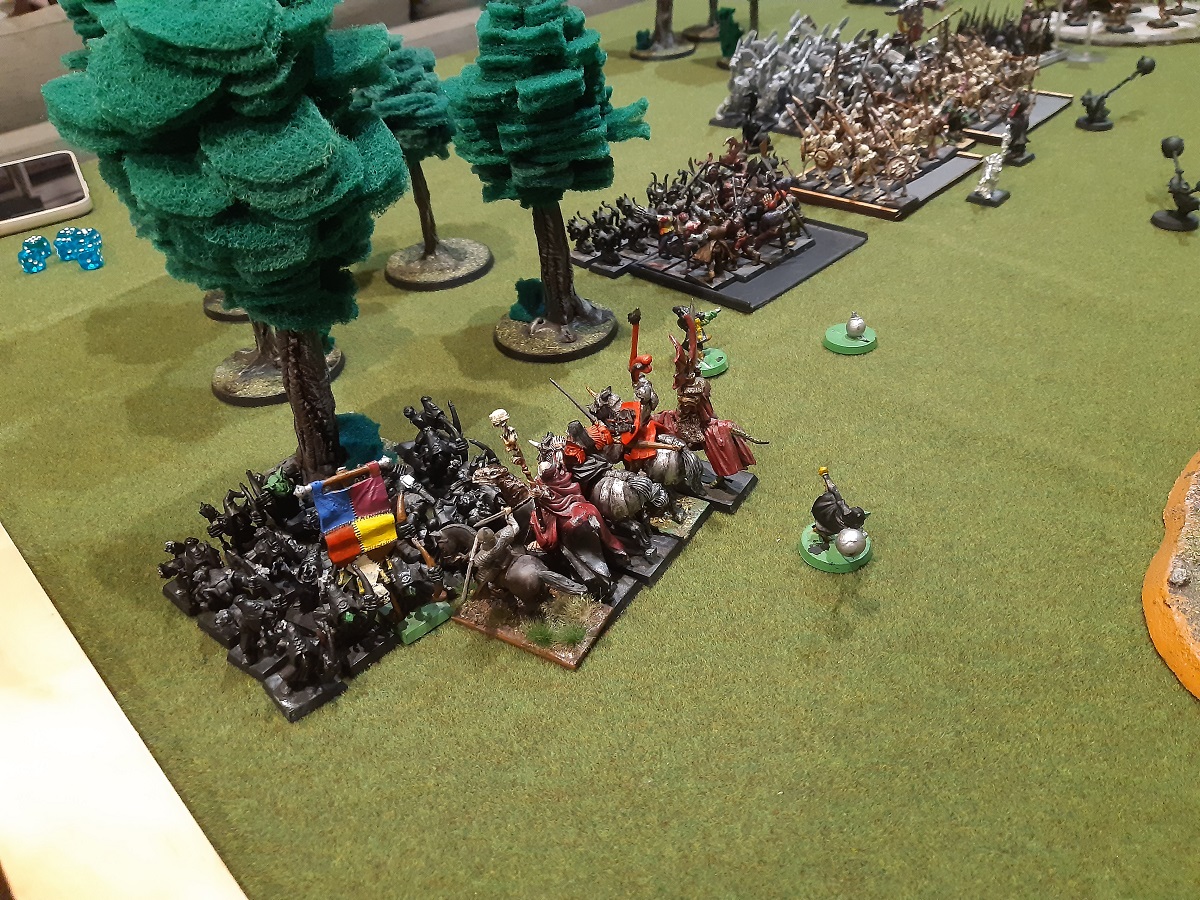
Undead turn three and Dan began with a double charge on my sharp sticks. Meanwhile the ghouls repositioned for a rear charge on my fleabags and his right flank continued to shamble forward.
While Dan’s surging continued to be pitiful, melee was another matter entirely. The cavalry in particular performed better than what was probable. Then, at the end of combat, not even an inspiring forced re-roll of the nerve test could see the sharp sticks stick around. The cavalry then continued forward, but fell short of the big git while the werewolves turn round to front my fleabags and morax.
‘My what big teeth you had’ – Last words of Snargit the goblin
Turn four and I was on the back foot. I responded by double charging the werewolves. I considered charging the zombies with my ax, but decided against it. My big git in the meantime ran away from the cavalry like the little coward he was. In the shooting phase I finally saw off the zombies, while my right hand thrower put some damage on the ghouls.
My left flank, where Dan’s line has one zombie horde sized hole in it.
Meanwhile, in melee, my morax in particular lay the smackdown on the werewolves. They were broken quite easily in the end, but I couldn’t manage the 4+ required to overrun my morax into the cavalry. My fleabags opted to change facing at the end of combat to receive the ghouls’ charge.
My fleabags and morax go into the werewolves…and they are promptly butchered.
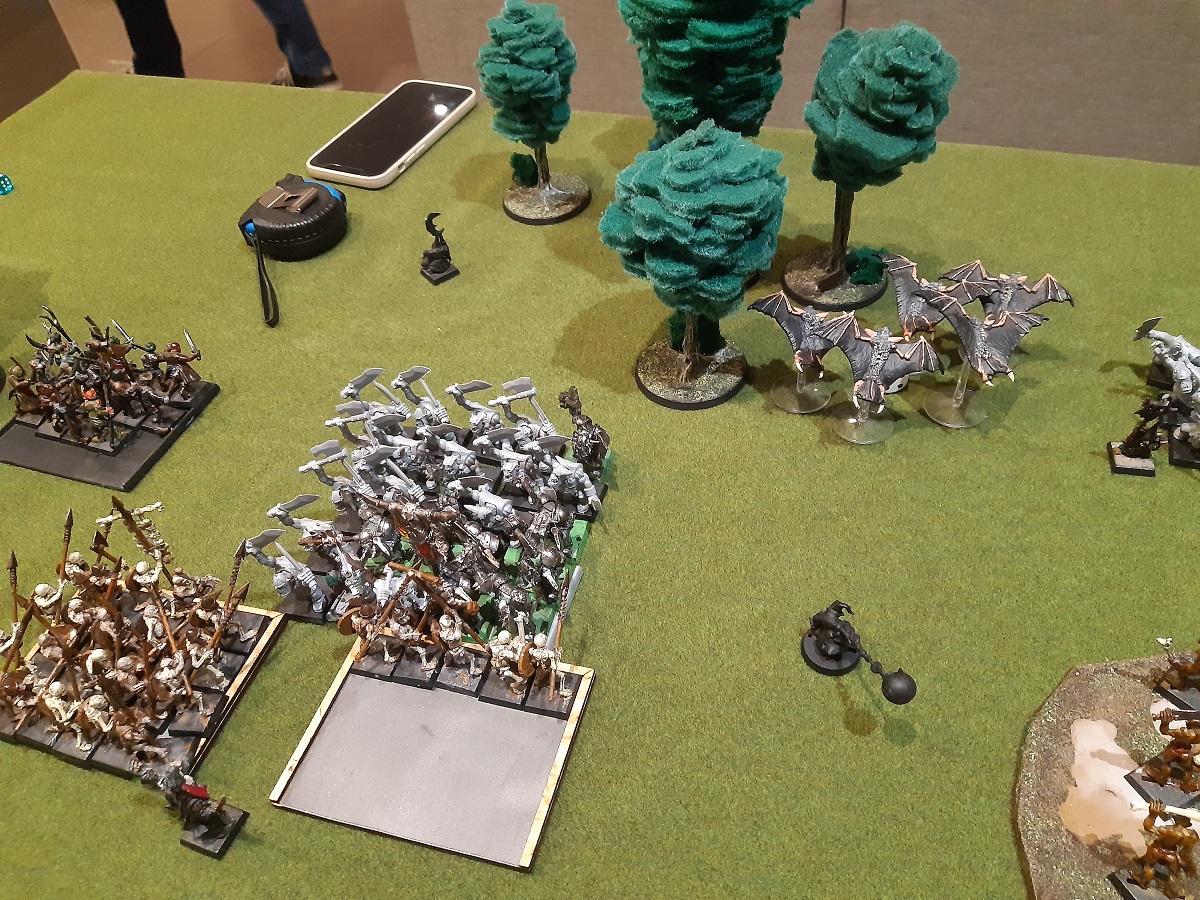
Undead turn four and the ghouls went into the fleabags, the cavalry turned and advanced toward the morax, and the skeletons shambled up. No sooner had I commented that Dan should’ve turned the cavalry after the previous combat rather than overrunning than he reminded me of surge. He had no trouble rolling the required single inch to see the revenants into my morax, who were routed easily. To to both of our surprise however the fleabags held firm against the ghouls.
Dan’s charges on my morax and fleabags, turn four.
Turn five and I kept my fleabags in combat with the ghouls and turned my ax to face the cavalry, which had changed facing after seeing off the morax. My ranged units focused on the right unit of skeletons, while my other thrower went for the cavalry. Combat was an incredibly close affair. My fleabags did some good damage, but the nerve roll led me down and I fell one or two short of making the ghouls waver when I had better than even odds.
The fleabags and ghouls are locked in a vicious combat.My left flank, turn five.
Dan maintained the ghoul-fleabag combat in his turn while his cavalry charged my ax, vampire lord charged my second thrower, and skeletons shambled forward. In the following combats, the fleabags were finally broken and thrower easily routed, but the ax held firm.
The revenant cavalry charge my ax, turn five.
In my final turn I held my ground. My shooting saw off the right unit of skeletons to protect my ax’s read, while in combat I managed some damage and a double six nerve test on the revenants, unfortunately when we double checked this till put me two short of breaking them!
One unit of skeletons remains on my left.
Dan’s final moves saw his last unit of skeletons charge one of my units of spitters and the cavalry continue fighting the ax. Both my units were broken in the ensuing combats, except that an inspiring re-roll saved my ax. The same would’ve been said of my spitters, but it was that they were just a little bit beyond the aura’s range.
And thus ended the battle.
Aftermath
I managed to rout 485 points worth of undead while Dan had managed to rout 605 points of goblins/orcs. With a lead of 120 points, the undead took the day!
It was a close fight and things really could’ve gone either way. Had Dan’s dice not been as favourable in the charge on the sharp sticks, or mine been just that little better when overrunning the werewolves or fighting the ghouls, we would’ve had a different result.
Another possibility, now I think about it, would’ve been to disengage the fleabags following the charge by the ghouls and then running off to cause chaos elsewhere.
It’s all learning however and we both had an absolute blast, which is the main thing. Our battle certainly only served to fuel our enthusiasm for the game.
Conclusion
I can see Kings of War being a game I enjoy equally as much as Bolt Action.
Dan and I did weekly X-Wing for five years and one of the things Dan pointed out was that Kings of War is very similar in the sense that the game is all about the moves you make to set yourself up to execute a battle plan. I couldn’t agree more and we both find it incredibly engaging because of it.
I hope you enjoyed this after action report and expect more Kings of War in the future. Next time however: terrain.
As mentioned in my last update, uni has kept me busy so I’ve not been able to do much hobby stuff. Matthew was around last Sunday however for another game of Bolt Action.
Matthew was keen to use his new Australian force, which gave me the opportunity to field my Germans for a change.
Disposition of Forces
I fielded a single reinforced platoon consisting of:
An Oberleutnant (1st Lieutenant) and one staff;
Medic with one staff;
Three 10 man Heer squads each with an SMG armed NCO and an LMG;
Eight man Heer Pioneer squad with a flamethrower;
Hanomag half-track;
Sdkfz 222 armoured car; and
Panzer III J (“Skypanzer”).
Matthew’s forces consisted of:
A 1st Lieutenant;
An artillery forward observer;
Two 10 man infantry sections with LMG;
10 man commando squad with five SMGs and an LMG;
An MMG team;
A medium mortar;
A sniper team;
A PIAT team;
A light howitzer; and
A Matilda (“Sheila”).
Order of Battle
We rolled Key Positions for the mission. Three objective markers were rolled with Matthew placing the first and third while I placed the second. Victory in this scenario goes to the force controlling the majority of the objectives.
Battlefield looking from my near right to far left.
My near left flank was open up to a large forest. The far side of the forest met with a hill, the top of which was the first objective. Beyond the hill, there was a fenced off section of open ground.
Battlefield looking from my far right to near left.
A road entered the battlefield from the middle of my table edge. It curved upon entering and headed diagonally to a T intersection that was just shy of the centre point of the battlefield. The intersection was our second objective. On my side of the intersection was a small wood. From the intersection the road branched diagonally left and off the table next to the fenced area on my far left. To the right of this branch of the road, in the middle of Matthew’s edge, was another small wood.
My right was open ground, though a medium wood was position just shy of the centre line and against the right table edge. Beyond this open area two ridges formed a gully. The original branch of the road passed through this gully and then off the board on my far right. The gully was our third objective.
I opted to place my Hanomag and pioneers in reserve, while Matthew did likewise with his commandos. With that sorted, the battle commenced.
Despite having only nine order dice to Matthew’s 11, turn one began with seemingly endless German dice. I ran my first Heer squad up behind the forest on my left, while the second ran up behind my central wood. The third then ran on into the open on my right. Still the dice kept coming though, so I proceeded to place my Hanomag and pioneers down.
The forward observer and mortar team were the first units to show up for the Australians. Both came on the far left, setting themselves up behind the fences. It seemed the rest of Matthew’s forces were still at the pub however, because another two German dice followed. I used them to bring my medic and lieutenant on, both of which I moved up between my central and right Heer squads.
Australians moving up beyond the hill on my far left.
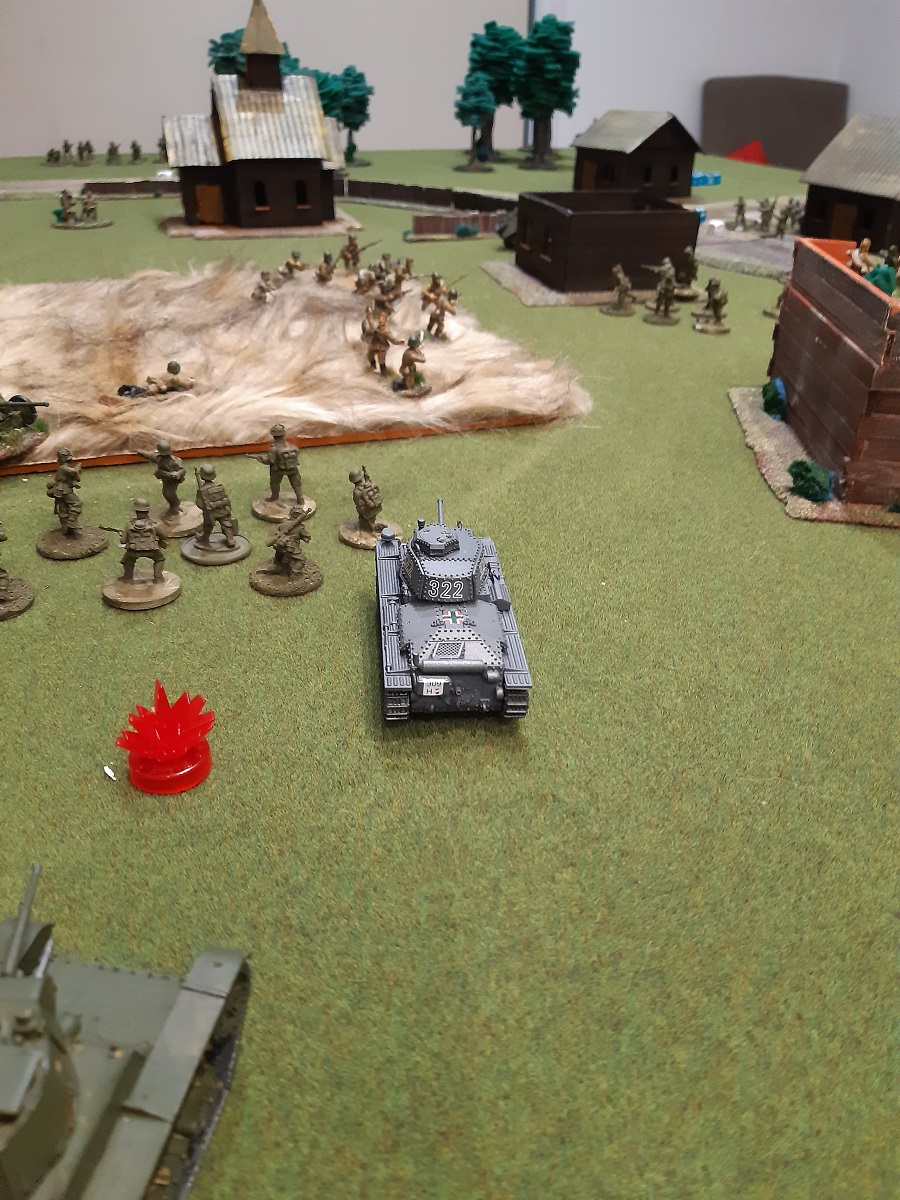
We then went tit for tat with orders. Matthew rolled on the howitzer just left of the trees in the centre of his line. I responded with my triple 2, which advanced up the road and managed to pick off two of the artillery crewmen. The last man stuck around, but the gun’s effectiveness was nonetheless curtailed. Matthew’s MMG then arrived on the left-hand road, only to be met with machine-gun fire from my Panzer III which arrived next. I managed to pick off only a single man, which was arguably the worst possible result.
The German left flank looking back toward the panzer and infantry in the centre of the line and gully beyond on the far right.
All my dice being out the bag, the rest of Matthew’s forces then arrived. Sheila drove on the right hand road and advanced into the gully, firing wildly on my Panzer as she went. Matthew’s infantry sections ran on up behind Sheila and on the far left respectively, while the sniper and PIAT teams ran up behind the far ridge. Finally Matthew’s own officer arrived to support the howitzer and MMG.
Turn two and I again scored the first dice. Skypanzer put another pin on the Australian MG while also returning a wild shot on Sheila. Matthew netted the second dice and attempted to fire his howitzer in response, but the lone crew man failed his order test and went down.
Armoured showdown: looking up the road from the Panzer III to Sheila at the entrance to the gully.
The next two dice went to me. I backed my triple 2 to keep it safe from the PIAT team and fired wildly at the Australian MG without effect while my leftmost Heer squad advanced into the forest before the hill. In response, Matthew used his next dice to place his MG in ambush.
Australians take control of the gully.
Another two dice to me saw my central Heer squad advance further into the middle wood, while my medic ran up beside them. Matthew then crept his sniper up the ridge and took a poorly aimed shot at my medic. Another Australian die then saw the forward observer radio for artillery support, with an aiming point placed on the righthand edge of the middle wood.
The only other action for the turn was Sheila firing on Skypanzer. Her shot went home this time, but she failed to cause any damage.
My first Heer squad advancing through the forest to the hill.
As for the remaining units; my Hanomag and pioneers both went down, while my third Heer squad and officer continued to run forward across the open ground. As for Matthew’s units; his first infantry squad advanced to the fence and his second into the gully, his officer and commandos went down, and his mortar and PIAT team went into ambush. At the end of the turn, Matthew opted to retain all his ambush orders, as well as keeping his officer down.
Turn three and the booming of guns heralded the Australian artillery barrage. Despite a miscalculation, shells still rained down on my officer, third Heer squad, and medic. The former took three pins a piece, while the latter took two.
Yet again I won the first order dice of the turn. I decided continuing to push my luck with my panzer was a bad idea and issued it an advance to turn and face the enemy armour. Though my main gun shot went home, I failed to pierce Sheila’s armour. Meanwhile Skypanzer’s hull MG sent Matthew’s infantry in the gully down on their bellies.
The German centre viewed from Matthew’s side.
The initiative continued with me as Matthew drew another two German order dice. The first saw my triple 2 cut Matthew’s sniper down in a devastating burst of machinegun fire. Next my officer ordered my third Heer squad and medic to snap to and rally. The officer and Heer both passed their order tests and dropped two and three pins respectively. My medic however failed and went down.
My order dice didn’t end there though. I tried to bring my Hanomag on, but it failed its order test and went down. Then my first Heer squad advanced up to the hill but shy of the summit.
The gully, turn three.
I was beginning to doubt whether any of Matthew’s dice were actually in the bag, but thankfully proof of their existence was found. With his first, Matthew attempted a shot on my panzer from his light howitzer, only to be foiled by the penalty for having one crewman. Matthew’s poor luck continued when Sheila activated, fired on the triple 2, but failed to penetrate its armour despite needing anything but a one.
The bedevilling of Matthew’s shooting didn’t stop there however. When the commandos arrived within short range of my third Heer squad I thought their days numbered. By some fluke of poor marksmanship or munitions however only a single member of the squad fell; despite Matthew’s 17 shots.
The commandos arrive.
The rest of the orders for the turn saw my pioneers go down, Matthew’s first infantry section advance to the hill, and my second Heer squad pick off a couple of men in Matthew’s first squad with some long range LMG shooting. The forward observer went down at some point too. At the end of the turn, Matthew again kept his ambush orders, except for his PIAT team.
Turn four and yet again I scored the first dice. Knowing they were not long for this world, I had my third Heer squad unload a hail of lead on the commandos. Only a single shot missed and I then proceeded to roll five wounds, wiping half the squad. The commandos passed their morale test however and proceeded to wipe my Heer without loss a couple of dice later.
Right hand side of the field.
Meanwhile, in the centre, my panzer had fired again on the Matilda and the infantry in the gully. A lucky shot took out a single infantry man, but my main gun continued to be ineffective.
Another German dice and I decided to make an absolutely absurd move. I sped my triple 2 forward and up next to Sheila and unloaded my auto-cannon into her side armour. While I netted two hits, I was unsurprised to find the shots were ineffective. Still: a pin is a pin.
When the next dice was Australian, I knew my little armoured car was not long for this world. Sheila sent another shot slamming into the side armour of the vehicle. Only to yet again roll a one on the penetration roll. Matthew then moved up his PIAT team to do what Sheila could not, only to find his shot go wide.
With my next two dice I ran my medic back toward my board edge. This move left my second Heer squad open to fire upon the commandos. My shooting was not as devastating this time, but I nonetheless whittled the commandos down to three.
Hanomag speeds across the field.
The tail end of the turn saw Matthew’s howitzer miss my panzer by one again, the infantry near the hill go into ambush, and the infantry in the gully go down. As for my last orders, my Hanomag arrived and sped up the left side of the field while my pioneers kept themselves down. Finally my first Heer squad took a few wild shots at the PIAT team and my officer ran away from the commandos to join my medic.
Turn five and yet again German dice flowed free. I began with my tiple 2, speeding towards the commandos and firing its auto-cannon as it went. By the time the gun was silent the commandos were no more. Skypanzer then opened up on Sheila and the PIAT team with no effect on either.
Meanwhile on the left my Hanomag advanced, picking off a couple of Australian infantrymen as it went. My first Heer squad followed, mounting the hill. In response, Matthew turned the ambush orders of his MG and mortar to fire. Luckily for me the mortar missed, but the MG managed to pick off two brave men. In response my Heer opened up on the infantry section in front them, cutting them down by half.
Pioneers pile out the half-track.
The German dice weren’t done yet though. With my next my second Heer squad saw off the PIAT team with some sharp shooting. Back on the left, my pioneers dismounted and mopped up the last of the infantry section near the hill.
My final two dice were then drawn, turning the turn into a I go, you go turn. I used them to put my medic and Oberleutnant down. Very exciting.
Sighting down the Australian gun.
Finally the remainder of Matthew’s forces were able to act. The howitzer attempted to shell my infantry on the hill, but missed. Sheila then fired on my panzer, but once more was let down by her munitions. Finally Matthew’s last infantry section went down.
Turn six and what would you know, it began with German dice again. My panzer’s main gun boomed out once more and this time it struck home, immobilising Sheila. My triple 2 followed up and by some sheer quirk of blind luck managed to score a glancing hit on the tank. The lucky hit caused another immobilised result, thus knocking Sheila out for good.
The end of Sheila thanks to lucky shooting from the little armoured car that could.
In retaliation Matthew’s mortar and MG fired on my men on the hill. The Heer went down as a mortar shell sailed long, though the slowest of the squad was taken out by the burst from the MG.
German forces seize the intersection.
From there the turn was fairly uneventful. My officer and medic ran up right of the central wood as my central Heer squad moved onto the objective in the intersection. On the left, my pioneers saw off the forward observer, while Matthew’s howitzer missed again.
Australian forces hold the gully at the end of the battle.
The final order of the turn saw the Australians in the gully ordered to charge the triple 2, only to fail their order test and go down.
We decided to call things there rather than rolling for a turn seven, the outcome being obvious. With two objectives to one, a German victory was declared.
Aftermath
This game was Matthew and my closest yet. Until turn four the entire battle was on a knife’s edge. Matthew had some rough luck throughout, particularly with his commandos and Sheila seemingly being armed with blanks. Then there was the endless stream of German dice that seemed to start each turn. Still, we thoroughly enjoyed ourselves.
My triple 2 was hands down my MVP. Taking out the two howitzer crew turn one neutered the Australian gun. The little armoured car that could then took out Matthew’s sniper team, finished off his commandos, and lucked out against Sheila.
Matthew’s commandos were his best performing unit, but we both agreed they needed more support. We both recognised cutting a team weapon or two and taking another infantry squad would have set Matthew up well.
We’re both looking forward to our next encounter, and I’m sure the Australians will be keen to even the score.
Final Thoughts
Another great game and doubly pleasing because we made use of my new setup. Also made me really want to get a Deutsch Afrika Korp force together for Bolt Action. Another thing to add to the list.
A flurry of activity for a couple of months and then nothing but silence. What happened? University. Who knew that studying law part time and working full time would keep me so busy?
I’ve not be wholly idle on the hobby front though; so here’s a look at what I’ve been doing over the past few months.
Skeleingtons
The leg bone is connected to the hip bone.
These bony boys were actually painted back in May/June, I’ve just taken that long to get around to taking a happy snap. While I’m still left what younger me was thinking when he assembled them, the refreshed paint work is a big improvement I think.
Originally they had Beasty Brown spear hafts and shield backs, while the metal elements were done in plain Tin Bitz. I’d also just painted the bases Scorched Brown.
In the refresh, I went with Desert Yellow for the spear hafts, Black for the shield backs, and Gunmetal highlighted with Chainmail for the metal parts. I also gave them an Agrax Earthshade wash and sorted out their bases as well.
Finally, I’ve magnetised their bases and assigned them a magnetic movement tray.
Orc Boyz
They iz real gud at fightn.
Now here are some classic Games Workshop miniatures for you. These are the orc boyz from the Warhammer Fantasy Battles 6th edition starter set. I can’t remember when I got my copy, possibly 2003 or 2004. I do know I went halves with my youngest brother though. I assembled them (aka cut them off the sprue and glued them to their bases) when we got the set, but otherwise these have been gathering dust ever since.
I went with a variety of colours for their jerkins: Khaki Grey; German Camo Orange Ochre; Stonewall Grey; and German Camo Beige. There are a couple of colours used for their pants too, though I can only remember Brown Violet. Leather things are in German Medium Camo Brown and metal in Gunmetal highlighted with Chainmail again.
Again I’ve magnetised their bases and assigned them a magnetic movement tray.
Dire Wolves
The model being eaten by the crow is my favourite.
Finally we have the dire wolves. These are a current GW offering for Age of Sigmar. I’ve assembled them on 50×25 MDF bases though for use in rank and flank games. They’re quite characterful models, though the mate who assembled them for me said they were extremely arduous to put together. GW love to make things needlessly and overly complicated these days.
Fur is layering of German grey, German Field Grey, then Ghost Grey. Fleshy bits are Gory Red followed by Medium Flesh. I’ve used Black Wash on the furry bits and Umber Wash mixed with some Gory Red on the fleshy and bony bits.
I was dubious about the contact the minis had on their bases, so I haven’t used magnetic bases. That’s also why they haven’t got a movement tray.
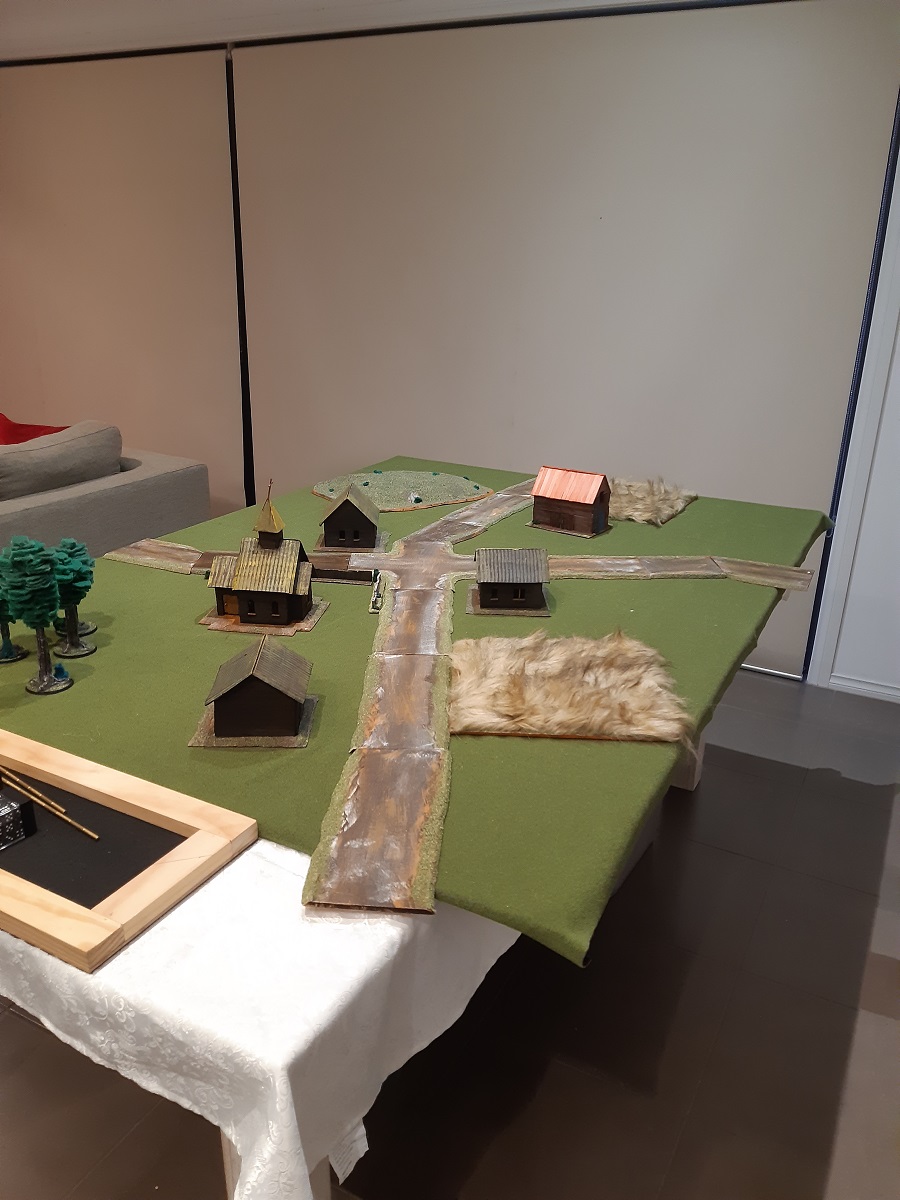
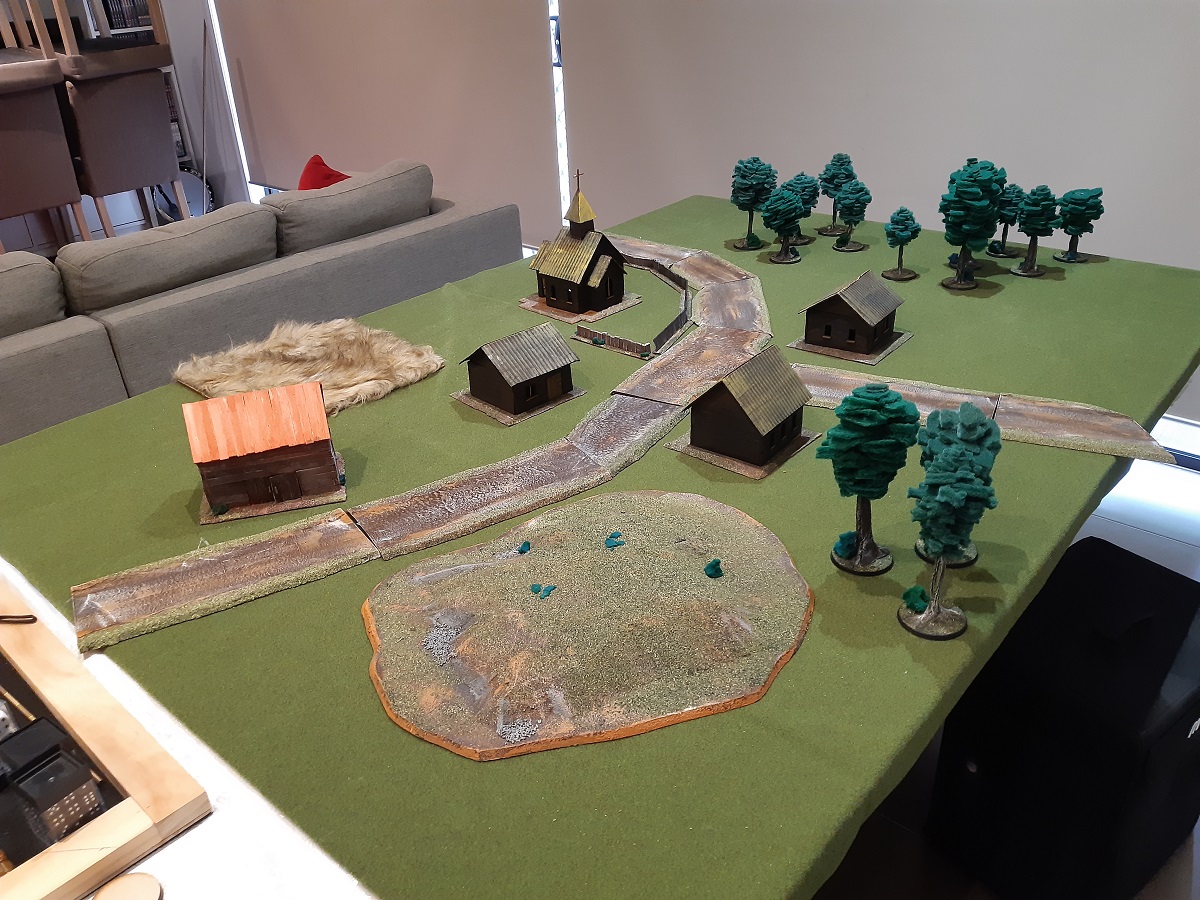
The Table
My wargaming table.
In other news, here’s a nice bit of carpentry that dad did for me.
Previously this room had a model railway layout that was in a permanent stage of very early construction. I got sick of the wasted space, so we did away with the top and then dad disassembled, cut things down to size, and reassembled with a fresh top.
The top is 1800x1200x16mm MDF with adhesive velvet stuff stuck on top (comes in sheets of 1000x450mm). The legs are, from memory,. 100mm square and are 800mm high (they’d previously been 1000 high in the train layout). The wheels add another 100mm, so the table is about 900mm high all up, so about benchtop height. The wheels are 360° rotating ones with locks too.
Don’t we wish our rolls always look like that?
We’ve added drawers at either end. They were from a furniture kit which Dad rescued from a skip. We’ve them added some firm felt to the inside.
All up a very neat construction.
The Rack
136 bottles of paint in a rack…
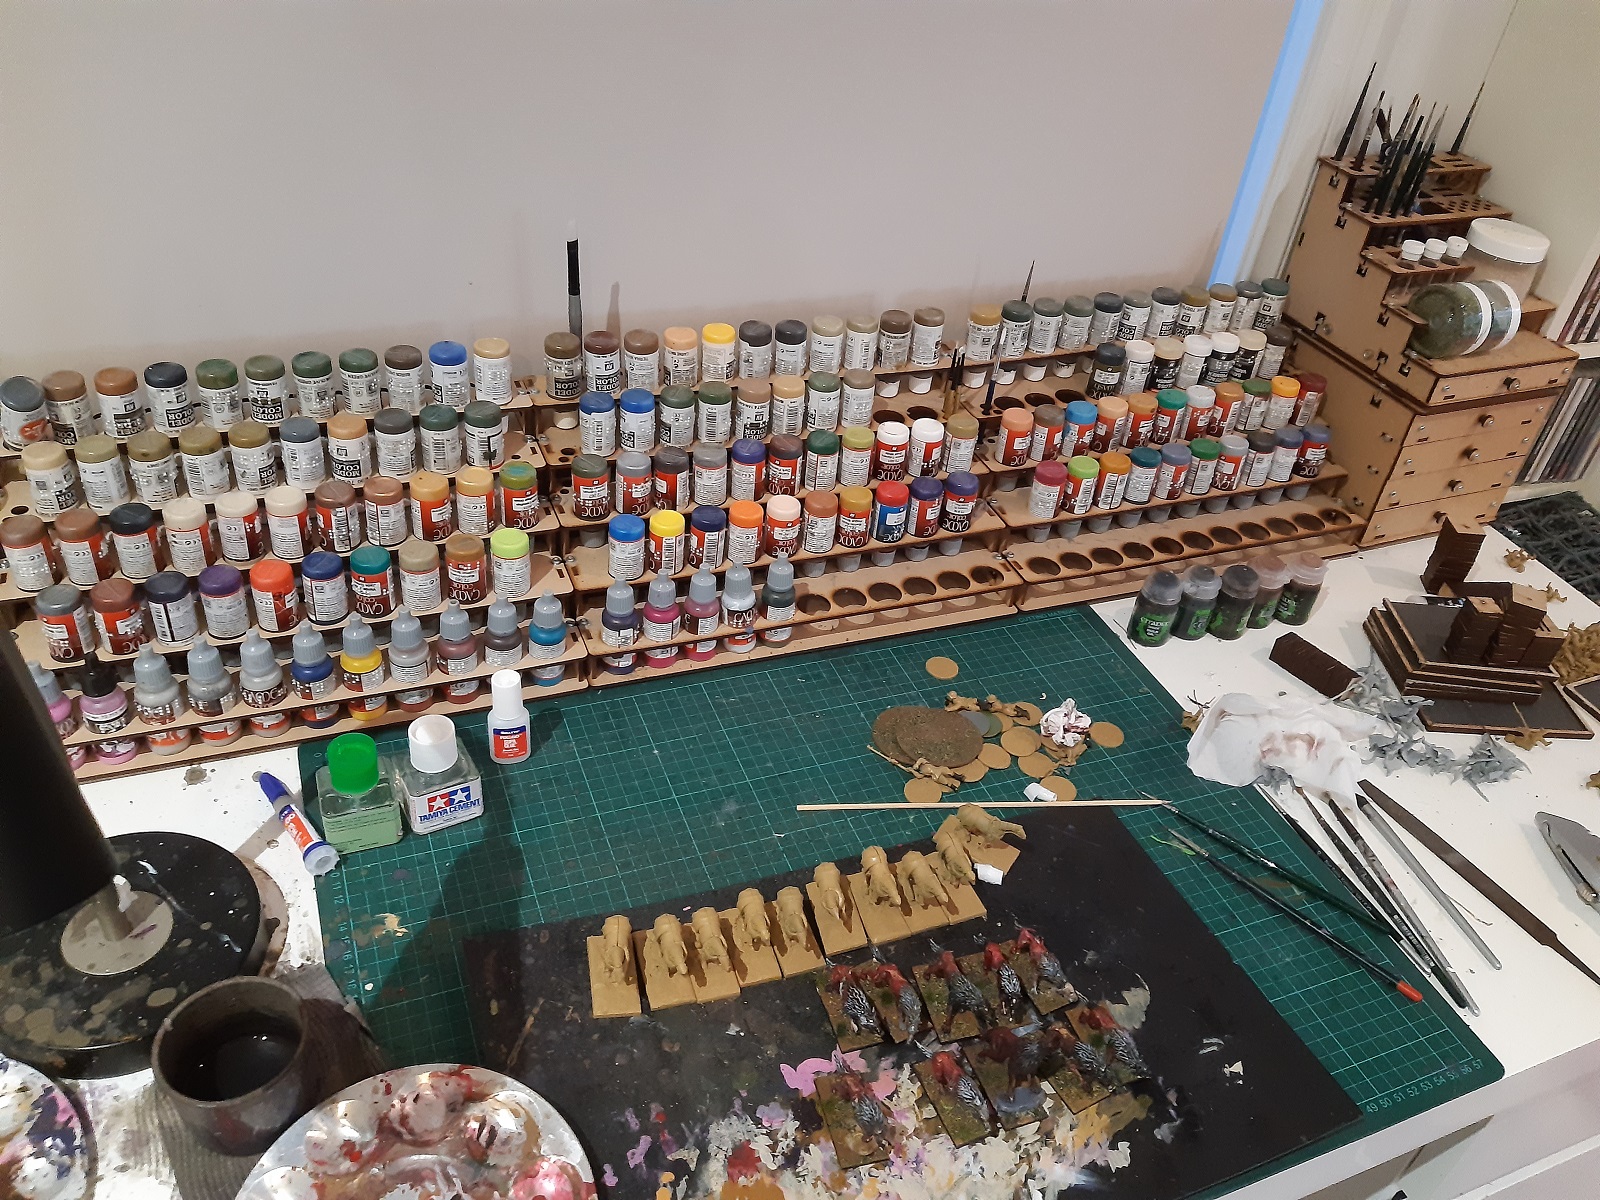
Finally we have my painting desk. This isn’t really anything new; I just wanted to show off my reorganisation.
The paint racks are from Back 2 Base-ix, a local company that does MDF and acrylic hobby products. They’re also who I source my movement trays and magnets from.
I previously only had two racks, but I was getting sick of the excess bottles accruing on my desk so I bought a third. I’ve now got all my paints braille labelled (it’s really hard for me to read the labels these days) and arranged in alphabetical order (Model Colour on the top two rows, varnishes and washes on the far end of the second row, Game Colour on the bottom three rows).
I also spreadsheeted the lot so I could keep better track of what I have (so I stop buying extras of things I don’t need).
Next Time
As mentioned, mid-semester break is soon upon us and I’m hoping to get some hobby things in while I can. I’ve a game of Bolt Action this Sunday that I’ll do my best to get posted as soon as I can after. I’m also expecting a game of 40k within the next three weeks. Will that be the first game of 40k I actually feel inclined to post on here? Only time will tell.
Matthew was back around last Sunday with his Fallschirmjäger for a top notch game of Bolt Action.
Battlefield and Mission
The mission we rolled was top secret. In this mission there is a central objective representing a drop of important intelligence or a high value target that requires retrieval. Once an infantry unit makes base contact with the objective they take possession of it. The unit must then move off its long table edge to successfully extract the item.
The item can be passed to another infantry unit within 1”, but may only pass between units once per turn. An enemy unit who defeats the unit carrying the objective in close combat also takes possession of the objective.
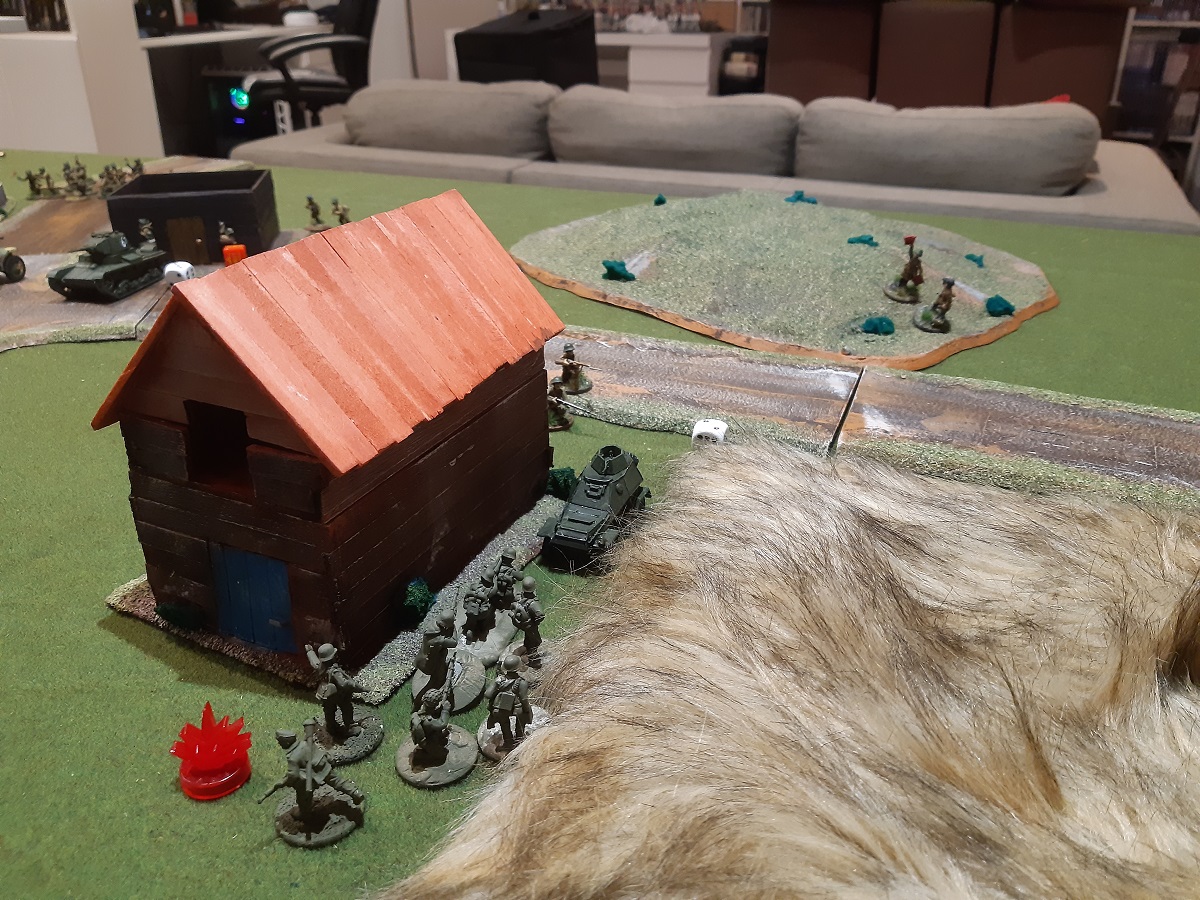
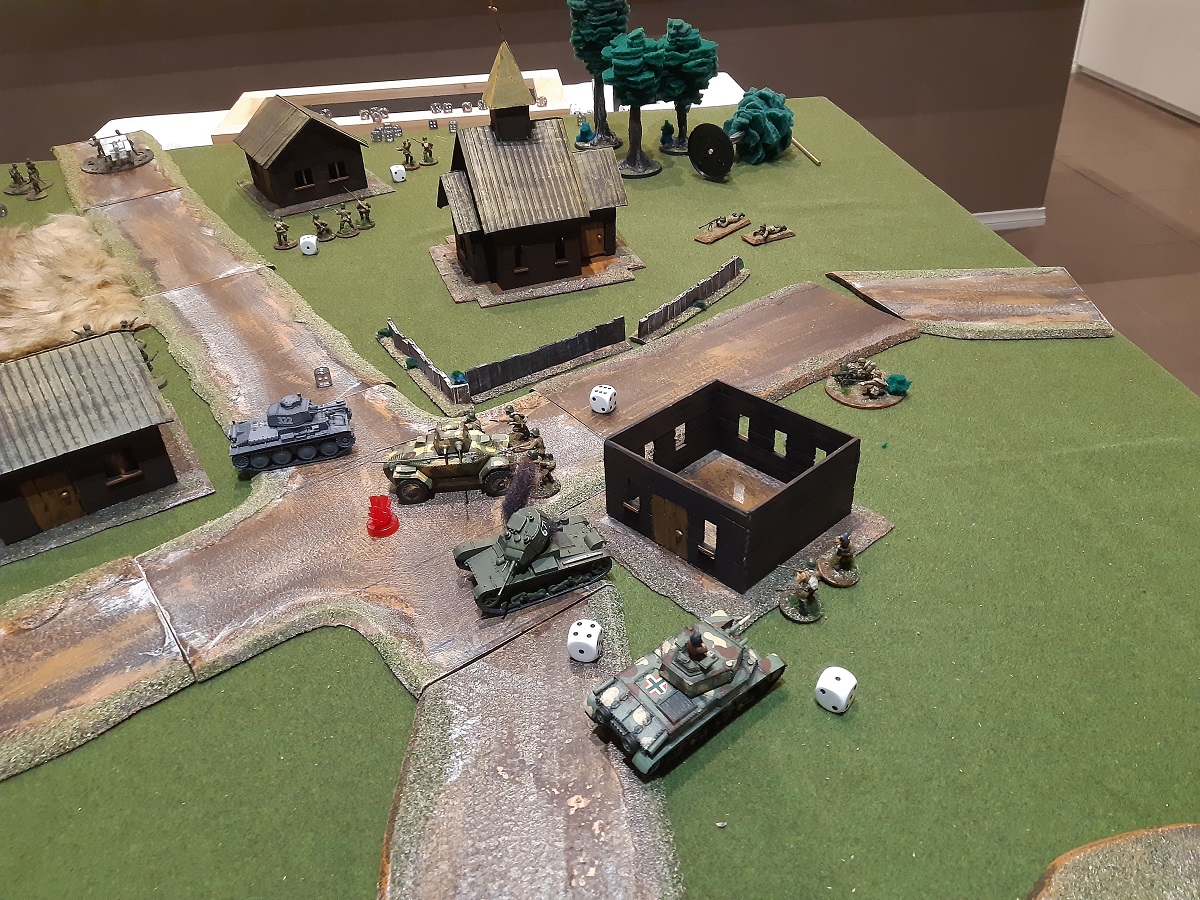
As it happened, I had set up the battlefield with a T intersection smack bang in the middle of the field. I placed my BA-64 there to represent the objective, orienting it to represent it having been knocked out after reconnoitring the German lines. Soviet and German forces were now scrambling to recover the vital intelligence. The below description of the battlefield is from my perspective.
Battlefield viewed from my near right.
A road entered from my long table edge on its far left. It traversed diagonally to a T intersection in the centre of the field. Turning left at the intersection, the road headed toward the far left corner of the field before turning off the far side of the short table edge.
Turning right at the central intersection, there was another T intersection. Continuing directly on, the road ran straight before veering slightly to head off the short table edge on my near right flank. Meanwhile, turning left at the second T intersection, the road carried on diagonally before turning slightly to exit off the right side of the opposite long table edge.
Battlefield from my far right (i.e. Matthew’s left)
Returning to my left, a wooded hill occupied the central line of the battlefield, nestled between the two roads on that side. Forward of my mid left and on the near side of the road was a house. Opposite this house, over the two roads, was another. While on the far left was a small wood.
Forward of my centre, on my side of the central crossroad, was a barn. Beyond the central intersection the ground was open. Right of centre, a field spanned between my table edge and the second intersection. Beyond this intersection, forward and right of centre, was an open hill.
Finally, my near right flank was clear, but beyond the road on this side was another field, with a house positioned near the centre line between the field and the second intersection. Beyond the field and the house, the right flank was clear save for the road that headed off the table on the far side.
Disposition of Forces
I took a single reinforced platoon, all regular save the free rifle squad, consisting of:
A 1st lieutenant and one staff;
A medic;
A 12 man rifle squad with AT grenades (the free squad);
Three 12 man LMG squads with LMGs;
A medium MG team (the Maxim);
A medium mortar team;
A flamethrower team;
A Zis-3 divisional gun; and
A T34/85.
Matthew’s Fallschirmjäger, all veteran, fielded:
A 1st lieutenant;
A 10 man rifle squad with LMG;
A 10 man assault rifle squad with LMG;
A seven man SMG squad;
A medium mortar team with spotter;
A puma armoured car; and
A Hanomag halftrack.
Order of Battle
In this mission, all forces are placed in reserve, but reserves begin coming on from turn one instead of turn two. And so it was straight to the bag to start pulling dice to see which forces would be arriving on time, and which would be caught napping.
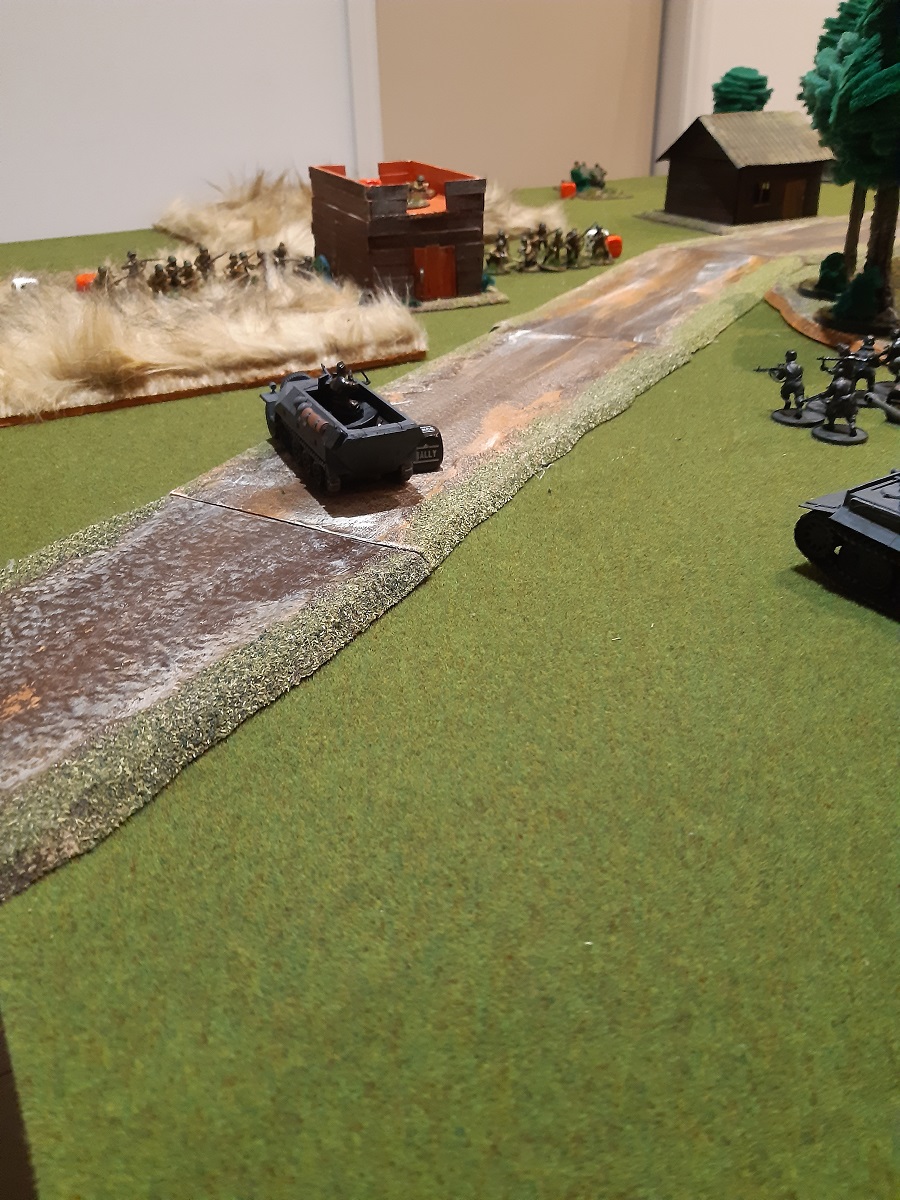
With 11 order dice to Matthew’s 9, you’d be forgiven for thinking the battle would start with some red. Instead, the first units to enter the field were German. Matthew brought his half-track (and its accompanying payload of SMG troops) on via the right road, parking the vehicle just short of the second intersection to use the house on the right as cover. Next, his mortar ran on behind the far hill, while its spotter made his way into the far house.
The German assault rifles advance on my left.
I scored the next two dice, but to my great displeasure the curse of the 9s was back. My T34/85 failed its order test by one and went down. Thankfully my Zis passed and came on my left to cover the long road. More black dice followed, with Matthew bringing his assault rifles on the left, running them up just short of the far road, while his rifle squad came on the right, moving up behind the field.
My mortar then came on my left, forward of the near road, while I sent my flamethrower right up the guts, ending its move at the near left corner of the barn. Matthew responded by bringing his flamethrower on, running it up behind his assault rifles. Next the puma arrived, and landed a long range shot on the my mortar team, taking out two crew. Thankfully the last man passed his morale test to continue manning the tube on his lonesome.
My Zis covering the road.
With so many German units deployed, the bulk of my forces began showing themselves. I ran my rifle squad up through the field to face off with the half-track, while my 1st LMG squad came on just left of centre next to my flamethrower. I then brought up my medic between the three units, ready to apply first aid as needed.
I didn’t have to wait long, as Matthew used his next dice to advance his SMG squad out the half-track, guns blazing at my rifle squad. Six men would have gone down had my medic not been there to save one, preventing the squad from needing to test their morale. I rolled a 4 on their green test, meaning they would continue on as inexperienced troops.
The German left/my right.
In response, I brought my 2nd LMG squad on to the right of the field with an advance. The hail of rifle and LMG fire they unleashed was devastating, cutting down three of the SMG squad. Unfortunately I proceeded to fail my next two order tests, which saw my lieutenant and my 3rd LMG squad go down.
Soviet left flank.
The final moves of the turn saw the German lieutenant come on behind the hill next to the mortar, and my Maxim arrive on my centre left to hold back the advancing German assault rifles.
Turn two and I netted the first dice. I used it to immediately order my 2nd LMG squad to fire on the SMG squad, who went down in response. There was nowhere the perfidious fascists could hide from my noble heroes however, as incredibly sharp shooting saw three of the remaining four killed. Unfortunately the last man managed to pass his morale test to stick around, but I had effectively neutralised the threat the squad posed.
The assault rifles stand off against the might of the Soviet Union.
My good shooting continued as my Maxim managed to take out the LMG from the assault rifle squad opposite with a fire order and exceptional damage. My third and fourth dice then saw my Zis go in to ambush, while my 1st LMG squad advanced and fired on the assault rifles, killing two more from the squad.
Despite my desire that some black dice should start being drawn, the red kept coming. I repositioned my medic slightly to keep the 1st LMG squad in range, but moved too far and left the rifle squad slip out of range in the process. My lieutenant then ran on through the field. With yet another dice, I tried to range my mortar in on the Puma, but was unsuccessful. It was only then Matthew secured his first dice.
My T34/85 arrives at the end of the turn.
His mortar crew proceeded to show mine how it was done, ranging in on my 1st LMG squad and blowing five of them to smithereens. The German assault rifles then advanced under fire from the Zis, which sprung its ambush but failed to land its shell. The Germans opened up on my 1st LMG squad, killing another two.
My 3rd LMG squad then arrived. I advanced them on the left, next to my MG. Firing on the assault rifles, I managed to take out another from that squad. My rifle squad was not so lucky when I ordered it to fire on the lone SMG. Though I scored a hit, I failed to take the man out. I would have been better to charge in, but the two German vehicles and their MGs dissuaded me.
I only had two units left to issue orders to, yet still the red dice came. I opted to order my flame thrower down. Again, I would have loved to have run him into the middle to grab the objective, but those pesky German vehicles and their deadly machineguns stopped me.
Finally another black dice was drawn, and Matthew drove his hanomag straight forward to open up on my rifle squad at point blank range. It seemed the German crew was in need of the training my men had received, as they only managed to hit twice and then kill a single man. A dismal showing.
My final dice was then drawn and, with little options in where I could actually deploy, I advanced my T34/85 on the far left and sent a long range shot sailing over the Puma.
In a repeat from last battle, the Puma sped forward to take my Zis head on.
With all the remaining dice Matthew’s, he was free to order the rest of his units. His Puma sped forward, turned the corner, and came hooning into the face of my Zis, firing its main gun wildly. The rifle squad on the right ran up to the field on that side, while the flamethrower team continued along with the assault rifle squad. Finally Matthew’s lieutenant went down.
Turn three and I pulled the first dice again. I had a tough decision to make: order my Maxim to keep the pressure on the German assault rifles, or fire my Zis on the Puma. I went with the former, scoring another hit but no kills. Matthew then had his own tough decision to make when he netted the second dice of the turn. He opted to lob another mortar shell on my 1st LMG squad, who went down and lost another two men.
The assault rifles continue to be shot to hell.
I netted another dice and this time gave the order for my Zis to fire. A few dice rolls and an almighty boom later and the Puma was knocked out thanks to massive damage, the 6 I rolled to penetrate having just seen the shot over the threshold.
The Puma’s daring run did not go as well as last time. Enemy armour destroyed!
The next two orders saw my mortar failed to range in on the assault rifles and the Hanomag take out three from my rifle squad, despite the squad going down in response. The tit for tat continued however when my 3rd LMG squad advanced and picked off another two from the assault rifle squad, including the NCO, though German initiative training saw that he was quickly replaced.
It was Matthew’s next order however that took me by complete surprise. He issued a run order to the lone SMG trooper, who dashed behind the objective and secured the intelligence. IO desperately wanted to put fire on the lone man, but didn’t have any units that could get an angle with a single order. In frustration I had my T34/85 advance and take out the German spotter.
The lone SMG trooper siezes the intel.
The race to secure the intel was well and truly on however, as I sent my 2nd LMG squad running at the Hanomag, while Matthew ran his rifle squad across directly toward the middle. He was determined to cover his extraction, while I was pushing to stop his escape.
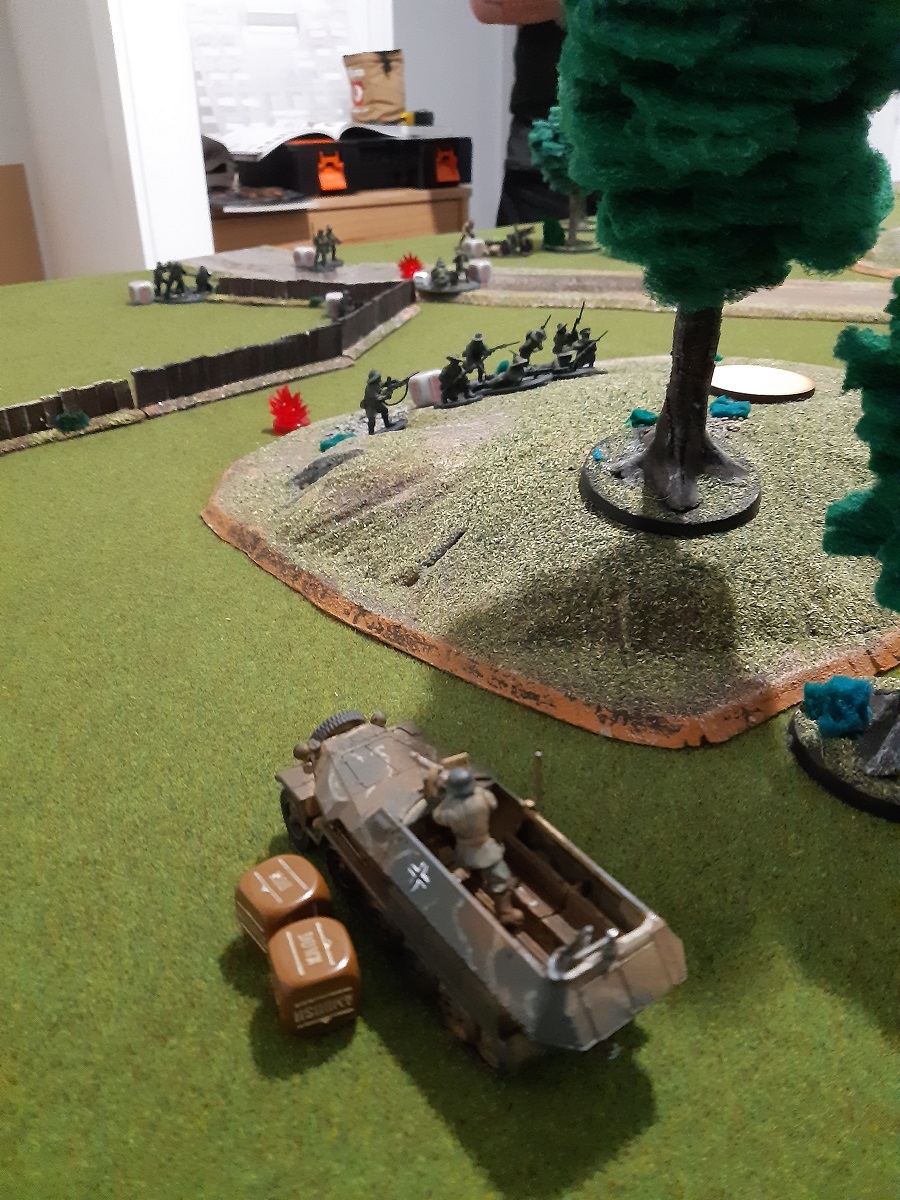
My flame thrower team ran up onto the other side of the objective, ready to pounce and reclaim the intel next turn, and I ran my medic up into the barn to support it. Meanwhile, my lieutenant advanced to the left of the barn, sending a wild shot at the German assault rifles,
My right flank viewed from Matthew’s perspective.
Matthew’s last moves were to advance his flame thrower, which remained out of range of my units, and put his lieutenant down. As for his assault rifles, they failed an order test and went down earlier in the turn.
Turn four and, much to my delight, I secure the first dice. I advanced my flamethrower team passed the SMG trooper, blocking his escape, and unleashed a torrent of flame. The man died in screaming agony. Unfortunately the flamethrower operator evidently was somewhat overenthusiastic in the application of his horrific device as he drained it completely of fuel. And so my flamethrower team was removed with a solitary kill to its name.
All wasn’t lost for Matthew however, as with clever orders he could secure the intel, then get the squad into his halftrack for a speedy extraction. To support the plan, he advanced his vehicle, firing on my 1st LMG squad when he arrived in the middle, though they suffered no loss. The squad’s good luck continued when, two orders later, the German mortar failed to hit despite having been ranged in.
To stifle his plans, I advanced my 2nd LMG squad and opened up on the German rifle squad, scoring three kills. More important however was the one pin as, when ordered to run, the squad failed its order test and went down instead.
Left flank at the end of turn four.
Meanwhile on the left I continued the pressure, taking out the flamethrower squad with my 3rd LMG squad and continuing to whittle down the assault rifle squad with my Maxim and T34/85, though my mortar continued to be ineffective. Matthew rallied the assault rifles however and cleared all its pins, ready for a manoeuvre next turn.
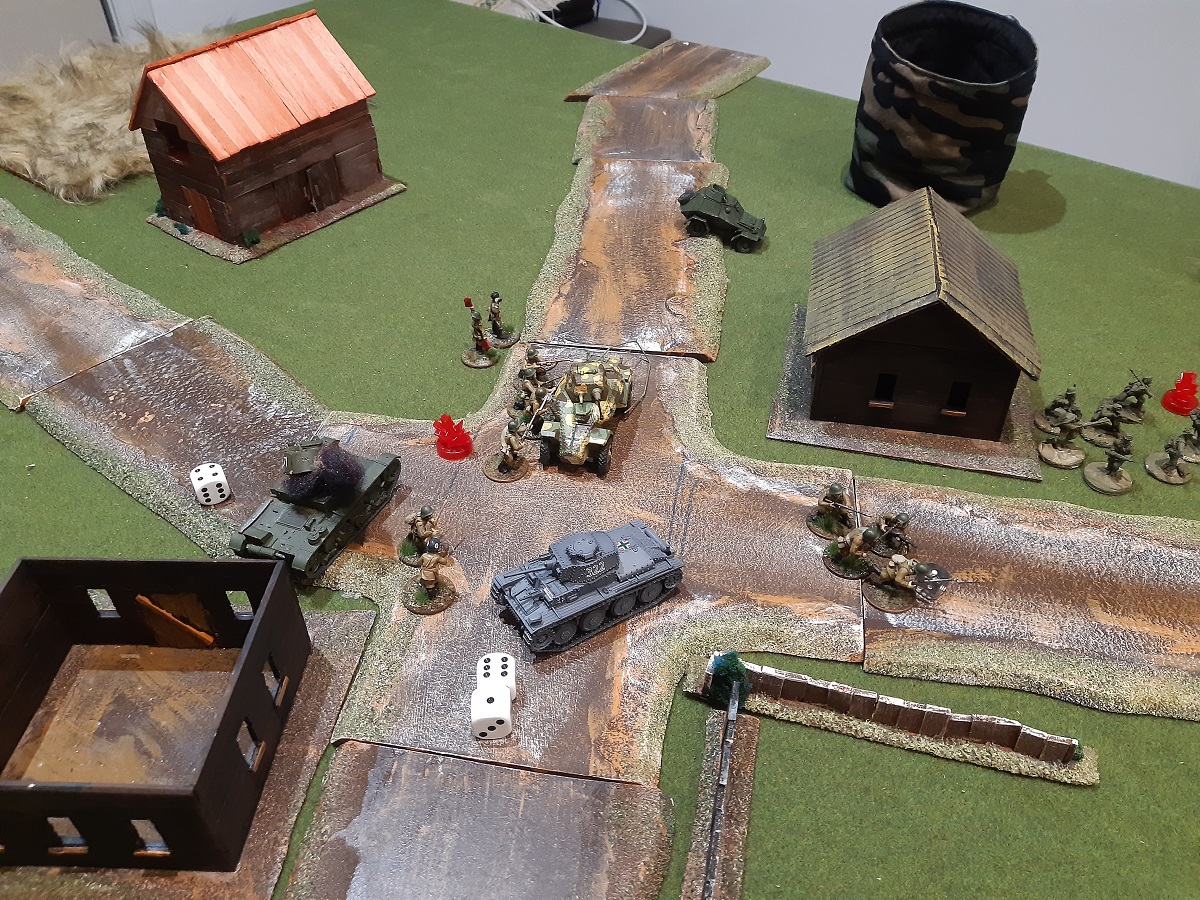
A sweep of the forces and fighting taking place around the objective.
Final moves of the turn for me included my rifles going down of their own accord, Zis going into ambush, and my lieutenant running into the barn. I also sent my medic into the middle to grab the intel, which I realise now might’ve been impossible, but we were caught up in the moment. As for Matthew, he moved his lieutenant out from behind the hill and took a long shot at my medic, but missed.
Turn five with the German order dice pool being much depleted, while mine remained almost entirely intact, it was no surprise I scored the first dice. I ran my medic into the barn and passed the intel off to my lieutenant. Though the Hanomag turned to open up on my officer, he was only able to kill my staff member. Further, my lieutenant passed his morale test to be able to run out of the barn and into the field, a single order away from getting off the board.
I mopped up the German rifles on my right…
It was clear where the battle was headed. As a result, after my 2nd LMG squad picked off another three from the German rifle squad, Matthew charged the squad into my unit and saw the remaining four men killed for the loss of two brave Soviet heroes. Meanwhile on the left, the assault rifles went at my T34/85 while under machine gun fire. Their assault was ineffective however and I charged my 3rd LMG squad in to see them off.
And did the same to the assault rifles on my left.
The rest of the action of the turn included my Zis being unable to hit the Hanomag, my rifles going down (intentionally this time), the German mortar continuing to shell my 1st LMG squad, and the German lieutenant going down.
My lieutentant makes his escape with the intel through the field behind the barn.
And so we arrived at turn six. As to be expected, I scored the first dice and saw my lieutenant safely off the field, successfully securing the intel.
Aftermath
Though it may read like a victory in which my forces were very much on top throughout the battle, I can assure you it was a very tense game. Matthew very nearly stole the intel out from underneath my nose. With a slightly adjusted battle plan, more cautious use of his vehicles, and more concentrated offensive he well could have seen me undone.
My efforts were assisted undeniably by some incredible shooting. The number of times I needed 5s to his and yet netted more than 50% hits was extraordinary. As for my flamethrower, I’m sure he’ll do well one day. One day.
Regarding my medic collecting the intel, I realised as I was writing the report up that it might not have been possible. Medics are ignored for the purpose of determining control of objectives according to the rulebook, so I suspect that captures possessing the objective in Top Secret as well.
I doubt the outcome would have been much different if that were the case however, I could have easily picked the intel up with my lieutenant instead. It likely would’ve just delayed my getting it off the field by a turn, though if my rifle squad obeyed an order that mightn’t’ve been an issue either.
Of course, I think it was pretty cool how things played out anyway.
Final Thoughts
I’m not sure when I’ll be able to have a battle next. The Delta strain of COVID-19 has made its ugly appearance here and the state is in lockdown, though things appear to be progressing most agreeably.
On top of that, I’ve just returned to uni to do law. I’m hopeful I can find half a moment between working full-time and studying part-time to get another battle in once we are able to interact face-to-face again.
Andrew was around Friday for some more Soviet v Hungary action. What transpired was our most hard fought battle yet.
Battlefield and Mission
The mission we rolled was hold until relieved. In this mission, the defender starts with limited forces on the field holding a central objective. Whoever holds the objective at the end of the battle wins the day. To hold the objective, you must have at least one Infantry or Artillery unit within 3 inches of the objective without any enemy unit of any type also within 3 inches of it.
I again won the roll off to determine whether I wanted to attack or defend, this time opting to be the defender. I selected the side with the hill to be my side of the field. The description below is from my perspective.
The battlefield viewed from my side.
Mynear left flank was dominated by a hill. Forward of the hill, a road entered the field from the short table edge. The road was on my side of the centre point of the table and ran parallel with the long table edges to a cross road in the centre of the battlefield.
On its far side, the road was abutted by a field that spanned in from the short table edge by a foot. Right of the field was a barn, and beyond the two lay open ground.
Shots of the battlefield from my side.
From the middle of my table edge entered another road, this too led to the crossroad in the centre of the field. In the near left corner of the cross road was a house, with another diagonally opposite in the far right corner. The near right corner of the cross road was bounded by some fences, a little to the right of which was a church.
Beyond the central crossroad and in addition to the already mentioned left spur, the road continued off both the far and right table edges. Off the far edge, the road edged slightly left of the centre line. To the right, the road ran diagonally, exiting the table from the far right short table edge.
Another two shots of the battlefield, this time from Andrew’s perspective.
Slightly forward of my far right flank stood a small wood. Beyond the wood was a house of the near side of the right hand spur of the road. Finally, on the other side of the road, was another field, roughly halfway between the left/right centre line and right short table edge.
I’d set up the battlefield prior to us rolling the mission, so it was by pure chance the crossroad sat very near the direct centre of the field. I elected that as the objective over which we would be fighting. A most suitable target indeed.
Disposition of Forces
I fielded a slightly amended list from our last battle. All units are regular, except as noted.
1st Lieutenant with one staff;
Medic with one staff;
Artillery forward observer with one staff;
12 man rifle squad with anti-tank grenades (inexperienced, the free squad);
Two 12 man LMG squads, each with an LMG;
An eight man LMG squad with an LMG;
Flame thrower team;
Maxim MMG team;
Medium mortar team (inexperienced);
PTRD team;
45mm 1937 gun;
BA-64 armoured car;
T-26B light tank;
Andrew had the same force as last time at his disposal. All regular, these included:
2nd Lieutenant with two staff;
Three 10 man rifle squads, each with an LMG;
Medium mortar team with spotter;
Medium howitzer with spotter;
Csaba armoured car;
Turan medium tank;
Panzer 38T light tank (German Allies);
Order of Battle
In this mission, the defender deploys one infantry squad and one other infantry unit on the field. These are placed within 6 inches of the objective. Half the defender’s remaining units then form the first wave while the others are placed in reserve.
The attacker meanwhile places all his infantry units. These may be placed anywhere, but no closer than 18 inches to either the objective or any enemy unit. The rest of the attacker’s force is placed in reserve.
I opted to deploy both my 12 man LMG squads. The first I deployed in the near house, while the second I positioned at the corner with the fences. I then opted for my lieutenant, artillery observer, mortar, MG, the third LMG squad, and my BA-64 to form my first wave.
My deployment. LMG squads one and two occupy the near house and crook of the fences beside the road respectively.
Andrew positioned his first rifle squad on the left beyond the barn, the second far forward in the centre, and the third on the far right somewhat forward. His mortar team and lieutenant were both placed forward on the far right.
Turn one began with a bevy of red order dice. I advanced my second LMG squad into the church and shot at the third Hungarian rifle squad, scoring both a hit and a kill. My artillery observer and mortar then arrived, taking up positions on the hill.
Andrew’s troops weren’t idle for long however, with the first rifle squad advancing toward the hill and firing on my mortar team. With him needing 5s to hit and not being able to bring all guns to bear, you’d be forgiven for thinking my mortar would be quite safe. Instead not only did he manage a 50% hit rate, but almost every shot wounded. Thus the mortar departed as quickly as it came.
Looking right from the centre.
In retribution I brought my BA-64 on, driving up the hill and opening up on the rifle squad. My shooting left a lot to be desired, but I did still manage to score a hit and all important pin. Meanwhile, on the right flank, the third Hungarian rifle squad failed its order test to advance and went down. The Hungarian mortar then failed to range in on the church.
The BA-64 and artillery observer overlook the first Hungarian squad from their vantage point on the hill.
The rest of the turn saw the last of the movement. Andrew shifted his lieutenant up toward his third squad. His second squad meanwhile ran up behind the far centre house. For my part, I brought my third LMG squad on behind the near house, MG team on right of the road, and my lieutenant on behind the church.
The second Hungarian rifle squad uses the far house to cover its advance.
Turn 2 began with more red dice. My BA-64 revved its engine and sped down toward the Hungarian rifle squad opposite. I managed a single hit, bringing the squad up to two pins. My second LMG squad then advanced out the church and fired on the third Hungarian rifle squad. Sharp shooting decimated the squad, leaving it with a single man, though he did pass his “last man standing” morale check.
Meanwhile my third LMG squad ran to support the BA-64. Immediate resistance then arrived, with all three of Andrew’s vehicles passing their order test. The Turan advanced first, firing at my squad in the house and picking off one or two. Next the 38T came up behind the Turan and cut down half the third LMG squad, who passed their subsequent morale test. Finally the Csaba sped on and attempted a shot on the BA-64, but missed.
The first Hungarian rifle squad faces off with the BA-64.
In response I was able to bring my 45mm gun onto the hill and my T26 on via the road. Unfortunately the shot from the latter on the Turan failed to connect. Even more disappointing were the three 9s I rolled when trying to bring on my rifle squad, PTRD team, and medic. My flamethrower made an appearance however, deploying to my mid-right.
As for the rest of the turn, Andrew’s mortar missed my squad in the house, while his second rifle squad advanced around the far house and picked off one from my second LMG squad. His howitzer then arrived on the far right and lieutenant shifted up. His first and third rifle squads meanwhile both went down as a result of their pins.
Hungarian armour advances along the road.
Finally, I ran my MG forward and across the road, put my first LMG squad in ambush, and called in my artillery strike next to the Hungarian column of armour.
Turn 3 and the artillery strike was delayed, much to my disappointment. on the plus side however we had more red dice to start the turn. My BA-64 drove further forward to put the barn between it and the Csaba. It also picked off another of Andrew’s first rifle squad. My 45mm then took a shot on the 38T, scoring a penetrating hit but then rolling a 1 on the damage result. Still, a Crew Shaken result meant I wouldn’t need to fear it for a turn.
My second LMG squad at the end of turn three.
Next my second LMG squad passed an order test to advance and fire at the Hungarian howitzer. I scored some hits, but no kills. Then my T26 shifted up in front of the near house and fired on the Turan, hitting, but failing to score any damage.
Andrew responded by bringing his Csaba forward and firing on the T26. In exploiting the side armoured he managed to immobilise my tank. I tried to bring on my PTRD team to cover my now stationary T26, but it failed its order test again. Thankfully my medic and rifle squad were more responsive. The former ran on behind the near house, and the latter ran on up the road. My third LMG squad also continued to run forward, putting itself behind the barn and out of sight of the Turan.
The armoured might of the two forces face off against one another.
With so many red dice out the bag it was time for Andrew to issue some orders. His second rifle squad opened up on my second LMG squad with devastating consequence. Six brave heroes were slain, though the squad held its nerve to stick around. The howitzer then lobbed a shot at the extremity of its range into my 45mm AT gun, leaving nothing but a crater and hunk of twisted metal in the shell’s wake.
The next few dice saw the Turan fire on my T26, hitting, but failing to score any damage, my flamethrower taking out the last of the third rifle squad; and the Hungarian lieutenant and his staff killing my flamethrower’s assistant. As for our weapon teams, my MG joined my first LMG squad in ambush, and Andrew’s mortar failed to range in on the near house again.
The Hungarian lieutenant rounds the corner of the house to shoot my flamethrower’s assistant dead.
The final dice saw the first rifle squad pass its order test to fire a panzerfaust into the BA-64, netting a Crew Stunned result, and my artillery observer advancing to send wild shots toward the first rifle squad.
The situation behind the barn at the end of turn three.
Turn four and my artillery strike still failed to materialise. I opted to shift the aiming point up slightly, tracking the advance of Andrew’s vehicles. Again the first dice was red and I opted to award it to my flamethrower. I regretted the decision immediately, not least because I failed to hit the Hungarian lieutenant, but also because I really should’ve acted with the T26. This realisation was compounded when the battle took a sharp dive south for me.
Brown dice after brown dice saw Andrew issue a series of consecutive effective orders. The second rifle squad fired on my second LMG squad again. After last turn’s drubbing I opted to put them down. It didn’t save them from taking another two casualties, but if I had not they’d likely have been wiped out. The mortar then ranged in on my first squad, though failed to score any kills.
Next came an armoured assault on my T26. The Turan moved up and hit it, but only netted a Crew Stunned result, followed by the 38T failing to hit it. Finally the Csaba brought its anti-tank rifle to bear, with the shot striking true, penetrating, and knocking it out. To add insult to injury, the first rifle squad then pass its order test to fire a panzerfaust into the BA-64, netting a crew Stunned result.
With my ability to deal with Andrew’s armour rapidly diminishing, I finally scored another order dice. When issued to fire however my BA-64 went down. Andrew’s lieutenant then took out my flamethrower, followed by his howitzer trying a shot on my second LMG squad. Thankfully it missed, but that was about the only highlight of the round for me.
With my final orders I continued to move the artillery observer and third LMG squad up on the left, picking off more of the first rifle squad as I went. My Lieutenant also moved up on the right toward the enemy officer, managing to pick off his staff. In the centre, my medic moved up, and PTRD team finally arrived to cover the middle. Finally, my rifle squad assaulted the Csaba, but woefully rolling rendered the daring manoeuvre impotent.
My rifle squad assault the Csaba. Urah!
Turn five and things went horribly wrong. I rolled a 1 for my artillery strike, resulting in the aiming point shifting a random distance (thankfully only 8 inches) and direction (unhelpfully near my rifle squad), and immediately being resolved. I’m not sure if the pitiful area of effect I rolled could be considered good luck or bad, but even one more inch would’ve caught the second Hungarian rifle squad in the blast. Instead I only hit the Csaba and my rifle squad.
The Csaba took two pins, but my rifle squad suffered a direct hit. I sent them down to half the damage, losing five of their number. Andrew then said for me to roll to resolve the hit on the Csaba and you’d think I’d have learnt from last time to follow his suggestion. Instead I rolled the additional pins for the rifle squad. A six. I then rolled to resolve the hit on the Csaba and wouldn’t you know I roll a 1 when I needed anything but.
A shot of the middle viewed from the right flank at the end of turn five.
It was bitter consolation to be awarded the first order dice of the turn after that inauspicious start. I used it to good effect however, charging my lieutenant into Andrew’s lieutenant and sticking him through with my bayonets for no loss. The Turan then shifted and opened up with its machine guns on my medic, who went down. Not only did Andrew only score one wound, but my medic saved himself from it!
Meanwhile the Csaba failed to pass its order test due to its pins, while my PTRD team failed to hit the armoured car while it sat fretting. Next Andrew rained shells upon my first LMG squad. Though I put them down, there was little I could do against both the mortar and howitzer, which took them out.
Andrew then opened up his 38T’s machineguns on my rifle squad, but fell one short of causing enough casualties to force a morale test. His second rifle squad tried to act, but failed its order test thanks to a single pin my MG team managed to inflict before the rifle’s could act.
Finally, on the left, my third LMG squad shifted to the right of the barn and took the first Hungarian rifle squad down to one man. He was then promptly finished off by the BA-64, which passed its order test to drive around the far side of the barn and fire its LMG. My artillery observer then ran into the barn. As for my second LMG squad, they failed their order test to advance and went down.
Another shot of the middle at the end of turn five, this time looking from the left.
Turn six and I was barely holding on. Three Hungarian vehicles were in my face and I had been reduced to a single PTRD to deal with them all. On the plus side, Andrew only had a single infantry or artillery unit within range of closing on the objective.
The turn began with the Csaba attempting to see off the rifle squad, but failing to do enough to cause a morale test. Furthermore, the mortar failed to range in again. A plethora of units then made their way into the middle.
The 38T finally saw off my rifle squad via tank shock, and the Hungarian rifle squad moved up. They were joined by my third LMG squad and artillery officer, while my BA-64 sped along the far side of the crossroad. From the right, my second LMG squad also ran toward the middle. My MG put another ping on the second Hungarian rifle squad, while my medic dodged out the way of an assaulting Turan before joining the other units in the middle.
The Turan and Maxim at the end of turn six. The Turan had attempted to run over my medic, how rude!
Finally my PTRD missed the Csaba again, while my lieutenant advanced and fired upon the Hungarian howitzer, but failed to do anything. On the plus side, the Hungarian artillery piece failed to hit anything.
The situation in the middle at the end of turn six.
At the end of turn six we rolled and, while I hoped otherwise, we scored a seventh. It began with my MG, second LMG squad, and BA-64 pouring fire on the Hungarian rifle squad, adding pins and inflicting some casualties. The Csaba then attempted to take out the BA-64 but, while it hit, failed to cause any damage.
Next the Turan turned on my PTRD team, which went down, saving it from any damage. The 38T followed the Turan’s lead and opened up its machineguns on my third LMG squad, which went down. Andrew still managed to kill three, but the NCO was able to pass his last man standing test and stick around.
Andrew then tried to run his remaining rifle squad, only to roll double sixes on his order test! Fittingly, their FUBAR result was to flee, and so they booked it away from the centre as fast as their legs would carry them.
On the right, my lieutenant fired at the Hungarian howitzer, killing a man and seeing the gun go down when it was ordered to fire. Meanwhile the mortar failed to range in on my second LMG squad.
The final order dice of the turn saw my artillery observer assault the Csaba because: why not? The result was much as you would expect: a big fat nothing. (Note: my medic also assaulted the Csaba, though on review it appears some pesky international convention would have that disallowed.)
The outcome in the middle at the end of the battle.
The battle thus ended with me having two infantry squads totalling five men within range of the objective, along with two other units. Andrew however still threatened the area with his Csaba and 38T, thus rendering us in stalemate!
Aftermath
A draw the battle may have been, but what a draw it was. Andrew and I both agreed it was an incredibly hard fought result. Between Andrew’s prompt neutralisation of my anti-tank capabilities and my wayward artillery strike, I was struggling to hold on.
I didn’t realise until much later but I, yet again, forgot to account for the BA-64 being open topped. That would have changed the Crew Shaken result to Immobilised, though it likely wouldn’t have made a difference. I also forgot to roll for Green for my rifle squad. Clearly I was far too taken up in the moment of being hit by my own artillery strike.
Final Thoughts
Another 10 out of 10 Mitre 10 battle. I remain wholly unperturbed at my artillery observer’s tendency to rain death upon my own units.
Should be more Bolt Action later in the month. Before then I will hopefully have a Warhammer fantasy Battles game to report on. I’ll also have a hobby update post when the mythical basing kits arrive.
Matthew was around the other day to showcase Victory at Sea to me.
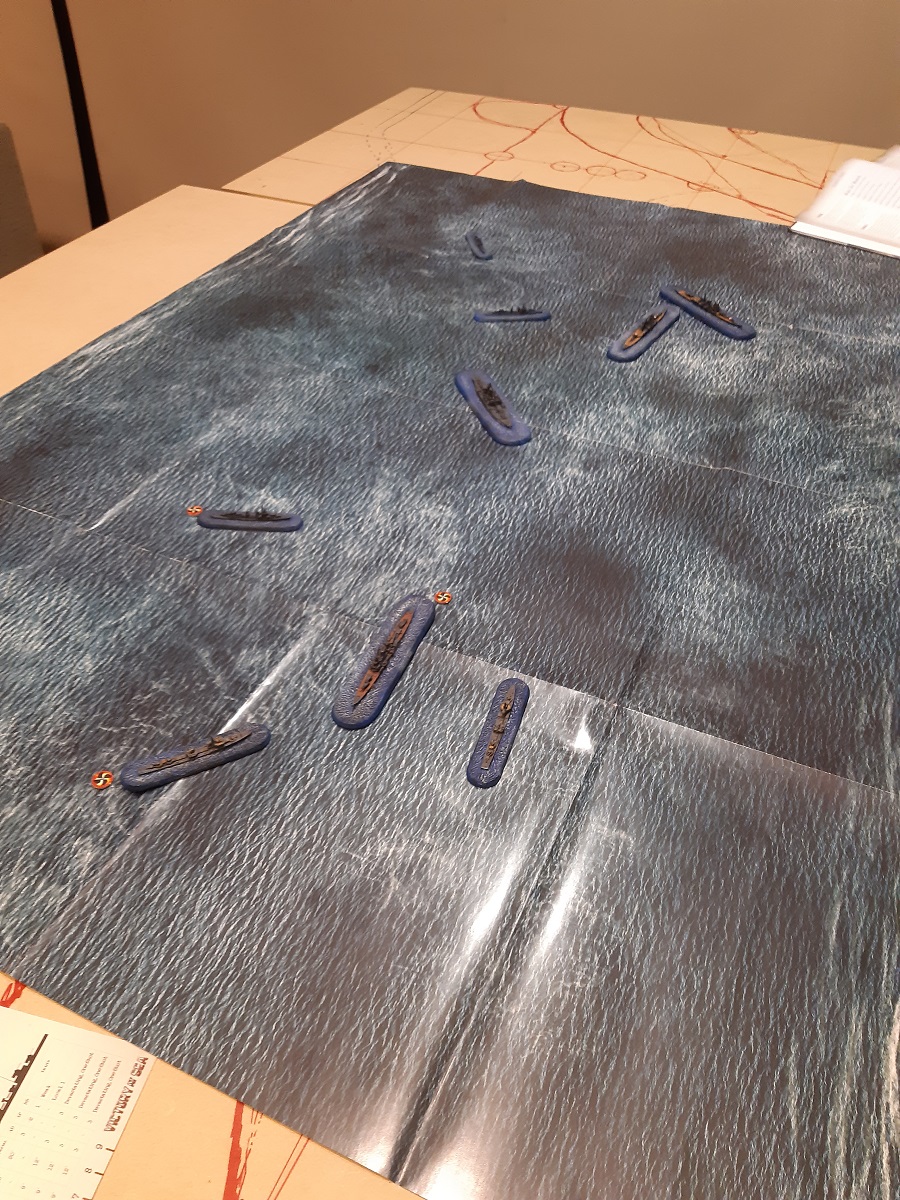
The Fleets
Both fleets were 1,000pts in strength,, mostly from Warlord’s Battle for the Pacific starter set. I took command of the Imperial Japanese Navy, while Matthew took command of the United States Navy.
The IJN force comprised:
Two Mogami class heavy cruisers;
One Furutaka class cruiser;
Three Kabuki class destroyers.
The US force comprised
USS Idaho (battleship)
USS Indianapolis (heavy cruiser)
USS Chicago (cruiser)
Five Fletcher class destroyers.
Order of Battle
I deployed my Mogami cruisers on my left flank, a Kabuki and Furutaka on my right, and finally the other two Kabuki destroyers on my far right. From my perspective, Matthew positioned two Fletcher class destroyers on the far left, then the USS Indianapolis to the right of them. In the centre were placed a Fletcher and the USS Idaho. Finally, the remaining Fletchers and USS Chicago occupied the right flank.
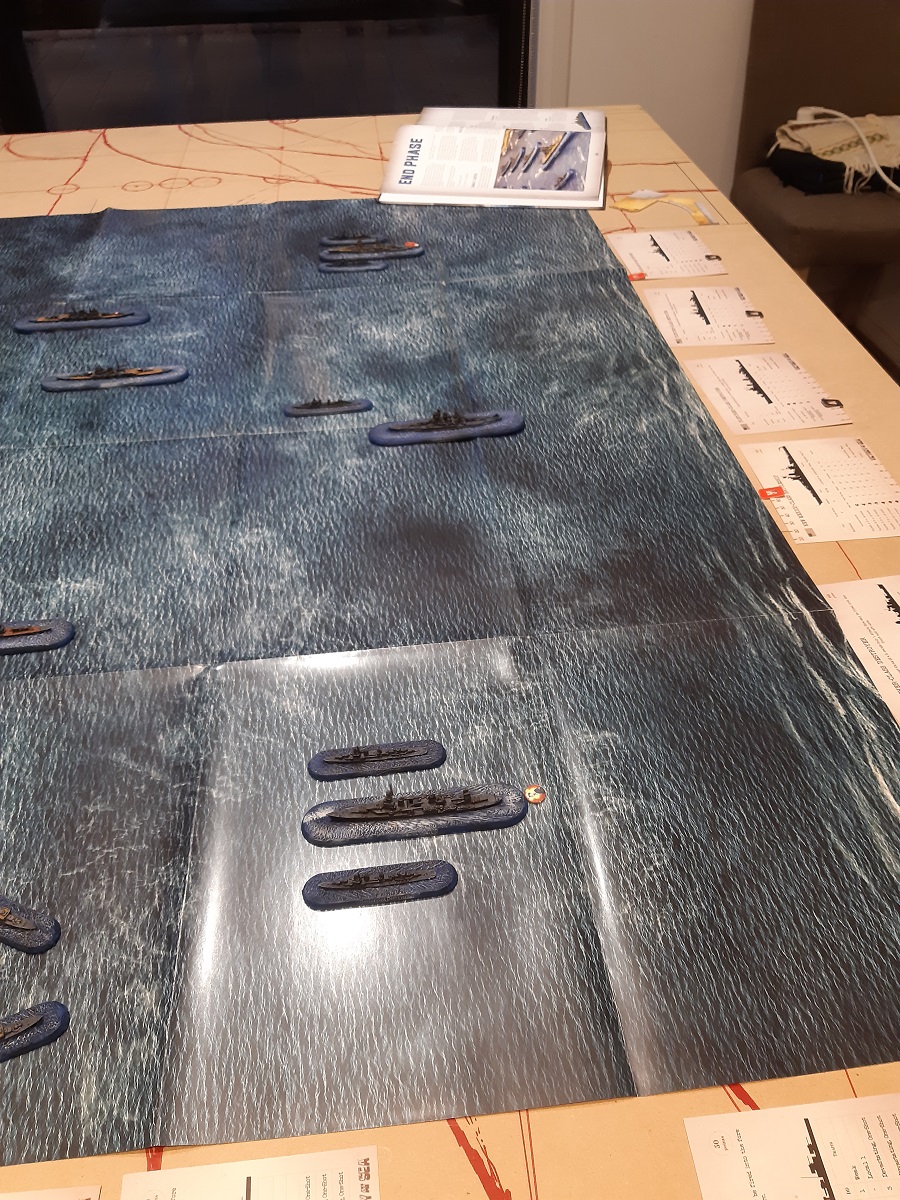
Image of deployment.
I secured initiative for the first turn and with that our ships began to make their way toward one another. Matthew’s advance was mostly cautious, while I advanced most of my fleet forward at full throttle. With the exception of my right most Mogami, all of my ships moved up 7 inches (thanks to their Agile trait). My destroyers on the right also did some weaving to push themselves right to the edge of the area of operation.
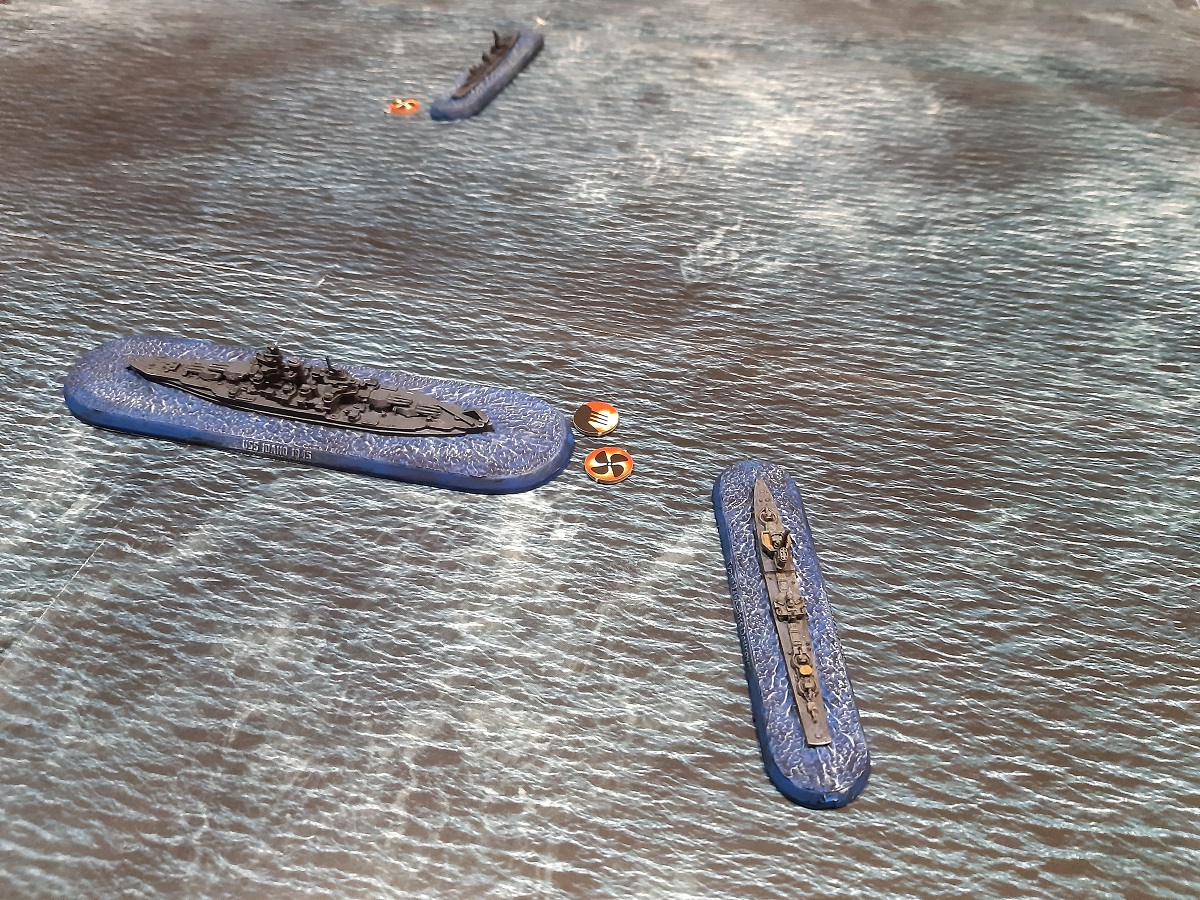
My Furutaka opened the shooting with a few hits on the USS Chicago, including a crew critical. The Chicago returned fire, scoring equal damage (but no crits) on the Furutaka, and mauling my middle Kabuki.
My middle Mogami then failed to inflict any damage on the USS Idaho and destroyer opposite, with the Idaho then promptly blowing my inner-most Kabuki out of the water. I went punch for punch though when my outer Mogami gave the USS Indianapolis a devastating salvo. I netted a critical hit on the ship’s engines, inflicting 11 points of damage on its hull and rendering it unable to undertake damage control for the rest of the battle.
End of turn one.
The remainder of the first turn’s shooting involved light guns from the various Fletchers and remaining Kabuki class destroyers that chipped away at the hull of various ships here and there.
Turn two and I again took initiative. I pushed the two bodies of my fleet further apart to avoid the Idaho. My Mogami cruisers turned in to punish the Indianapolis, while my Furutaka and Kabuki destroyers manoeuvred to get up close and personal with the Chicago. In both instances I endeavoured to catch the vessels in my broadside while avoiding their own. I wasn’t successful, but I did set up large silhouette shots on them.
My left most Mogami opened the shooting and I opted to unleash all my torpedos at point blank range on the Indianapolis. This decision turned out to be overkill in the extreme as the majority of my torpedos hit and dealt enough damage to near enough sink the vessel twice over from full. I then proceeded to sink the nearest US destroyer and put the tiniest scratch on the Idaho.
In retaliation the Idaho opened up on my other Mogami, mauling it most pitifully. The ship was taken down to a critically damaged level and lost operation of its rear turrets.
Meanwhile on the right the Furutaka opened up on the Chicago, sending it to the bottom. Furthermore, one of my destroyers would later sink a Fletcher. In reply the various American destroyers were ineffectual, the most notable demonstration of which was the torpedo strike on my stricken Mogami that failed to do any damage.
Turn two and some American ships have decided to try out scuba diving.
Turn three and the surviving American destroyers all powered ahead and turned themselves around. I brought my barely scratched Mogami around to take on the Idaho while the damaged one slowly made its way around. Meanwhile on the right, my ships positioned to deal with the remaining Fletcher there.
Gunnery was less exciting this time round. The Idaho mauled my healthy Mogami,. Otherwise a combination of the light armaments and speed of American manoeuvres kept damaged low on both sides. The weight of damage was piling up however, and it was perhaps at this point my Furutaka slipped below the critically damaged threshold. It lost all its main guns and Agile trait as a result.
Turn 3 and the duel with the USS Idaho begins.
Turn four and half my ships were limping around, though Matthew’s ships weren’t much better. Both my Mogami cruisers moved side by side toward the Idaho, preparing to unleash reloaded torpedos. Matthew hastened to bring his own torpedos to bear on my cruisers, while the right saw my healthy Kabuki sweeping around my paddling Furutaka and other Kabuki.
Thanks to holding the initiative I was able to unleash a devastating torpedo salvo on the Idaho from my more operational Mogami. In reply the Idaho ruined that ship’s day, but failed to sink it. I then proceeded to sink another Fletcher, while in response the American destroyers whittled away at my forces. By now I my Mogam cruisers were on 3 and 6 hull, my Furutaka 3 hull, and my damaged Kabuki was on 1 or 2.
The battle continues.
Turn five and the Idaho continued a wide sweep to my left while my healthy Kabuki sped toward it. With all my cruisers being heavily damaged they could do nothing but paddle as best they could toward it.
With the initiative I was able to get the ever important one point of damage to shift the Idaho into being critically damaged. All of its turrets were knocked out save the B turret as a result, but there was still no stopping the Idaho sinking one of the Mogami cruisers in the shooting phase, though in response I sunk another Fletcher.
Turn six and things continued to limp around. By now the Idaho was well on the left, nearer to my deployment zone than Matthew’s. My healthy Kabuki was hot on its tail, my Furutaka slowly making its way from right to left near the centre line, and my last Mogami turned around to face the Idaho’s starboard side.
A last hurrah of torpedos put the Idaho down to 16 hull before it sunk the culprit (my final Mogami). After this last bit of action, things petered out.
Don’t let your memes be dreams, little Kabuki!
In the turns that followed, my little Kabuki that could turned into the Kabuki that couldn’t, failing to land its payload and being sunk for the trouble of trying. From there it was clear my last two ships, so heavily damaged as they were and facing the Idaho’s superior armament could not hope to carry the day. And so there things concluded.
Aftermath
And so the US navy carried the day, the Idaho proving too tough a nut to crack.
Had any of my final payload been delivered things may well be different. As it was, I was quite proud of my clever manoeuvre to set the shot up. Rather than continuing in a line that would have put my Kabuki parallel to the Idaho and into its one functional turret, I swung my destroyed around to create a T at the back of the American vessel. This took the main armament out of play while giving my torpedos a shot on the less armoured portion of the ship.
For Matthew’s part, he was on the receiving end of a devastating first couple of turns of shooting that scuttled his cruisers good and proper. Furthermore, he suffered from fire being spread thin, leaving my ships crippled but not sunk. Some poor turns of shooting for him mid-game didn’t help things, with shots that surely should’ve sunk the Mogami cruisers only leaving them afloat with the barest structural integrity.
Final Thoughts
All in all, Victory at Sea was pretty decent. Was everything one expects from a system published by Warlord Games: simple, straightforward rules that are quick to pick up. I may very well get a Royal Navy fleet together at some point.
For now however I’m looking forward to Friday when I’ll be taking on Andrew’s Hungarians again. There’s also the promised Warhammer fantasy Battles game to come, though that’s likely to be pushed back to next weekend. Finally, I’m waiting for an order of movement trays to arrive so I can put the final touches on the unit I’ve been working on the past month. So there’s plenty to look out for.
As mentioned in my last report, I had the pleasure of having two games of Bolt Action in two days. I was spoilt indeed.
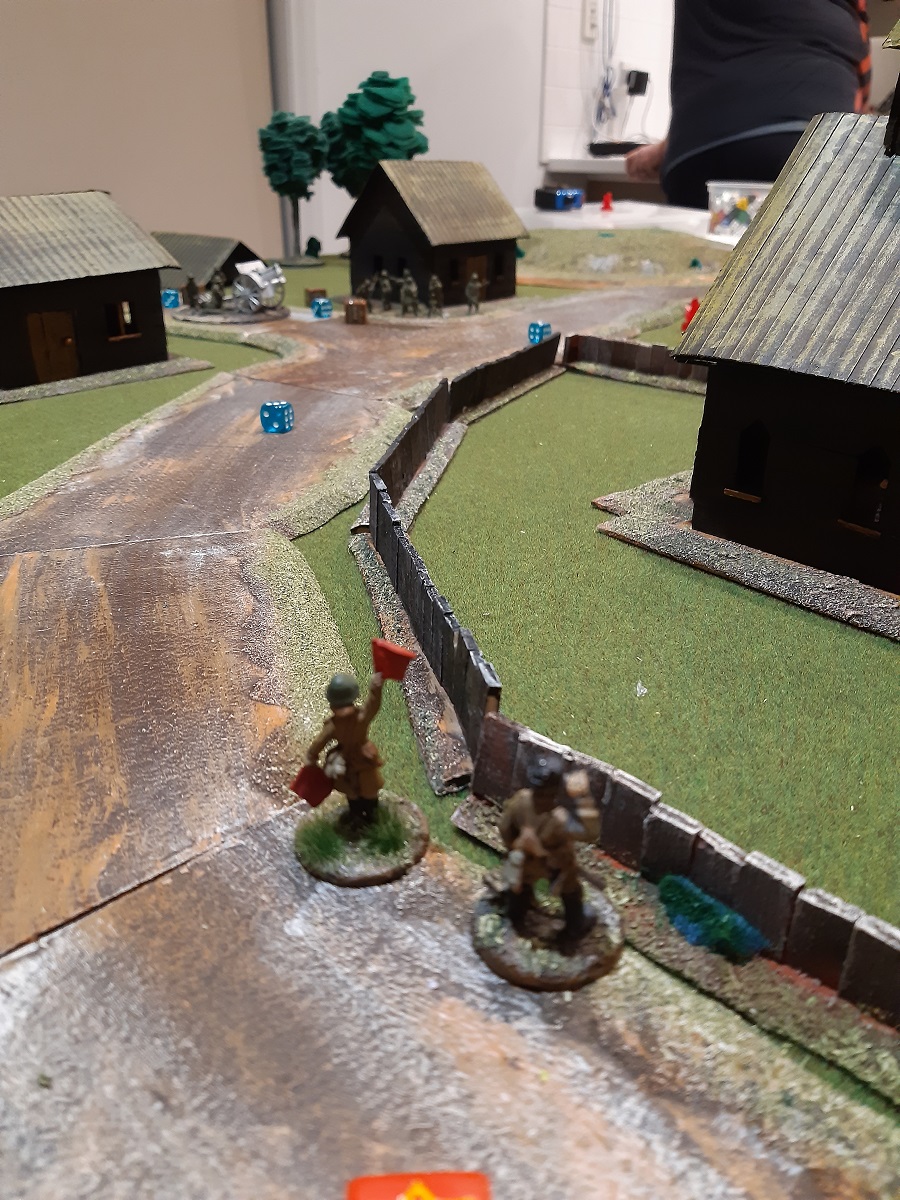
Andrew was keen to get his new Hungarian force on the field, so I put together a suitable 1,000pt Soviet list, shifted round the terrain, and got ready for another great game.
Battlefield and Mission
The Mission we rolled was Manhunt. In this mission one side is the attacker while the other is the defender. The attacker’s objective is to seize the highest ranking enemy officer. To seize the officer, the attacker must win a close quarters fight against the officer. Should the officer be killed, the battle results in a draw. The defender wins if their officer survives the battle uncaptured.
Both of us were keen to be the attacker, but it was me who won the roll off with a 2 of all things.
Andrew selected the side without the field as his table edge. The description of the battlefield below is from my perspective.
My left hand flank was open ground studded by two forests. The nearer was roughly halfway between my board edge and the centre line, while the further was roughly halfway between the centre line and the far side.
A road entered the battlefield from my mid-left flank. It curved up toward the centre line, before following the line through a village in the centre of the field, then curving back towards me to head off the right-hand side of the field. In the centre of the village was an intersection. A second road intersected the first there, running from the centre to the far side from the middle of the centre line.
Right and slightly forward from where the road entered from my side was a small church. Fences surrounded it on the near, left, and far sides. The near and far centre portions of the field were clear, but the centre of the battlefield was occupied by houses around the intersection. One was on Andrew’s side of the road left of the second road, the second house was opposite it to the right. The third was opposite the second house on my side of the road.
My near mid-right was occupied by a field from the table edge. Beyond and left of the field was the third house, while open ground lay ahead and right until the road. Across the road on the mid-right as a wood. The near far-right was open ground, though a barn was positioned just beyond the forward right corner of the field on my side of the road. Beyond the road on my right was a barren hill, behind which was open ground.
Disposition of Forces
I fielded a single reinforced platoon. All are regular, except as noted:
Captain with one staff
1st Lieutenant with one staff
Artillery forward observer with one staff
12 man rifle squad with anti-tank grenades (inexperienced, the free squad)
Two 12 man LMG squads, each with an LMG
Flame thrower team
Maxim MMG team
Medium mortar team with spotter (inexperienced)
PTRD team
45mm 1937 gun
BA-64 armoured car
T-26B light tank
Andrew’s Hungarians were all regular and consisted of:
2nd Lieutenant with two staff
Three 10 man rifle squads, each with an LMG
Medium mortar team with spotter
Medium howitzer with spotter
Csaba armoured car
Turan medium tank
Panzer 38T light tank (German Allies)
Order of Battle
In this mission the defender deploys half his forces (rounding down), one of which must be the highest ranking officer in his force, within 12” of the centre of the table. These units start in hidden deployment. Meanwhile the attacker nominates half his forces (rounding up) to form his first wave. All other forces are in reserve.
Andrew selected one rifle squad, his mortar, and his howitzer to join his officer on the field. His officer was positioned in the house nearest me, with the rifle squad on the road behind the house. The mortar and its spotter was then placed at the intersection. Finally, the howitzer was positioned on the road leading off Andrew’s side and at the very extremity of the allowed distance from the middle.
Hungarian deployment.
I elected my 1st Lieutenant, artillery officer, mortar, Maxim, flame thrower team, and one LMG squad to form my first wave. Next I rolled for the preparatory bombardment. The Hungarian officer and rifle squad both took two pins, the howitzer one, while the mortar managed to avoid any damage or disruption. With that, the battle commenced.
Repositioned Hungarians at the end of turn one.
The action began with my first LMG squad running on through the field. Their arrival was heralded by the boom of howitzer fire, though thankfully the Hungarian crew failed to range in. With the next dice however, Andrew brought his rifles up to the right of the near house and opened up on my first LMG squad, killing one man.
Soviet forces advance through the field toward the Hungarian position in the village.
The rest of my first wave then made their way on. The artillery observer moved up the road, wile my mortar positioned itself behind the church. The BA-64 drove on in the middle of my line and shot wildly at the Hungarian mortar. Meanwhile on the right, the flamethrower team ran up beside the LMG squad in the field, while my Lieutenant hung behind them. Finally my Maxim ran up short of the barn, facing itself toward the Hungarian rifle through the field.
My artillery forward observer scouts the village, ready to call in the barrage.
The arrival of the rest of my men was heralded by more Hungarian artillery fire, this time from the Medium mortar. It too failed to range into my relief. Finally, the Hungarian Lieutenant ran back toward Andrew’s line, ending on the other side of his mortar team.
Turn 2 began with the Hungarian rifle squad going down. While they’d passed their order test the previous turn, they still had one pin left on them and subsequently failed the necessary test.
Next up I brought my second LMG squad on. It was at this point Andrew noted the Confusion of Battle special rule that applies for the mission. Essentially the mission takes place as a battle rages around the AO, lines having become muddled for whatever reason. As a result, reinforcements may come on any table edge except the table edge the last enemy unit deployed from that turn. Things were about to get chaotic.
I advanced my second LMG squad on from the opposite side to my first wave and dumped fire into the howitzer. With the gun shield being on the wrong side to protect them from the attack, I wiped the crew out without much trouble. First blood to the Soviets.
Soviet forces outflank Hungarian forces in the village.
The zaniness continued when Andrew brought his Panzer 38T on the short table edge on my very near right flank. Its MGs blazed away into my flamethrower team, but while it scored a hit, it was unable to drop a man.
Cognisant of my artillery observer’s vulnerability I used my next dice to activate it and call in a barrage on the centre of the field. The BA-64 then charged forward just short of the road while blazing away at the Hungarian mortar, but only managed to kill one man.
I scored another order dice and attempted to bring my PTRD team on, but was unsuccessful. Getting the next dice as well, I decided to have my Lieutenant get my men to snap to with the intention of mopping up the Hungarian rifle squad.
My flamethrower team was first to act, passing its order test (just), and advancing to turn the dreadful device on. Unfortunately I failed to hit with a 2. Then, if that wasn’t bad enough, I rolled a 1 on the test to see if the flamethrower was exhausted. And so a poor Soviet supply line managed to achieve what German MG fire could not and the flamethrower team was removed.
It was up to the LMG squad and Lieutenant to do the job instead. I had intended to charge the LMG squad should the rifles remain after a dousing of flame. Instead I had them fire, while the Lieutenant advanced. Between them, the two units applied another two pins and killed three men.
Hungarian infantry out flank my mortar team and artillery forward observer.
A flurry of units then entered the battlefield. I moved my 45mm anti-tank gun into the field, ready to strike the 38T next turn, while Andrew moved his second rifle squad on to protect the tank. The third rifle squad came on the left-hand short edge and picked off one of my artillery forward observers. Finally my T-26B trundled on behind the 38T and picked off two riflemen from the second squad. The Turan and Csaba however were nowhere to be seen, both failing their order tests to materialise.
The action in the corner next to the field.
The final moves saw the Hungarian Lieutenant pick off men from my second LMG squad, while my rifle squad ran on ready to assault the officer next turn.
Turn three, and before the first order dice was drawn the distant booming of guns saw all heads turn toward my table edge. I rolled Fire for Effect for my artillery barrage and Fire for Effect it did. I rolled the maximum area of effect. I had already realised my mistake at moving my BA-64 up so far, and now there was no doubt it was about to take a pounding. As it turned out, it, the first Hungarian rifle squad, Hungarian mortar, Hungarian Lieutenant, and even my rifle squad, were in range.
Andrew suggested I start with the Hungarian rifles, but instead I went with the BA-64. It was a direct hit. Somehow the little clown car survived, though the engine caught fire. I passed the resulting morale test however and the armoured car stuck around. It netted a total of five pins from the experience however, so it was doubtful it’d be much use.
Next the Hungarian rifles took three pins, taking them to six, much to my satisfaction. Next was the Hungarian mortar, and I rolled a direct hit yet again. Of course, the Hungarian officer being so close he too was caught in the blast. When the dust cleared the mortar’s spotter was fleeing for the hills while everyone else was reduced to their component body parts.
With the Hungarian officer dead, so were either of our hopes of victory.
Aftermath
And so I snatched stalemate from the jaws of victory.
You may be wondering why I didn’t just reposition the blast template in such a way it did not hit the officer. This choice was an option and it did cross my mind, but we weren’t playing for sheep stations and, besides, things were both more cool and more hilarious this way.
And how hilarious it was indeed. From the reinforcements popping up everywhere, to the impotent flamethrower, to that fateful artillery strike. Andrew declared it to be the most hilarious game of Bolt Action he had ever played and I heartily agreed.
The destruction in the middle would’ve been even more complete had I remembered the impact of the BA-64 being open topped. That would’ve bumped the On Fire result to Knocked Out. I’ll have to remember that for next time.
All in all though, comedy gold.
Final Thoughts
Manhunt was a highly enjoyable mission. I look forward to playing it again sometime. On the topic of my next game, Matthew is keen to show me Victory at Sea on the last Sunday of this month. I also have another Warhammer Fantasy Battles game pencilled in for the first weekend in July. I’d also like to get another Bolt Action game in next month too. So hopefully there’ll be plenty to come in July.
In the meantime, I’m intending to have a general hobby update at the end of the month. Been working on some fantasy things I’m looking forward to having done.
Hello Comrade, it has been a while. I am sure you knew however that it would only be a matter of time before I made a new Bolt Action post.
Today we return to the eastern front, 1944, as Matthew’s fallschirmjäger take on my Soviets.
Battlefield and Mission
We rolled Demolition for the mission. In this mission, we each have a single objective marker placed in our deployment zones. If an enemy unit is within base contact of the objective at the end of a turn, the objective is destroyed and the destroying side seizes victory.
The battlefield.
I won the roll off and opted for the side with the fields. The below description of the battlefield is from my perspective.
The ground on my left flank was open, with a road entering from my side a little in from the left table edge. This road ran on a slight diagonal up to a village roughly at the centre line. The road continued off the opposite side of the table, with a second road intersecting it at the village. This second road ran left-right, roughly along the centre line, until it veered slightly forward after passing a hill before heading off the right-hand side.
The village on my left.
To the left of the intersection in the middle of the village was a small church, while the far left of the field was open. Fences created a small yard around the church. Two houses sat on the other side of the road to the church at the intersection. One was north of the left-right running branch of the road, while the other was to the south. A third house was further along on the southern side of the road, roughly near the centre of the battlefield.
A small wood sat on my table edge just left of centre. It was here I positioned my objective marker. To the right of the wood the ground was clear until the fields on the right flank. Forward of this central portion, passed the central house and on the other side of the road, was a wooded hill. Beyond the hill, the far side of the field was clear.
Another shot of the battlefield.
On the right flank was a field against my table edge, a field width away again from the right-hand side. A barn was positioned forward of this field, to the right of which was another field spanning to the table edge. Forward of the fields was the road. Finally, on the far mid-right was another small wood. It was in this wood Matthew placed his objective.
Disposition of Forces
My forces, all regular except where stated, comprised of:
captain with two staff
1st Lieutenant with two staff
12 man rifle squad with anti-tank grenades (inexperienced)
Three LMG squads with 12 men, including an LMG
SMG squad with 12 men
Tank rider squad with 7 men (veteran)
MG team
Sniper team (veteran
Two Zis-3 divisional guns
T34-85
Half-track (inexperienced, I don’t have a suitable Allied half-track model, so it is a captured Hanomag)
Matthew’s forces, all veteran, were:
1st Lieutenant with one staff
10 man fallschirmjäger squad with LMG
7 man fallschirmjäger SMG squad
Flamethrower team
Medium mortar team with spotter
Sniper team
Pak-40
Puma armoured car
Tiger I
Hanomag half-track
Order of Battle
The German left flank.
As mentioned above, I placed my objective in the wood on my mid-left and Matthew did likewise (my far-right). Matthew placed his Lieutenant next to the objective with his mortar to the left of the wood, while the spotter was on the far left beyond the church. Also on my far right was arrayed the hanomag, behind which was the SMG team, and Tiger. The rifle squad was left of these units.
The Puma, Pak-40, and German sniper.
Meanwhile, on my far left, the Puma was positioned on the road with the Pak-40 next to it. Finally, the flamethrower team was right of the road behind the house, while the sniper team was positioned behind the church next to the spotter.
A sweeping shot of the Soviet deployment.
As for my forces, I placed one Zis on my far left covering the road. The second I positioned in the middle of my line, covering the road between the hill and barn. On my mid-left, my Maxim, one LMG squad, and Captain were all in the wood covering my objective. Forward of them I placed the rifle squad.
The Soviet right flank.
Meanwhile, on my left, the second LMG squad was as far forward in the nearer field as possible, and the third just behind the further field. Behind these squads was my Lieutenant and sniper team. My half-track, SMG team, T34-85, and tank riders were all placed in reserve.
The battle commenced with a salvo of gun fire in the literal sense. My divisional guns opened up on the Puma and Tiger respectively, but shot wide. Both vehicles moved up and returned in kind, with equally unimpressive shooting. The Puma’s bold advance along the road however had brought it quite close. So close in fact I judged it in range of a run order of my rifle squad.
Urah! The Riflemen assault the Puma for the glory of the Soviet Union!
Without need to take an order test thanks to Tank hungers granted from their anti-tank grenades, I charged them left and forward. Needing 6s because of the Puma’s move blunted the assault however, and nothing came of the brave charge.
Meanwhile, on the right flank, my second LMG squad advanced up to the left of the barn and my third LMG squad advanced halfway through the far field. The two squads then opened up on the fallschirmjäger rifle quad.
Brave Soviet heroes advance through the distant fields toward the fascists.
Where my guns couldn’t hit the backside of a barn, my riflemen were crack marksmen and I managed to pick off three or four of the squad. In response, the fallschirmjäger rifles advanced and picked off one man from my second LMG squad.
The sniper skulks around behind the church.
The rest of the turn consisted of moving. The fallschirmjäger SMGs mounted the Hanomag, which moved up almost to the field. My sniper and Lieutenant entered the barn, and the German sniper and flamethrower both ran forward, the sniper behind the church, the flamethrower into the intersection. The Pak-40 went into ambush, as did my Maxim. My first LMG squad and Captain and the enemy Lieutenant all went down. Finally, the mortar failed to range in on my second LMG squad.
Turn two and to my horror it began with two black dice. First the Puma machine gunned my rifle squad, though it only lost two men. It wasn’t all bad either, as I rolled a 5 on their Green test, turning them regular. The Tiger then tried to take out my Zis again, but failed.
A red dice was drawn and I knew I had to act with the rifle squad. The flamethrower team was closing in and if they didn’t act now, they’d be burnt bread. Unfortunately their one pin from the Puma’s machinegun fire meant an order test. An order test I subsequently failed. The next dice was black and it was all over for the rifle squad. Half the squad was burned alive by the advancing flamethrower while the others fled in terror. First blood to the Fascists!
German forces move to blunt the Soviet advance.
Thankfully the right flank was looking a little better. Though my sniper missed the mortar team, an order to snap to from the Lieutenant saw the Lieutenant and my LMG squads advance. The third squad were now at the far end of the field, while the second squad crossed the road.
They poured fire into the fallschirmjäger rifles, culling them to three men. In response, the fallschirmjäger SMGs advanced out the Hanomag and opened up on my third LMG squad, killing half of them. The squad held its nerve however and stuck around.
The left-most Zis-3 faces down the Puma armoured car.
The rest of the turn was more poor gunnery from the divisional guns and movement. The sniper headed into the church, and my T34-85 arrived carrying the valiant tank riders on my far right. It moved up into the far field, hugging the right side.
Turn three opened with a tide of red. The divisional guns continued to demonstrate an impressive ability to be wholly ineffective. The crew in the middled missed yet again, while the gun on my left flank fired a dud that bounced off the Puma.
The true might of the Red Army is, of course, its people. The Lieutenant again ordered the second and third LMG squads to snap to. Unfortunately the third squad was too busy cowering from SMG fire. I decided to get the Lieutenant to show them how things would be done and had them act next. Firing on the rifle squad, not only did all shots hit, but I wiped out the last three men to a man. This allowed my second LMG squad to advance into the wooded hill, shooting at the mortar team as they moved.
Tiger v T34-85
The third LMG squad were not long for this world, as another three were taken out by SMG fire. A re-rolled morale test however kept them in the fight. In retaliation, my T34-85 unloaded on the SMG squad, which was quickly mopped up by the tank riders. In response the Tiger advanced to the barn. Its cannon missed the T34, but its MG neutralised the last of the third LMG squad.
Meanwhile, on the left, the Puma shifted up the road next to the Zis and out of its arc. Its machinegun took out two of the three crew, but the last man held his nerve, again thanks to a re-roll. The German sniper shifted into position in the church, while the flamethrower team entered the house nearest me, ready to threaten my objective. Finally, back on the right, my half-track entered the fight and drove up left of the barn.
Turn four and my T34’s main gun opened up on the Tiger to no avail. In response, the Tiger returned fire. The devastating 88mm shell was no match for superior Soviet tank design however as it ricocheted harmlessly off the T34’s hull. Unfortunately the barn did not offer my Lieutenant similar protection from the Tiger’s MG fire. With a dreadful tearing sound, the barn was filled with a hail of bullets, killing everything on the ground floor.
Recompense was not long in coming however, with my middle Zis landing a shell that penetrated the side armour of the Tiger and destroyed the tank in an almighty boom. Meanwhile, on my left flank, my other Zis sent a HE shell into the nearest house, killing the flamethrower team inside.
Soviet forces advance following the Tiger being knocked out.
With the Tiger neutralised, I was clear for an all-out advance. Though the Hanomag moved along the road to pester my second LMG squad, the squad were able to shift up to the far side of the wood and take out two of the mortar crew. To check the inevitable, Matthew turned the Pak-40 to face the right flank. I was unfazed however, gunning my half-track forward just short of the far wood and advancing my tank riders across the road.
The Pak40 is turned to cover the German left and all important objective.
On the left, the Puma picked off one man from the first LMG squad, while the sniper took shots at my Captain who kept himself down.
Turn five and the Pak-40, which I had completely forgotten about prior to my half-track gunning it forward, finally came into play. A boom echoed out across the battlefield as it fired, followed by a second explosion as my half-track was totalled, sending the SMG team inside sprawling to the dirt.
Vehicle graveyard on the Soviet forward right.
With the end of the battle looming, and my SMG squad down, I attempted to speed my T34 forward, only to have it fail its order test. The turn’s bad luck continued as the Hanomag opened up on the LMG squad in the wooded hill. My decision not to put them down resulted in all but two of the remaining men losing their lives.
Soviet forces press for the objective.
The near obliteration of the squad did not perturb it however, and it advanced across open ground, rifles firing, toward the objective. Their movement was backed up by the Zis. Buoyed by its destruction of the Tiger, it sent a shell into the Hanomag, immobilising it. My other Zis meanwhile turned to face the Puma.
Other actions for the turn were uneventful, with both snipers trying to take out the opposing force’s officer, and the Puma failing to land shots on the first LMG squad.
The desperate push for the objective.
Turn six and I threw everything at the objective. The SMG squad refused to budge, failing their order test, while both the T34 and tank riders didn’t have the distance to make it. The last two men of the second LMG squad however just had the range and secured it.
The impotent Zis-3. I need to requisition new shells.
The rest of the turn was uneventful, with guns failing to hit (Pak-40 and middle Zis) or inflict damage (left-hand Zis), and both snipers continuing to miss.
The remainder of the second LMG squad seize the objective.
And so turn six concluded with the Soviets destroying the German objective, securing victory for the Motherland!
Aftermath
As ever, there were some small rules errors made here and there early on, but once we were in the swing of things the battle progressed at a pace. And what a battle it was. We both thoroughly enjoyed ourselves, and while the Soviets certainly controlled the field, there was every chance of a sneaky German win.
Matthew and I both agreed he should have turned the Puma to face my units in the wood and gunned it towards them. By assaulting with the Puma he could have bullied my men off the objective and potentially secured it.
For my part, I’m very happy with how things went and my decision making. The turn one assault on the Puma was a bit silly and got my rifle squad killed but who could resist such a tempting (and hilarious) order?
Final Thoughts
It was so awesome to play Bolt Action again, but what was even better was it was just the first of a Bolt Action double-header. Yes, you read that right: there is a second after action report in the works. So come back next week to read a report on what was hands down the most absurd battle of any game of any system I’ve ever played (yes, even more absurd than Warhammer Fantasy Orcs & Goblin things).
So I’ve been pining for some good old rank and flank gaming of late. Partly because I always found I enjoyed Warhammer Fantasy more and partly because I think it’s a form of wargaming that’s easier for someone who is blind/VI – less units to keep track of and all. Well as it happened I was in luck.
With Dark Heresy falling through again and three of four in my boardgame group busy, the last the latter, Ben, was keen to play some Warhammer Fantasy Battles (WFB) 6th edition. Why 6th? Because it’s the best edition, and because I have hardcopies of the rulebook and 6e army books for Orcs and Goblins and Vampire Counts.
So I rustled up my old forces, dusted them off, and got ready for some Old World fun.
The Armies
While not the prettiest things, most being unpainted and a good chunk of what was having been done before I became decent, it turned out I had quite a bit of stuff. So much so that with a bit of proxying Ben and I came up with two 2,120 point lists. Why 2,120? Because that’s how much we got the Vampire Counts to and we did them first.
Orcs and Goblins
Level 4 Night Goblin great shaman with the Staff of Badum, Dangly Wot-Nots, and a dispel scroll
Black Orc Big Boss with heavy armour, an extra hand weapon, and Crumpa’s Club of something or rather
Level 2 Night Goblin shaman with the Staff of Sorcery,
Level 2 Night Goblin shaman with a dispel scroll and a power stone
Two units of 20 Night Goblins with spears, both with three fanatics
Two units of 20 Night Goblins with shortbows, both also with three fanatics
16 Arrer Boyz
Two units of 8 Goblin Wolf Riders with shortbows (half proxied with Forest Goblin Spider Riders – clearly they’re wolf spiders)
25 Black Orcs (15 proxied with regular Orc Boyzz)
(All units had standards, musicians, and bosses)
Vampire Counts
Level 4 Master Necromancer with the Rod of Flaming Death, Book of Arkan, and a dispel scroll
A Blood Dragon Vampire Thrall on a nightmare with barding with a lance, shield, Talisman of Protection, and blessed with Red Fury
Level 2 Necromancer with a Power Familiar (proxied with a Wraith)
A Wight Lord with heavy army and the Hell Battle Standard (I think that name is correct, unit he is with causes Terror. Proxied with a regular old skeleton standard bearer)
Two units of 20 Skeletons with spears and light armour plus champion, musician, and standard bearer
Two units of Zombies with musician and standard bearer (half are zombie-fied Empire militia)
19 ghouls, including a Ghast
6 Fell Bats (one is just a stand, requires fixing)
9 Black Knights with the Screaming Banner (proxied with a Wight converted from an Empire captain, a mounted Wight, a mounted Von Carstein vampire, and six Norman knights)
The Battlefield
I set up a battlefield with a couple of hills, some woods, and a big chunk of marsh.
From the perspective of what would become my side, there was a one hill positioned left of the middle in my deployment zone. Forward of that, through the mid-section, a wood obscured the left flank, while from that to the centre line was clear. Opposite the hill, nearer the centre of the opposing deployment zone, stood another wood.
In my deployment zone and near the centre line, or just right of it, was another wood. Forward and right of the trees the marsh spanned through the mid-section up to the mid-point between the deployment zones. Beyond the marsh was a stand of trees right of centre. Right of these trees lay the second hill. It was forward of the opposing deployment zone and obscured that flank.
The Battle
We had a roll off to choose our side that Ben won with a 6. We then took turns deploying one unit at a time, as well as rolling all our spells.
The Greenskin Horde
From my right to left, Ben positioned his two units of Wolf Riders behind the hill, then Arrer Boyz behind the tree-line. The two units of speargoblins were positioned either side of the wood in his deployment zone. The first unit of shortbows was then placed left of the left-most unit of spears, the Black Orcs behind them, and second unit of shortbows on the far left flank, obscured by the wood in the mid-section. His shamans were positioned between various units.
Corpse Wall
As for my deployment, going left to right, I went with my Black Knights left of the hill in my deployment zone, unit of Zombies and unit of Skeletons on the hill with Master Necromancer between them, then my battle standard Skeletons and my second unit of Zombies with the other Necromancer beside the latter. Right of that came my Ghouls facing the marsh and Fell Bats on the far right flank.
Ben won the roll off for first turn, again with a six, and the battle commenced.
Right off the bat the second Wolf Rider unit decided fighting amongst itself was the order of the day while the first unit shifted back to wait for my Fell Bats to near. The rest of the Goblin force marched up and Mork’s gaze saw some Skeletons crumble to dust. Gork also got set to go on the warpath, prompting me to use my dispel scroll to avoid a stomping.
Greenskins after Turn 1 movement
In my turn I flew my Fell Bats up, but kept them obscured by the hill, while the ghouls marched through the swamp. The rest of my army marched up, which led to the first onslaught of fanatics.
Half a dozen whirling loonies scattered themselves about the place. Two ploughed into my battle standard bearing skeletons, while others interposed themselves between my battle line and Ben’s. I moved up my other units just shy of seeing a further three fanatics being unleashed. I also crossed my fingers and hoped Gork and Mork wouldn’t see fit to push any of them into my general.
Turn 1 Undead movement
In my magic phase, I reanimated all the destroyed skeletons and set a bolt from the Rod of Flaming Death into one of the fanatics. And so Turn 1 ended with everything more or less as it began, though with our armies closer together and Fanatics all over the place.
Turn 2 and things went from funny it hilarious as the second Wolf Rider unit continued to squabble, while the first decided to show them what’s what and shot at them. The rest of the greenskins kept it together, but only thanks to the encouragement of the nearby Black Orcs.
Fighting within the ranks
To my relief the Fanatics weren’t overly troublesome. They mostly put themselves in annoying positions. One made its way toward the forest behind my line and another was even so kind as to plough through a unit of Night Goblin shortbows. Most importantly none went hurtling into my Master Necromancer.
The rest of the horde stayed put to focus its efforts on shooting undead and bring down Gork’s wrath. Evidently he was put out at having been put off last turn and so his big stompy foot came down with irresistible vengeance. Thankfully he failed to squish any Black Knights, but crushed some skeletons before slipping and flattening a Black Orc.
My turn began with a charge from the Fell Bats into the left flank of the first unit of speargoblins. After that, I continued to move everything up, which sent yet more fanatics hurtling into everything. My terror causing Skeletons were devastated down to only 5 models as the nutjobs ploughed through. I was quite fine with the losses though, the Necromancers would just have to earn their keep. I was much more cautious with my Black Knights however, given they wouldn’t be getting back up should they fall.
Bat attack!
None the less, I had them trigger the last three fanatics from the shortbows behind the forest. They could only be set up for mayhem next turn, and even then RNG might keep my units safe.
My magic phase was quite eventful. Not only was I able to replenish my devastated unit of skeletons back up to 20, Vanhel’s Danse Macabre sent the unit charging into the second unit of speargoblins. Unfortunately, while the first unit failed their Fear test on the Fell Bats, the second passed their Terror test and held firm against the Skeletons.
Combat was underwhelming. Casualties on both sides were exceedingly light. My Wight Lord in particular put on a terrible performance with his three attacks rolling 1, 1, 2 for 3/3 misses. When the dice stopped rolling however my Fell Bats won their combat and lapped around, the Night Goblins having held, while my Skeletons lost combat by 1 but didn’t lose a Skeleton thanks to my battle standard.
Turn 3 and you’d be forgiven for thinking the second unit of Wolf Riders would’ve gotten over their differences by now. They hadn’t and continued to squabble. The shortbows on Ben’s far right were also subject to animosity and moved up toward my Black Knights. Thankfully the forest slowed their movement enough to prevent them running into their own Fanatic.
Speaking of Fanatics: two of them clobbered half my Black Knights to death much to my dismay. In good news however, two put themselves into trees and a further two collided and took themselves out. With the good came the bad however, as every single unit within 6” of my terror causing Skeletons passed their Terror test, dashing my hopes of a Terror induced rout.
Wolf Riders finally join the fight – never mind the napping Arrer Boy
The greenskins continued to pick off undead, with the Arrer Boyz and first unit of Wolf Riders falling just one kill shy of inflicting 25% casualties on my Ghouls. Goblin magic this turn was terrible, with several failed casting attempts and a miscast that left one shaman unable to muster power for the rest of that phase.
Meanwhile our melees started to edge in my favour. While the speargoblins still held against the Fell Bats, the other speargoblins fled and were destroyed after losing to my Skeletons. This sent the Skeletons pursuing right into the Black Orcs.
In my turn I threw caution to the wind and charged everything I could. The Black Knights went straight through a fanatic and into the second unit of shortbows. Miraculously, while Ben rolled four or five hits he failed to wound with a single one of them.
Charge!
In the centre, my second unit of Skeletons charged the out of position Night Goblin Shaman, who promptly fled. As a result, the Skeletons ploughed into the Black Orcs and other unit of shortbows. They were joined by some Zombies, while the other unit of Zombies finally made their way across the bit of marsh they were stuck on.
Magic saw more Skeletons back on their feet, as well as the Wind of Death sapping the Night Goblin Great Shaman of his life force.
Knight fight
On to melee and the rout began. While my knights won handily, snake eyes saw the shortbows hold firm. The rest of the goblins weren’t so lucky. The Fell Bats finally caused the speargoblins to rout and chased them down. Meanwhile the Zombies broke the other shortbows and ran them down too. The odd unit out was, as to be expected, the Black Orcs. They butchered Skeletons with gay abandon and won their combat handily, leaving my battle standard unit with only five models left.
End of the battle
It was however quite obvious which way the battle was going, and Ben had to head off anyway. While the Black Orcs would undoubtedly hold on, my forces were free to swarm them, and my Necromancers had free reign.
Another shot of the end state
We did the Fanatics movement to see what would happen, but that only resulted in one spinning off the table and another two colliding. The second unit of Wolf riders stopped squabbling though. Better late than never.
We also rolled a one on one combat with my Vampire Thrall and Ben’s Black Orc Big Boss in which the latter was decapitated handily. Even allowing the orc to strike post-humous my Thrall managed to make two of three 6+ ward saves, granted thanks to his Talisman of Protection.
Aftermath
The battle was Ben’s first time of really playing WFB. Should he do it all over again, he said, he’d definitely deploy differently. The most important change of which would be to get the Black Orcs in the front line. I also advised he would’ve been better to take the side he gave me, using the height advantage of the hill and marsh to guard his flank.
For my part, I’m definitely not going to set up such a large marsh next time. I think it was too much of an impediment. Though I do need to double check movement and difficult terrain. Battle-wise, everything proceeded as I had foreseen *cackles in Palpatine*.
Final Thoughts
Ben and I had an absolute blast. WFB 6e was my first wargame and sure there’s a nostalgia element, but it was genuinely a highly enjoyable experience. It’s quite obvious why 6e is considered the best version of WFB. The rules are solid, the army books flavourful and balanced, and it was a time when GW was still about the hobby and not about building castles out of wads of bank notes (no surprises if there’s a chapel to Harry Enfield in there).
It’s given me real enthusiasm for getting some more fantasy stuff together and touching up all my old models. So who knows, maybe you’ll get to see more bony boys in the future?
“Expect to see more 40k in the future” he said, “hopefully some after action reports within the next couple of months” he said.
And now it’s late May the following year.
I haven’t been idle all that time, but I did get disheartened for a bit.
Following my initial surge of industry, I struggled to do more painting for sight related reasons. As a result, I stalled. I kept assembling things though, and with assistance on the more complex kits I was able to field a force for my first game of 9e last month.
I’ve been meaning to write that battle up. I quite enjoyed myself. It was against Demons of Khorne and was a close contest that could’ve gone either way. That game enthused me to get more things, including ordering a neoprene mat, and to attempt some painting again.
Jessica, the Trygon
The result was that Jessica (yes, I named my Trygon Jessica) received a paint job. I’ve also got half my hormagaunts painted, and a warrior too (though I’m not as happy with him as the other stuff).
I had a second battle the other week, though it was a totally one-sided affair that would be best forgotten. None the less, I remain hopeful for more games in the future. Games that I will hopefully get written up for here.
Coming to an Ikea shelving unit near you
I’ve quite the nice little collection infesting my spare room to utilise when that time comes. Up to 60 termigants now (24 flesh borers, 36 devourers), a tyrannofex, five bases of rippers, a trygon, a broodlord, the Swarmlord, 24 genestealers, 12 hormagaunts, three venomthropes, and nine warriors (three venom cannons, six deathspitters). Further, I’ve eight genestealers to assemble and six hive guard for someone else to assemble.
Finally, on a more general note, while I’ve found doing hobby things increasingly difficult (even more so when I stopped in the first place), I’ve only become more enthusiastic for the hobby.
I’m really keen to see what limits I can push myself to, and utilise assistance to maximise my ability to participate. I also want to play all the games. Actually, that isn’t really anything new, as you can probably tell from my varied interests. In that regard there will be a very nice little post coming some time later this week. Possibly tomorrow. Yes, really.
For now, I conclude with that teaser and wish blessings of RNGesus upon your dice.