We played our second battle in our El Alamein Flames of War mini-campaign last night. We have brought forward the last battle to next week on account of my mate being interstate for a work conference.
Background
On the night of 26 October 1942 elements of the 2nd Armoured Brigade was ordered to circle north around an area of resistance known as “Woodcock”. They would then strike south while the 2nd Battalion King’s Royal Rifle Corps would also attack the point. The units were moved forward under the cover of darkness. Unfortunately the lack of light made going slow and units lost their position. By daylight, however, Commonwealth forces continued with their orders to take the point and regroup.
Battlefield and Mission


I selected the mission Breakthrough for the scenario. The objective would be the large hill opposite the canyon through which the road leads. My mate (the attacker) would deploy in the quarter with the canyon and I (the defender) in the other two quarters without the objective.
The Forces

German (all proxy again, except the Panzer III Ns)
HQ with two Panzer III Js (late)
Three panzer platoons with three Panzer III Js (late), except for the two Panzer III Ns (one a piece in two of the platoons)
One Flak 88 with extra crew.

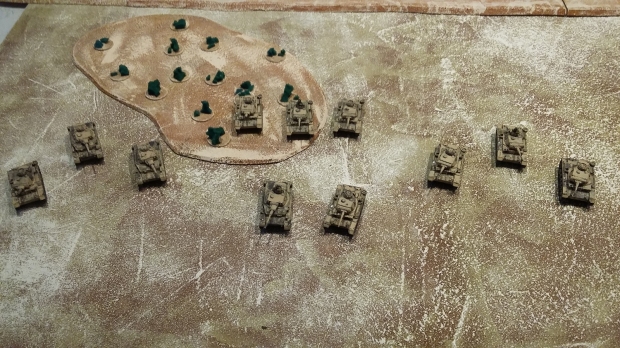
British (yes this is the image from last time, just imagine a Hurricane IIC is also in it)
HQ and two heavy armour platoons each with three Shermans
Light armour platoon with three Honey Stuarts
Hurricane IIC limited air support
Order of Battle


I deployed the Flak in one quarter near the central line on the long edge and one platoon of Panzers behind the building and scrub in the other quarter, the rest of my force had to be kept in reserve. My mate put down two platoons of Shermans, including his HQ, and his Honey Stuarts in the canyon, the last platoon of Shermans was kept in reserve.


The battle began at dawn and under the cover of darkness only movement occurred. One platoon of Shermans moved up the road while the others swung around the cliffs. The Honey Stuarts stayed put, likewise the immobile Flak 88. My Panzers moved up ready to strike.


Turn two and day broke and with the sun’s rise so came the roar of Hurricane engines as a full sortie was successfully called in on my Flak 88. Thankfully no reserves showed up for the British. The Shermans moved up again and the command platoon took out the Flak 88 before the air strike hit. The other Sherman platoon knocked out one Panzer III. My Flak’s command team survived the bombing run and I just kept his head down. I also scored no reserves, much to my dismay. My Panzers opened up on the Shermans and actually managed several hits, but all were saved with ease. I stormtroopered them back to lead the Shermans on.


Turn three and still no British reserves, but the Hurricanes returned, this time swooping for my Panzers. The Shermans continued to move up and the command platoon opened up its machine guns on my Flak command team to no effect. The Sherman’s shooting was equally ineffective and I thought I’d get out of the turn ok, but then the (single) Hurricane blew up one of my Panzers and the final tank lost his nerve and reversed out of there. In my turn I managed to score some reserves and I decided to come in to swoop at the side of the Sherman platoon that’d emerged from the canyon. I scored a single hit which managed to bail a Sherman. Not good.


Turn four and the Hurricanes stayed away, but the final Sherman platoon arrived and drove straight onto the objective, which was to be expected. The Shermans and Honey Stuarts moved up across the field. My mate ignored the Flak command team this time, but the Sherman platoon that had just pivoted opened up on my Panzers – knocking out two of them. The Stuarts, unsurprisingly, did nothing. My turn and some more Panzers arrived, but by now it was too little too late. I couldn’t get in range and what little shooting I put into the Shermans in the centre of the field missed its mark.


Turn five and the British had secured the objective. Another crushing defeat for Axis forces in North Africa.
Aftermath
It was an even worse showing than the last battle for the Axis, having only managed to bail a single tank in two separate turns. My force distribution was quite poor and I really should have run two larger Panzer platoons, rather than three small ones. I think fielding my air support would also have been a better choice than the Flak – I’d have interceptor capability and good tank knock out power (especially because my mate tends to group his tanks closer than I do). Still, it was a good game if for no other reason than it was visually awesome. I really do love my desert board and the view of tanks rolling across the desert and flaming wrecks exploding is really quite fantastic.
Next Time
Next time the points go up again, but we’ll be running “just everything” lists. This means my mate will have four Churchills which don’t actually fit into the Heavy Armoured Company force organisation chart, but hey, it’s for fun and he’s already won the campaign anyway! I’ll have to give more careful consideration to what to field, but I might see about cracking open the box of Plastic Soldier Tigers I picked up last weekend…
Our next battle is next Wednesday (2 March 2016), but then it’ll be a drought till late April because my mate is off to the US for a holiday. I’ll be busy painting things though, so you might see some of that, otherwise look forward to the next mini-campaign which I plan to be three games of Bolt Action set during Operation Barbarossa! Happy wargaming!