I finally was able to organise a game of Bolt Action last Wednesday, my first in over 12 months and my first in 2nd Edition. This write up has also been slightly delayed due to a lack of internet.
Forces
Soviet (Me) – All regular except the free rifle squad
1st Lieutenant and one staff
Guards squad, eight men with LMG
Guards squad, seven men with LMB
Guards squad, eight men all with SMGs
Rifle squad (free)
Zis-3 Divisional Gun
ISU-152
British (Andrew) – All veteran
1st Lieutenant and one staff (SMGs)
Para squad, ten men with LMG and some SMGs
Para squad, ten men with LMG and some SMGs
Light mortar team
Medium mortar team
6pdr AT gun
Tetrarch light tank (The Little Tank that Could)
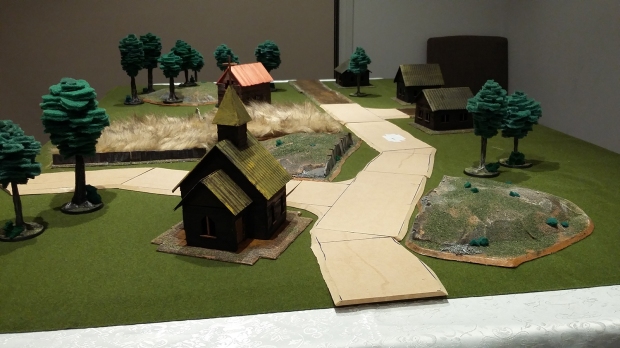
Battlefield and Mission


The mission rolled was Key Positions. A total of seven objectives were rolled, with me placing the first one.
They were placed as follows: both ridges, the church, the barn, the wooded hill, the centre most house, and on the painted road leading off the short table edge (so the one near the wooded hill and village).
Order of Battle
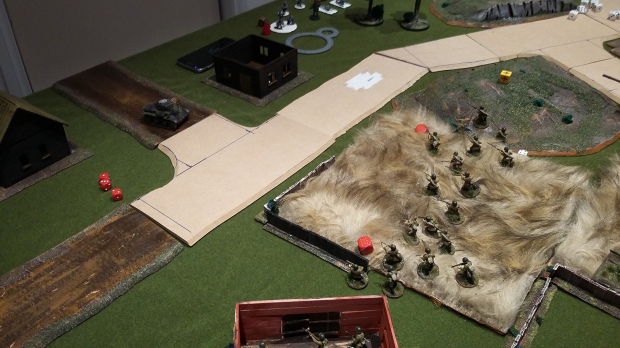
I won the roll off to choose a side, and took the one with the wheat fields and wooded hill on the basis that four objectives were closer to that side (although further away from the table edge than the three on the other side). The first turn involved moving all out forces on. It was a stack of red dice to begin with, but I ended with the last dice which was Very Good.
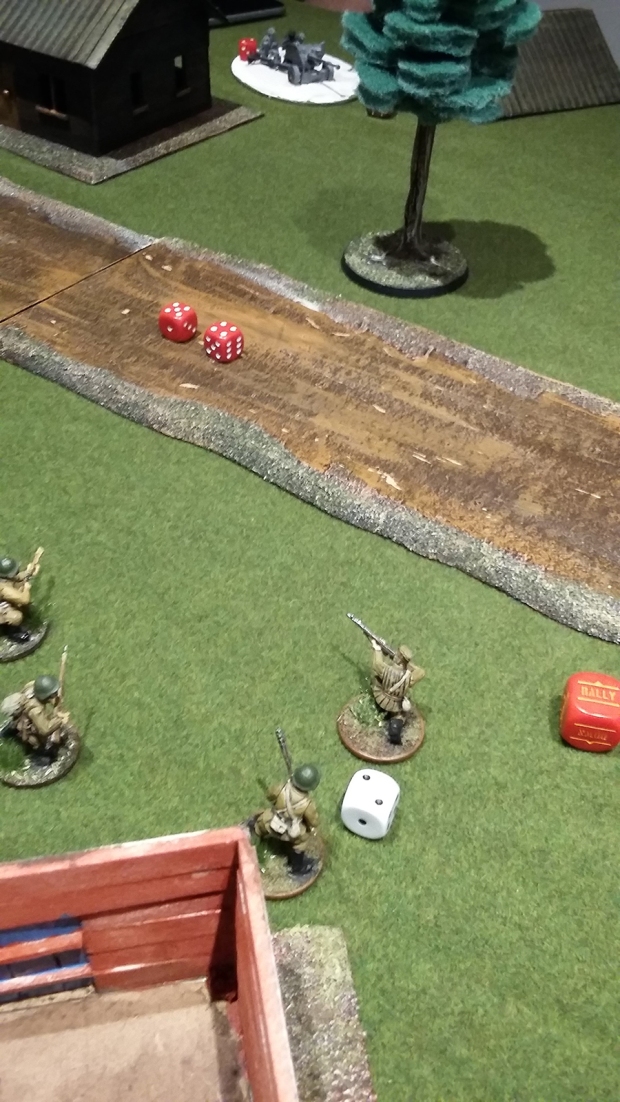
I ran the eight man Guards squad on the right flank; seven man towards the barn; rifle squad straight up the middle and into the wheat field; SMG Guards squad up in between the seven man Guards squad and the rifle squad; HQ behind the rifle squad; and Zis3 behind the SMG squad.
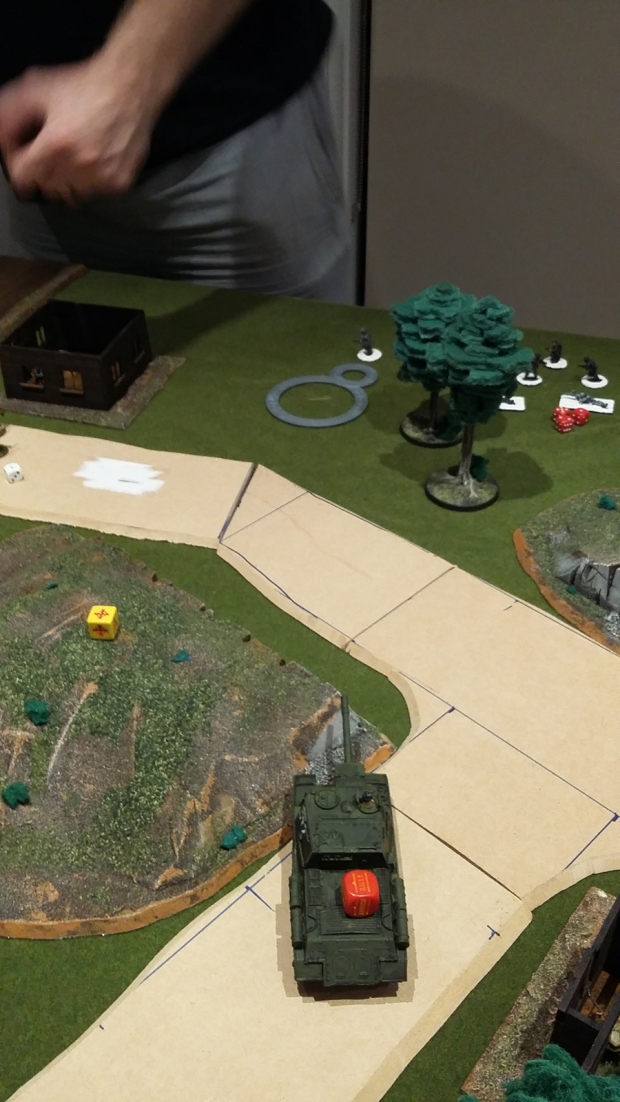
In response, Andrew moved the 6pdr on his right/my left flank (in the village, with sights down the road); Tetrarch behind the house near the road heading off the long side, HQ behind the centre most house, medium mortar in the centre, first para squad behind the trees near the ridge on his side, second paras just to his right of the ridge, and light mortar on the left.
The ISU-152 was the last unit to trundle onto the field, rolling on via the road and lining up a shot on the second para squad. I rolled a six to hit, hitting four but only killing three, and then rolled six pins! Glory to the ISU-152!


Turn two and the paras got the jump. The second para squad went first, passing their order test (being stubborn, the pins weren’t an issue for them taking morale tests) and running out of sight of the ISU-152 behind the ridge. The first para squad then went down, as the medium mortar attempted to range in on my rifle squad, but failed. I ran my seven man Guards squad into the barn before the light mortar moved up but still drew range just short of my Guards on my right. Said guards were up next and ran into the church.


In the centre, I ran my rifle squad and SMG Guards straight forward, the Zis3 trundling up behind them. The 6pdr took a shot at the barn, but missed (we didn’t realise this shot shouldn’t have incurred hard cover negatives, can’t remember what the roll was, so it may have still missed – it wasn’t high). The British HQ moved into the centre house, but were just out of range on the rifle squad. The Tetrarch, however, did not have such issues and moved up and put heat on the rifle squad, killing two. They rolled for Green and I rolled a one! This resulting in an extra three pins!
My HQ moved up through the field they were in before the ISU-152 was again the last to make a move, trundling up and setting its sights on the medium mortar. And I rolled a six to hit again. I was only able to kill two of the mortar crew, but I again rolled six pins!


Turn three and the paras again got the jump. The medium mortar tried once more to range in on the rifle squad, but failed, while the Tetrarch shifted up and sprayed the SMG squad with MMG fire, scoring only one hit and failing to kill! The British HQ went into ambush, anticipating a move from the SMG Guards. Next I opened fire from the church on the light mortar squad, taking it out. First blood to the Soviets! I then advanced my Guards squad out the barn and shot at the 6pdr, killing one man. The first para squad ran to Andrew’s left flank, fleeing the terror of the ISU-152, before I successfully rallied the rifle squad! A total of three pins were removed (one for the successful order test, and two from the rally).
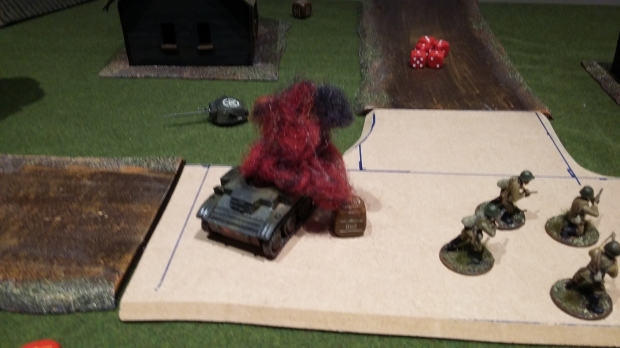
My SMG Guards went in on the British HQ, who opened fire with their SMGs. They scored three hits and no kills! Andrew’s dice were sorely against him. I shot back with my SMGs, killing the Lieutenant’s staffer. Next up was the Zis3 and on examination, the Tetrarch had mot moved quite enough to get out of its arc and in short order it was reduced to the Little Tank that Couldn’t when my shot hit, and very thoroughly blew it up.
At some point the 6pdr fired on the Guards who’d left the barn, hitting, killing two, and scoring an additional two pins.
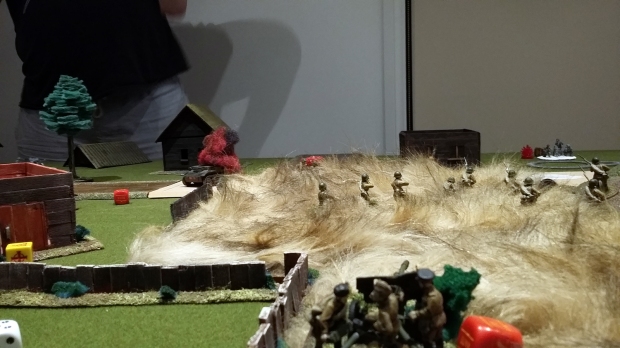
The last two dice and the second para squad was first to move. They shifted up and sprayed the church will bullets, but with all their pins (now down to four), they couldn’t land a hit. And finally, the ISU-152. It shifted up, pivoted to face the second para squad. Once again, I hit with a six. Five paras were caught in the blast but three ones meant I only killed two. Then came the pin roll. Six. The second para squad were set to 10 pins, which broke them and the squad fled.
At this point that meant the ISU-152 had rolled a six to hit each time it fired, had only killed 7/12 infantry struck, but inflicted maximum pins each time. The British paras were suitably terrified.


Turn four and things were Not Good for the British. I scored the first dice this time and moved by SMG Guards right up to the centre house and poured on the lead on the British lieutenant, but failed to kill him. I then move my Guards near the barn. They passed their order test and shifted closer to the objective, shooting at the 6pdr ineffectually along the way. The medium mortar again tried to range the rifle squad (who I kept down), but failed.


The British lieutenant was again unable to kill a Guard, while the 6pdr continued to actually do things, blowing apart another two Guards on the left and again adding two extra pins. I put my Guards in the church on ambush, and my HQ down, but kept pulling red dice. The Zis3 fired over the down rifle squad at the centre house, but missed (again, a mistake). The ISU-152 was next, shifted up, fired at the repositioned para squad. Another six to hit, half the squad blown apart, and another six pins. Finally the remaining para squad ran back towards the centre.


Turn five and the game was all but over. I tried to move the Guards on my left, but they decided staying down was a better idea. The ISU-152 trundled up, fired at the mortar, five to hit, and finally ended its existence. The rifle squad ran towards the barn, giving the Zis3 at the centre house, hitting, and finally killing the British lieutenant.


The battle being over, Andrew sent the paras into a suicide charge on the SMG squad. Four of them were shot before they made it in, before the last failed to kill a man and was beaten down. Finally the 6pdr took a long shot on the exposed ISU-152 and missed. I spent the rest of my dice shifting units around to secure objectives.


At the start of turn six, we declared the battle over. A very decisive victory to the Soviets.
Aftermath
Andrew rued not putting the Tetrarch in reserve. He needed it to move on after knowing where the ISU-152 was to knock it out. He also noted he should have run more, and smaller infantry squads (for example, he could have run two seven man squads and one six man para squad). The dice were very much in my favour though. The ISU-152 rolled 6, 6, 6, 6, 5 on its rolls to hit, killing 12/17 targets, and applying 24 pins (noting that it didn’t need to roll for pins when it killed the medium mortar).
This being my first game of 2nd Edition (I don’t even own the book yet), and Andrew also being fairly new, we certainly made some mistakes (particularly, as noted, firing HE at buildings), but we had a lot of fun, and a lot of laughs. He’s away soon, but when he’s back, expect to see more Bolt Action after-action reports, and some SAGA to boot!

Brilliant stuff! Thanks for a great write-up, and welcome to 2nd Edition!
– Drax
LikeLike
Thanks mate! It’s been a long time coming! I’m hoping I can have more regular games in the future. Going to demo a game to my brother Saturday or Sunday week, so fortnight’s time should have another report up 🙂
LikeLike
Pingback: The Welsh are Ready for War | Blind Wargaming